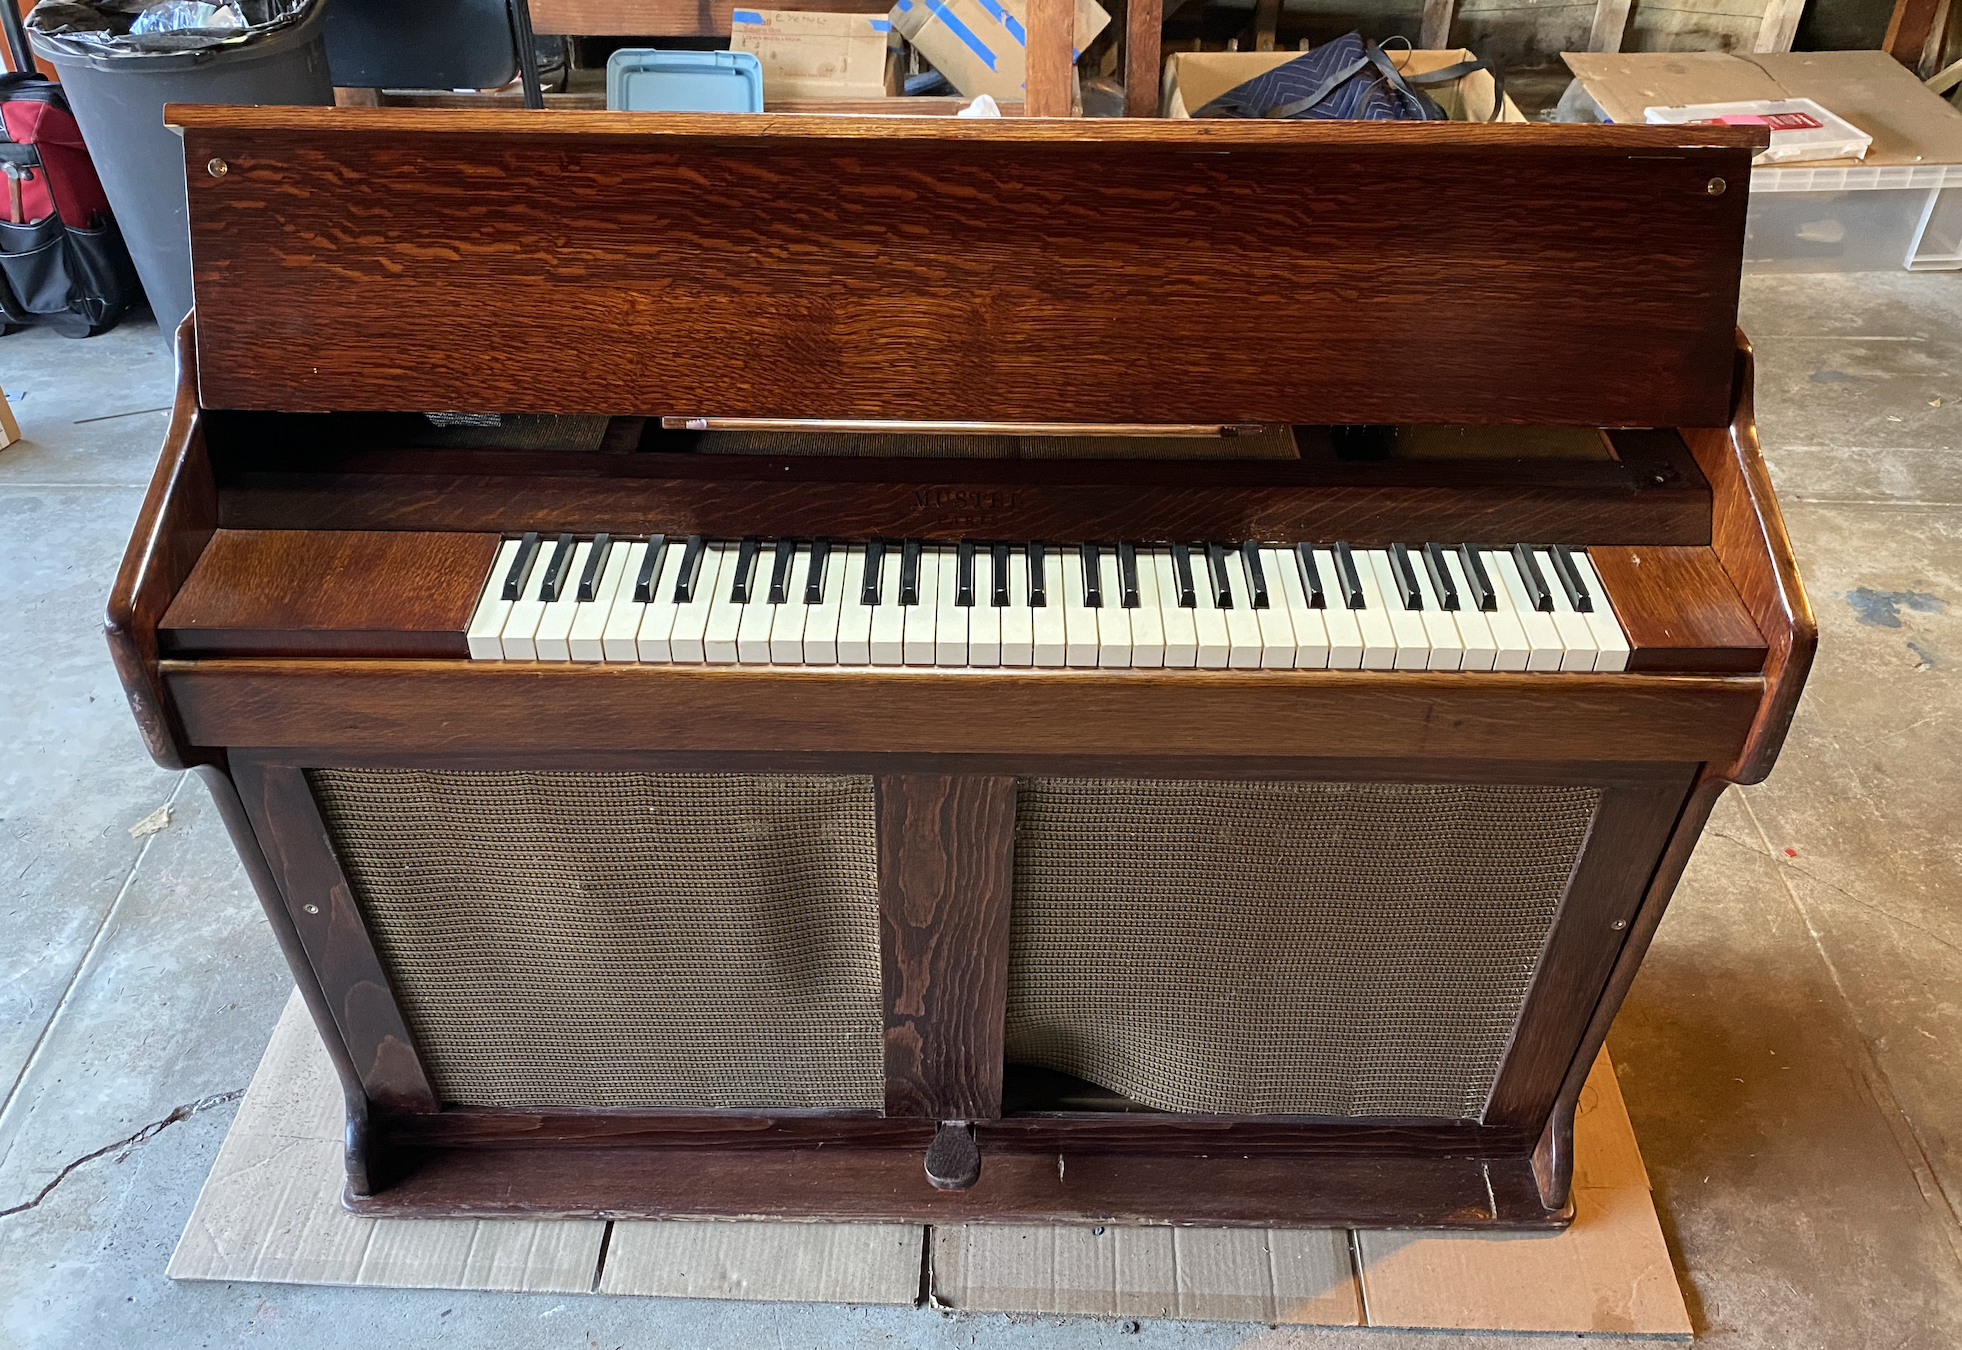
A celesta is an instrument which looks like a small upright piano on the outside, but instead of strings on the inside it has a row of “tone bars” like a xylophone. It is quite common in symphony orchestras, but much less so in people’s homes. You may remember the sound of this instrument from the main theme of Harry Potter.
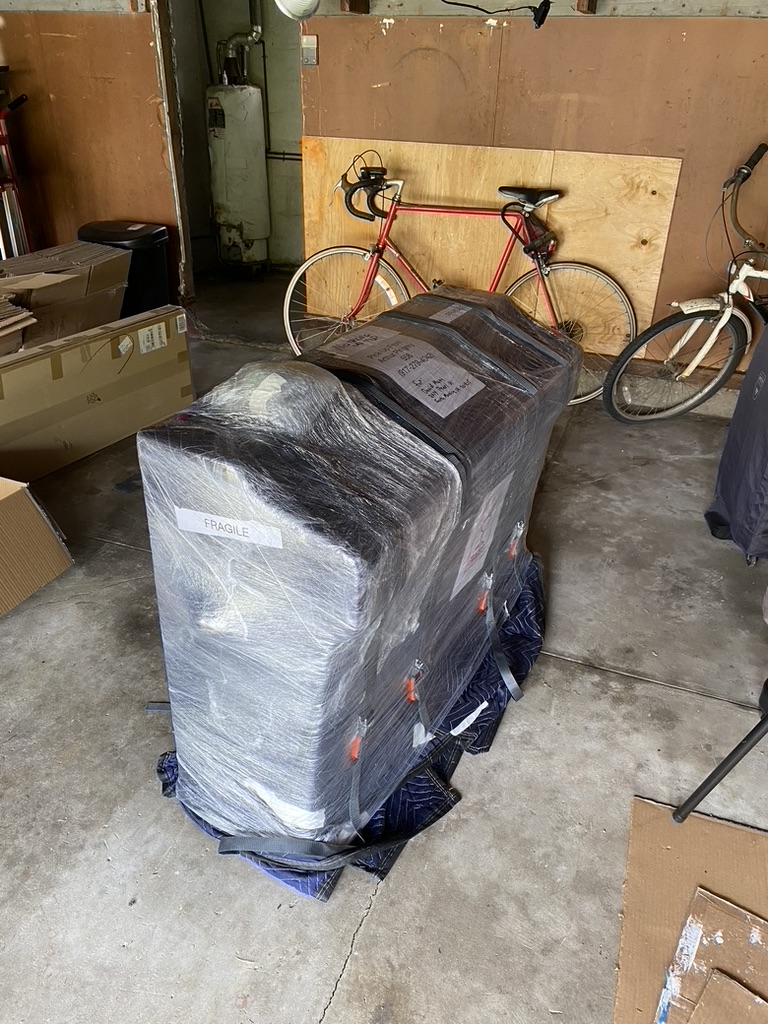
Several months ago, I was contacted by a client on the East coast who had acquired one of these instruments. The celesta had been badly damaged in a flood. We agreed that he would ship it from Florida to Los Angeles and I would attempt to restore it. The instrument arrived wrapped in plastic and the first step was to unpack it.
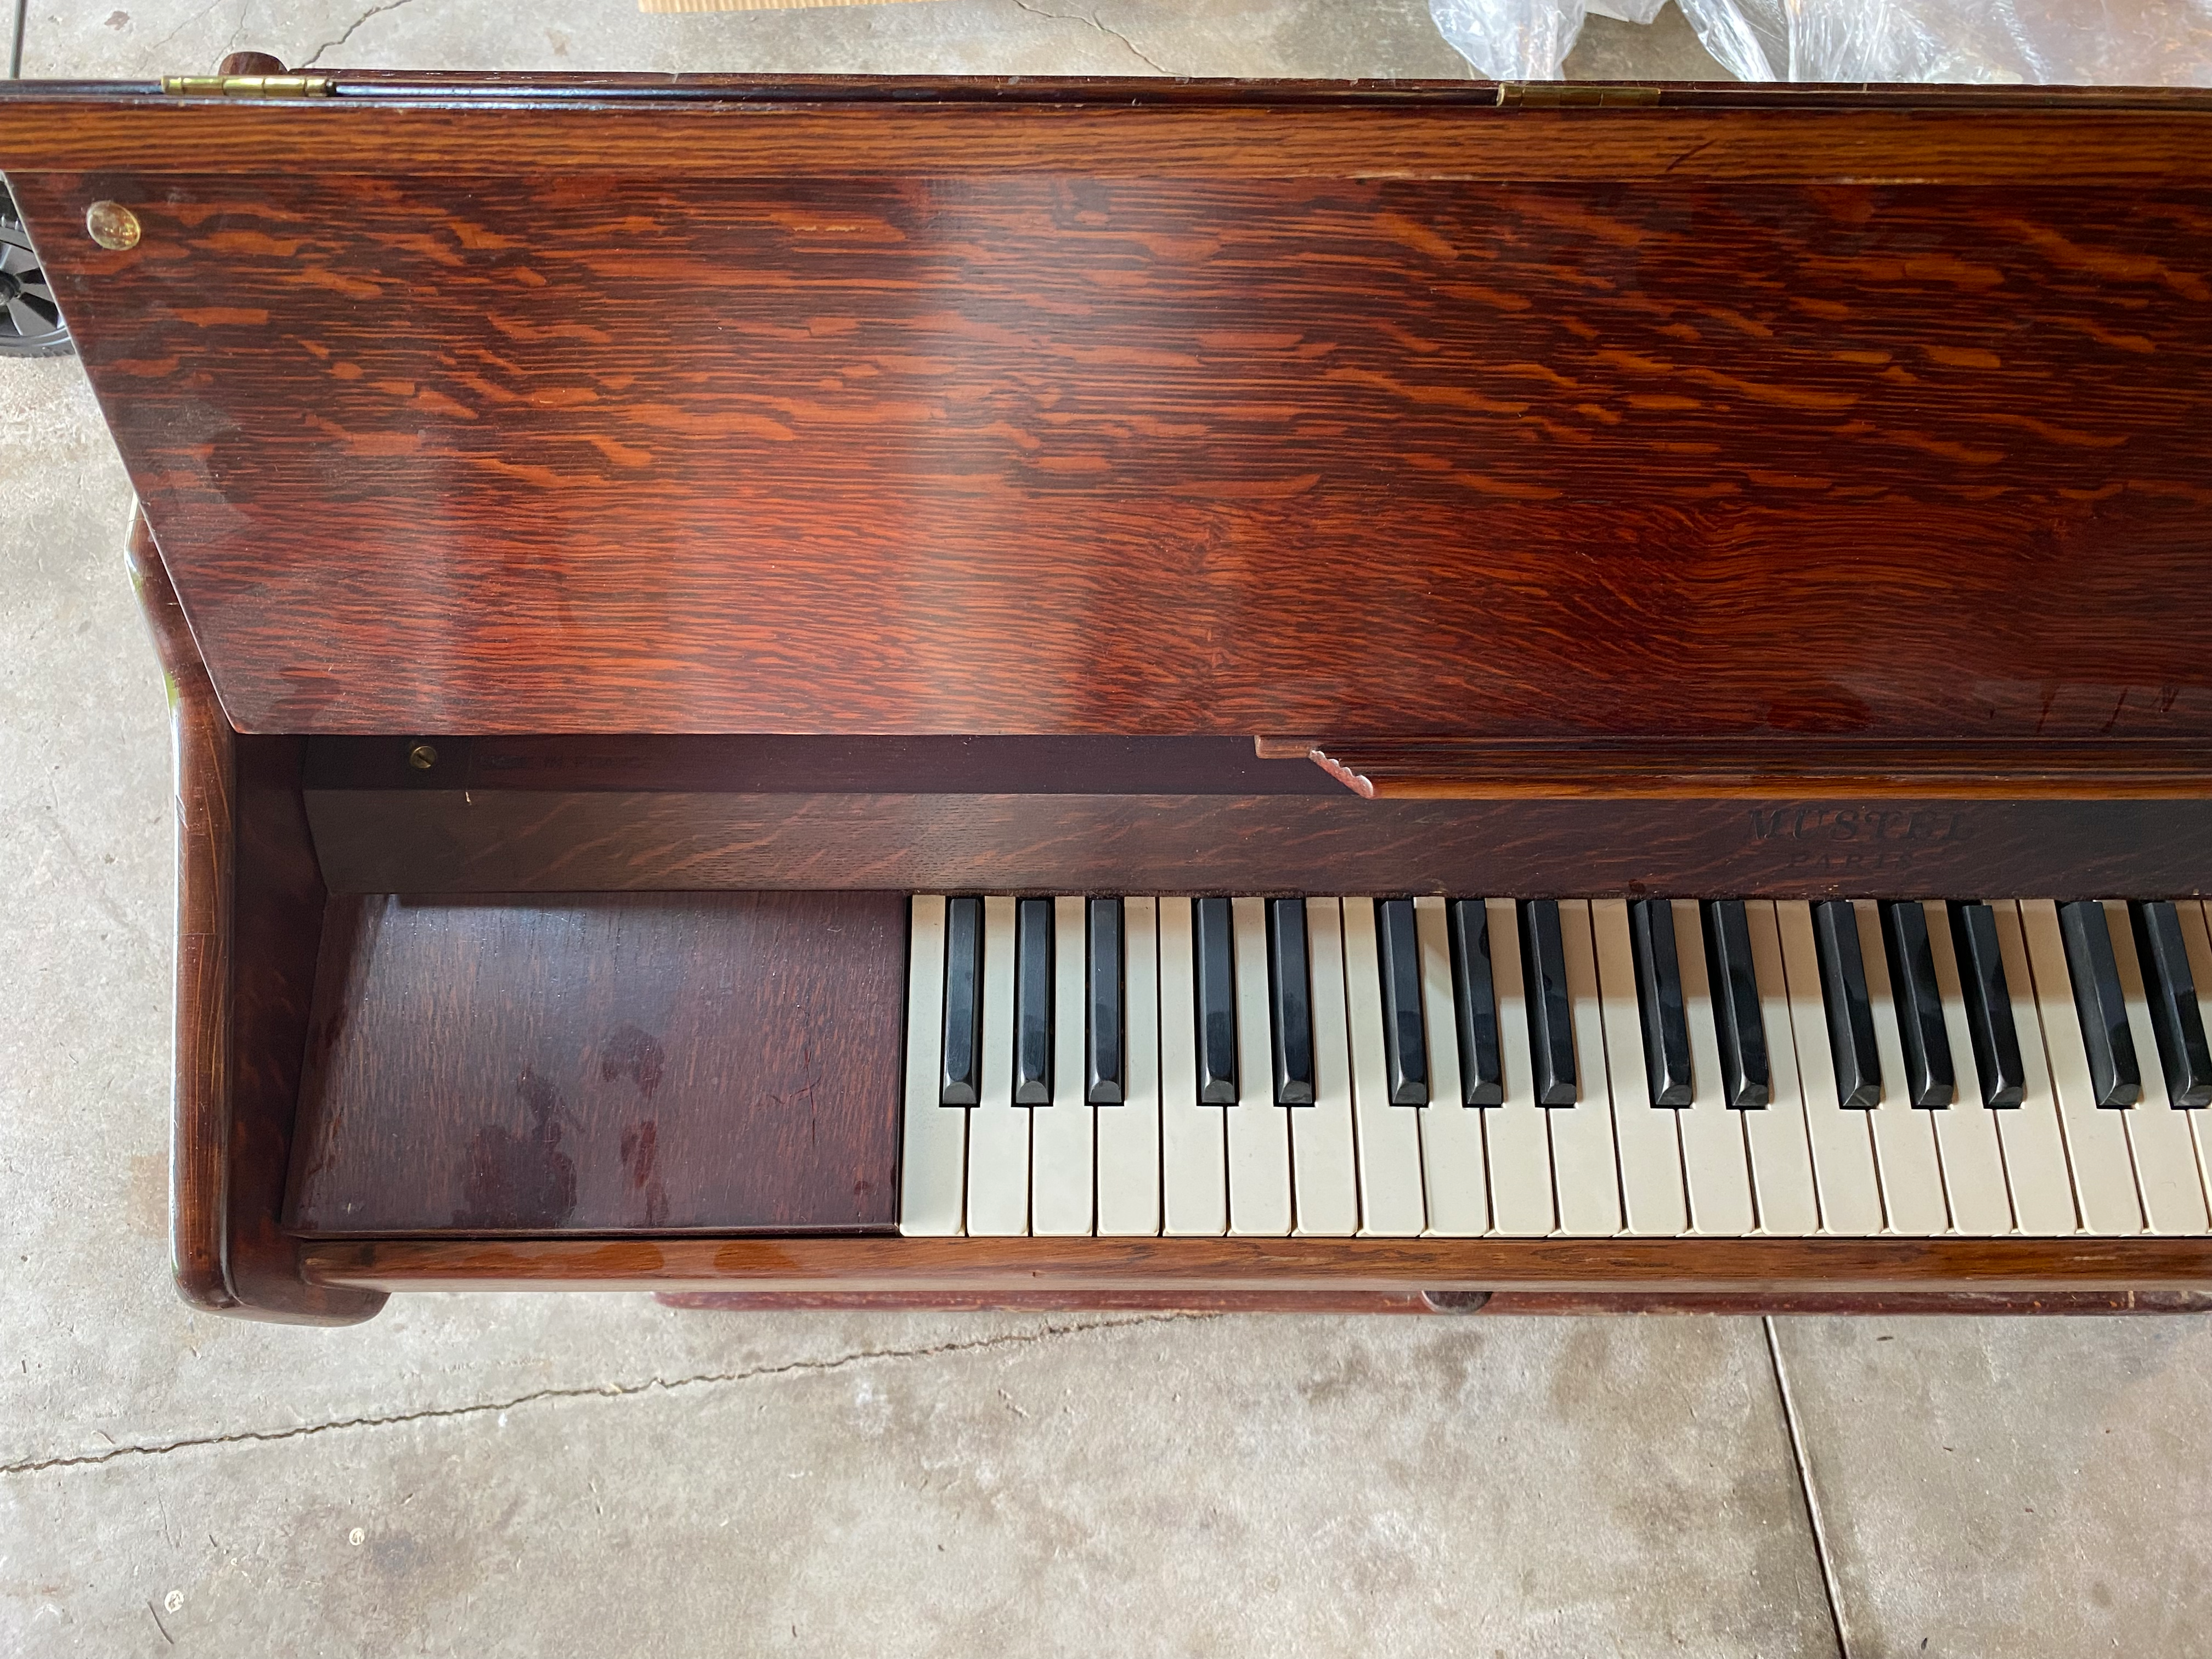
Once unpacked the next step was to inspect it. The exterior paint and key tops were in decent condition.
However, the screens on the front and back of the celesta were badly dented.

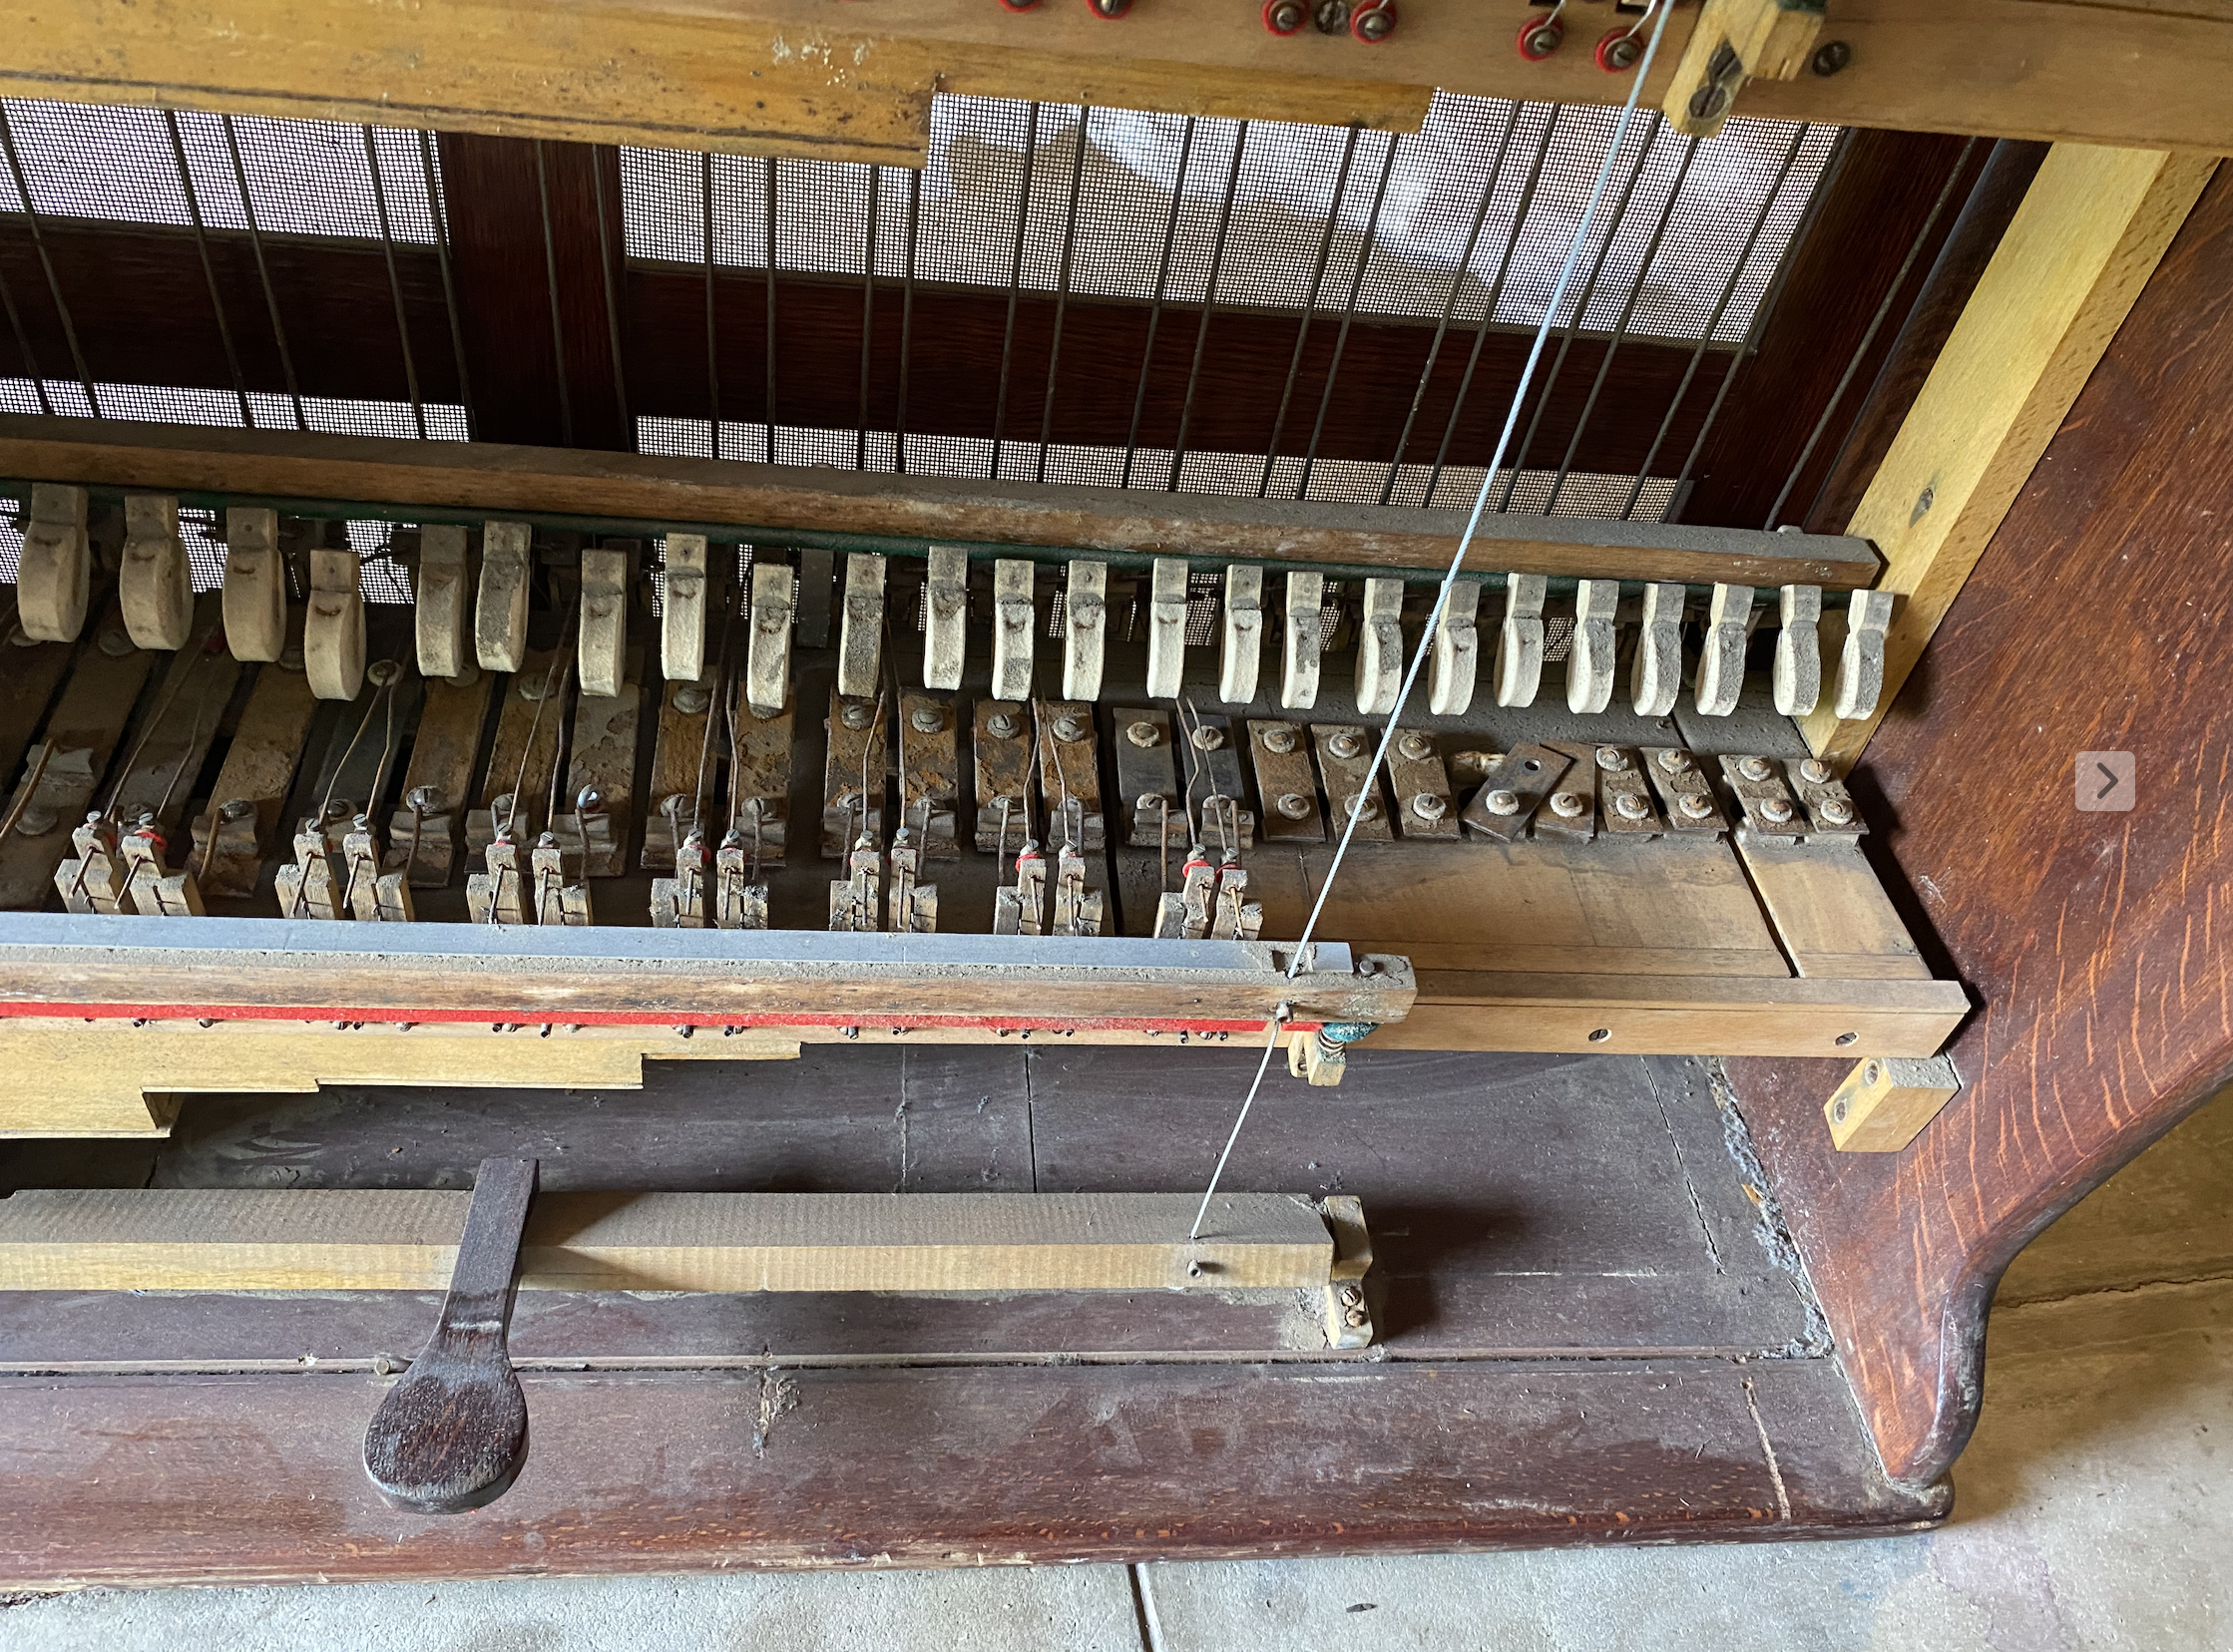
It was only once I opened it that I saw the real extent of the damage. The soundboards were so caked in rust that the dampers were glued to them. Most of the notes would not even play. The bottom was caked with a thick layer of mud that would prove very difficult to remove.
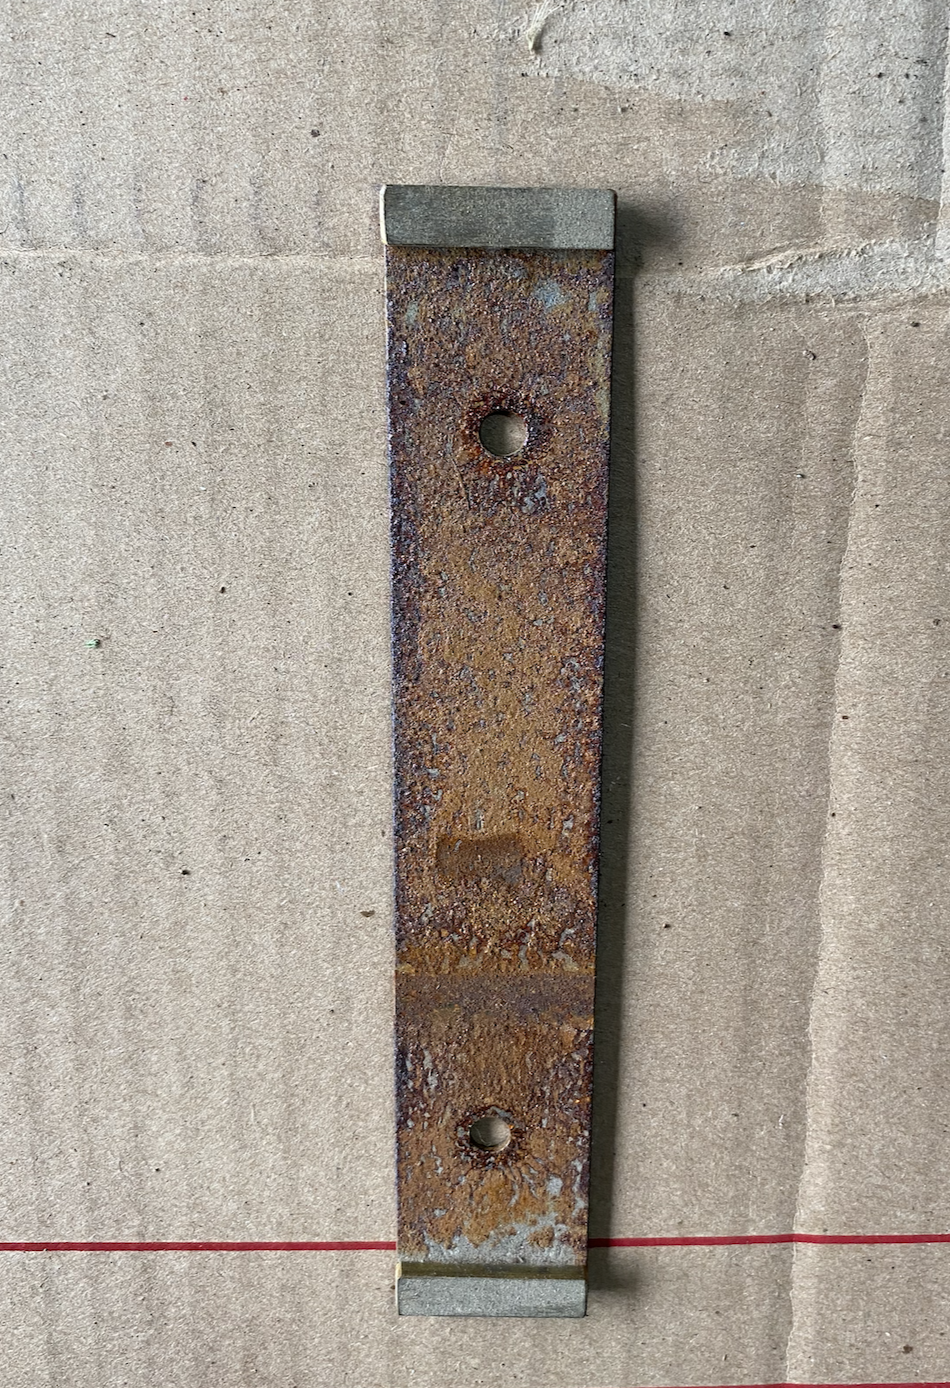
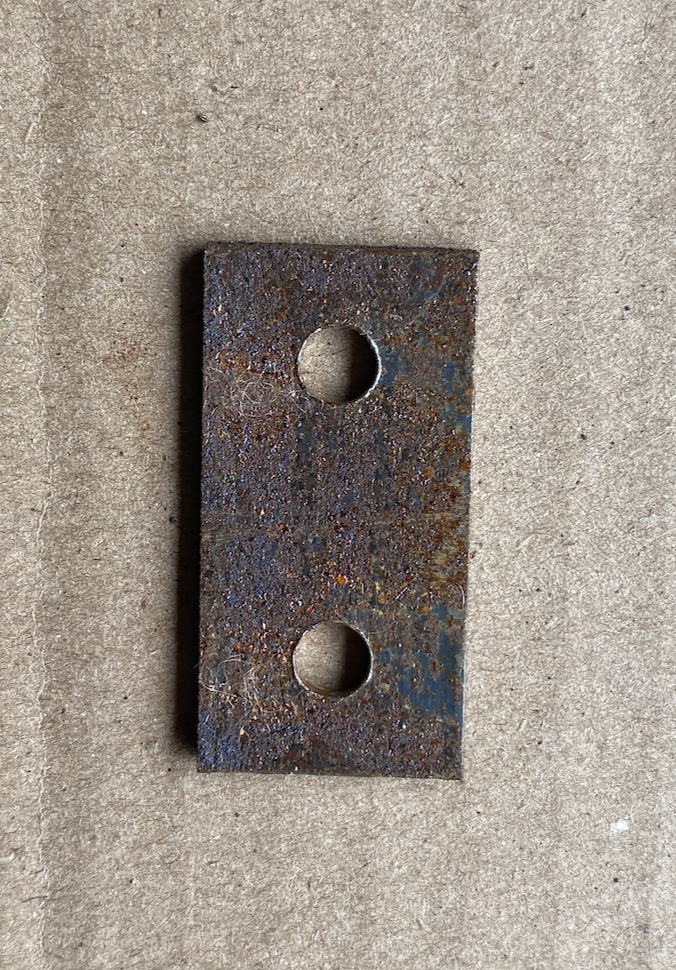
Here is a look at one of the sound bars close up revealing the extent of the rust damage.
The first step in the restoration was to clean the dirt off the bottom. This was much more difficult than one would imagine, requiring several hours and numerous passes with different tools, most notably a toothbrush.
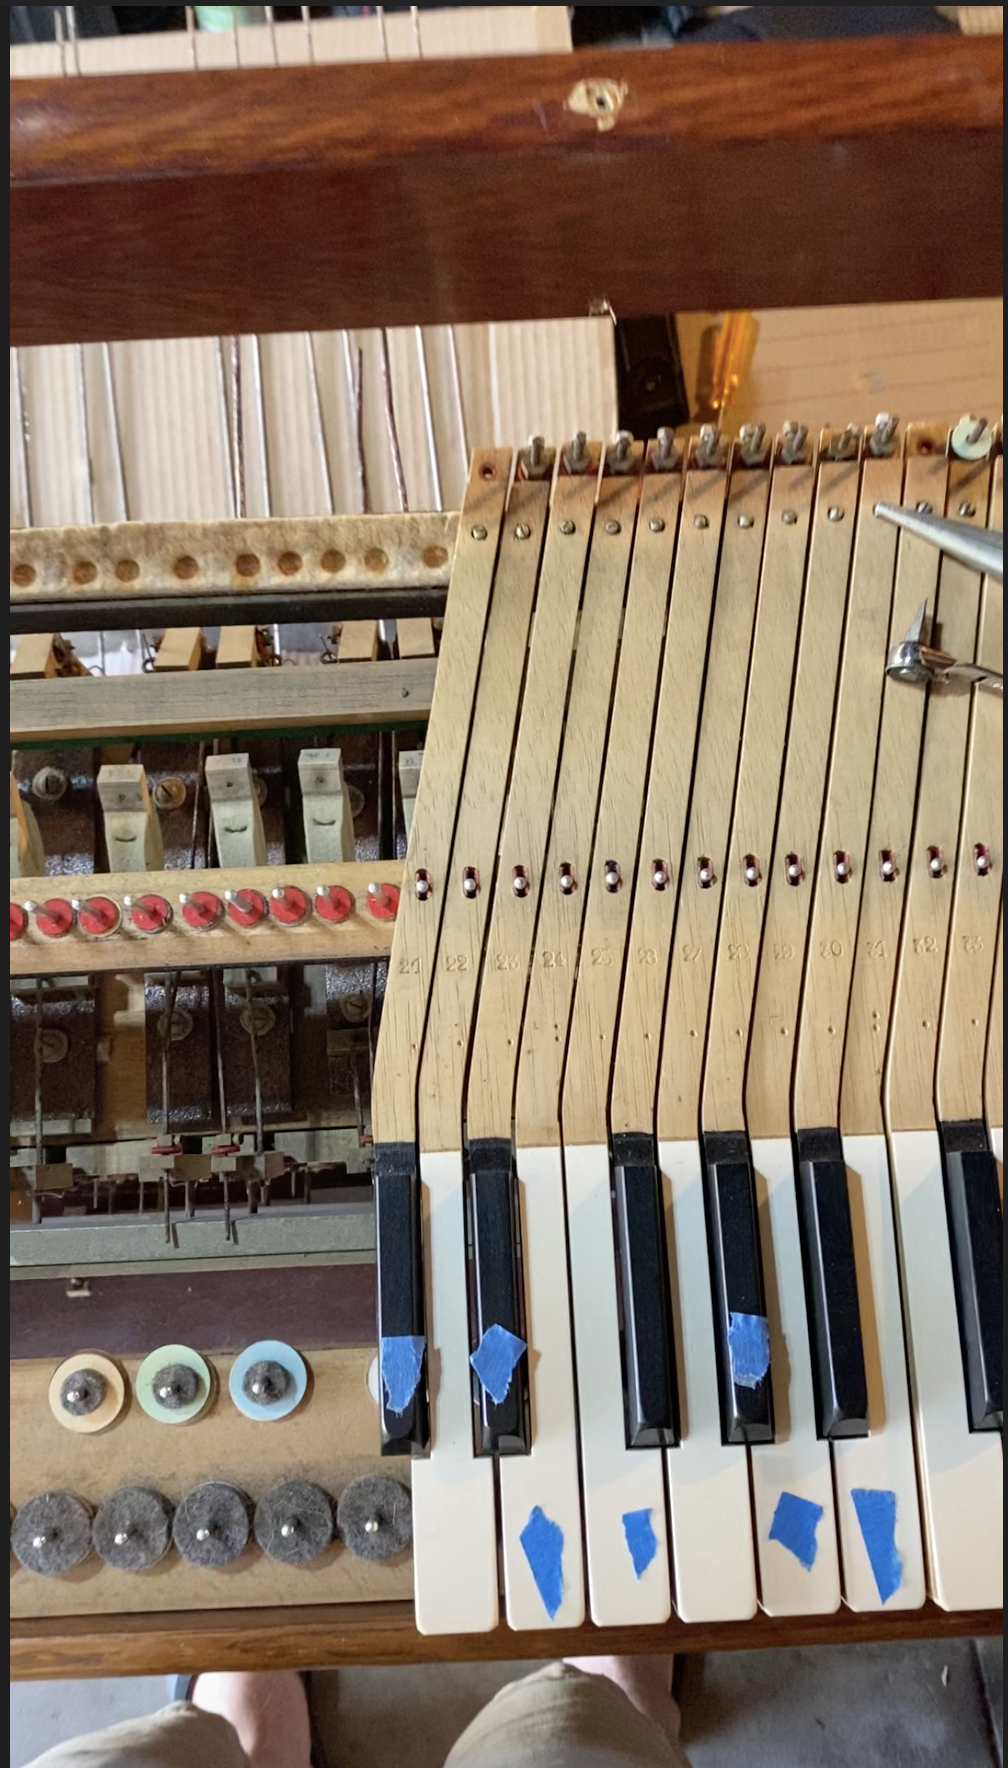
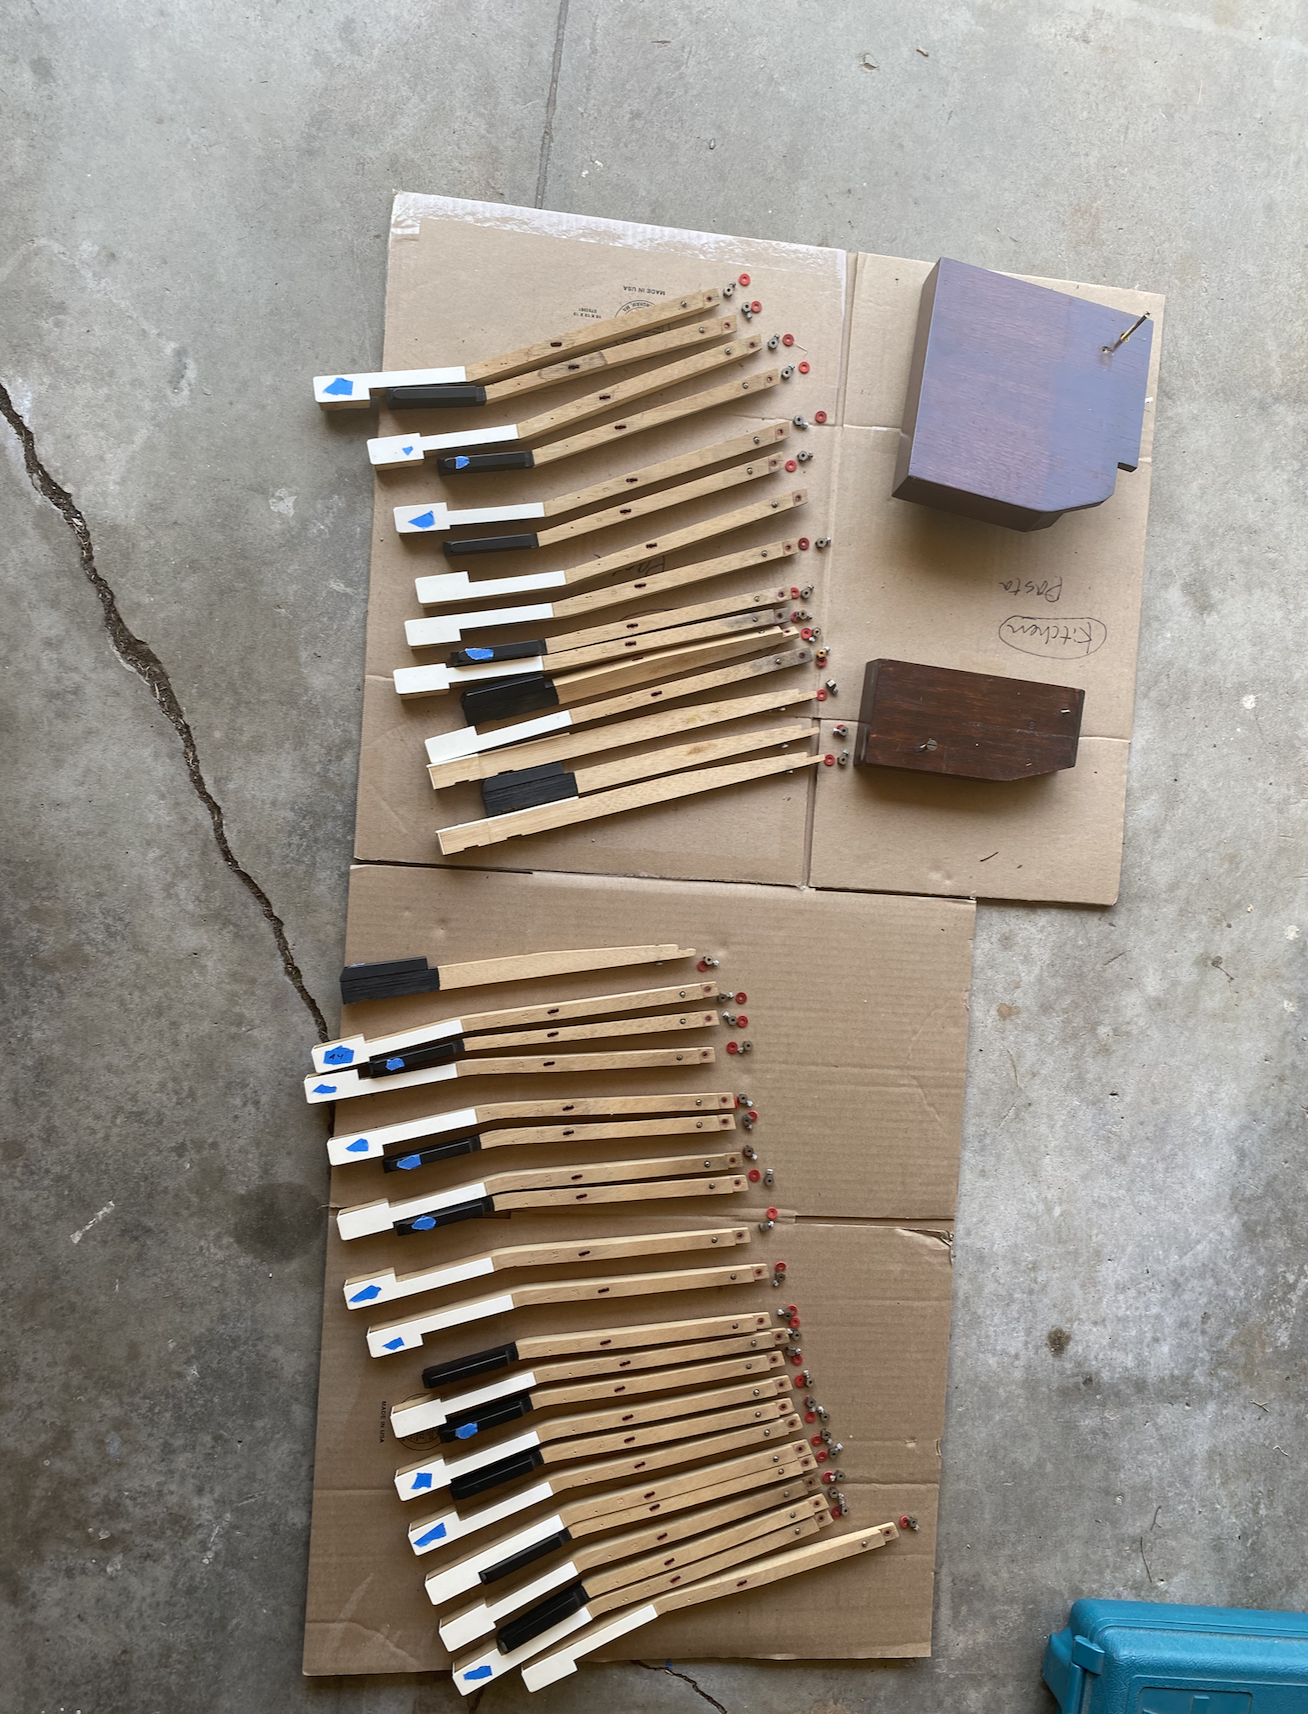
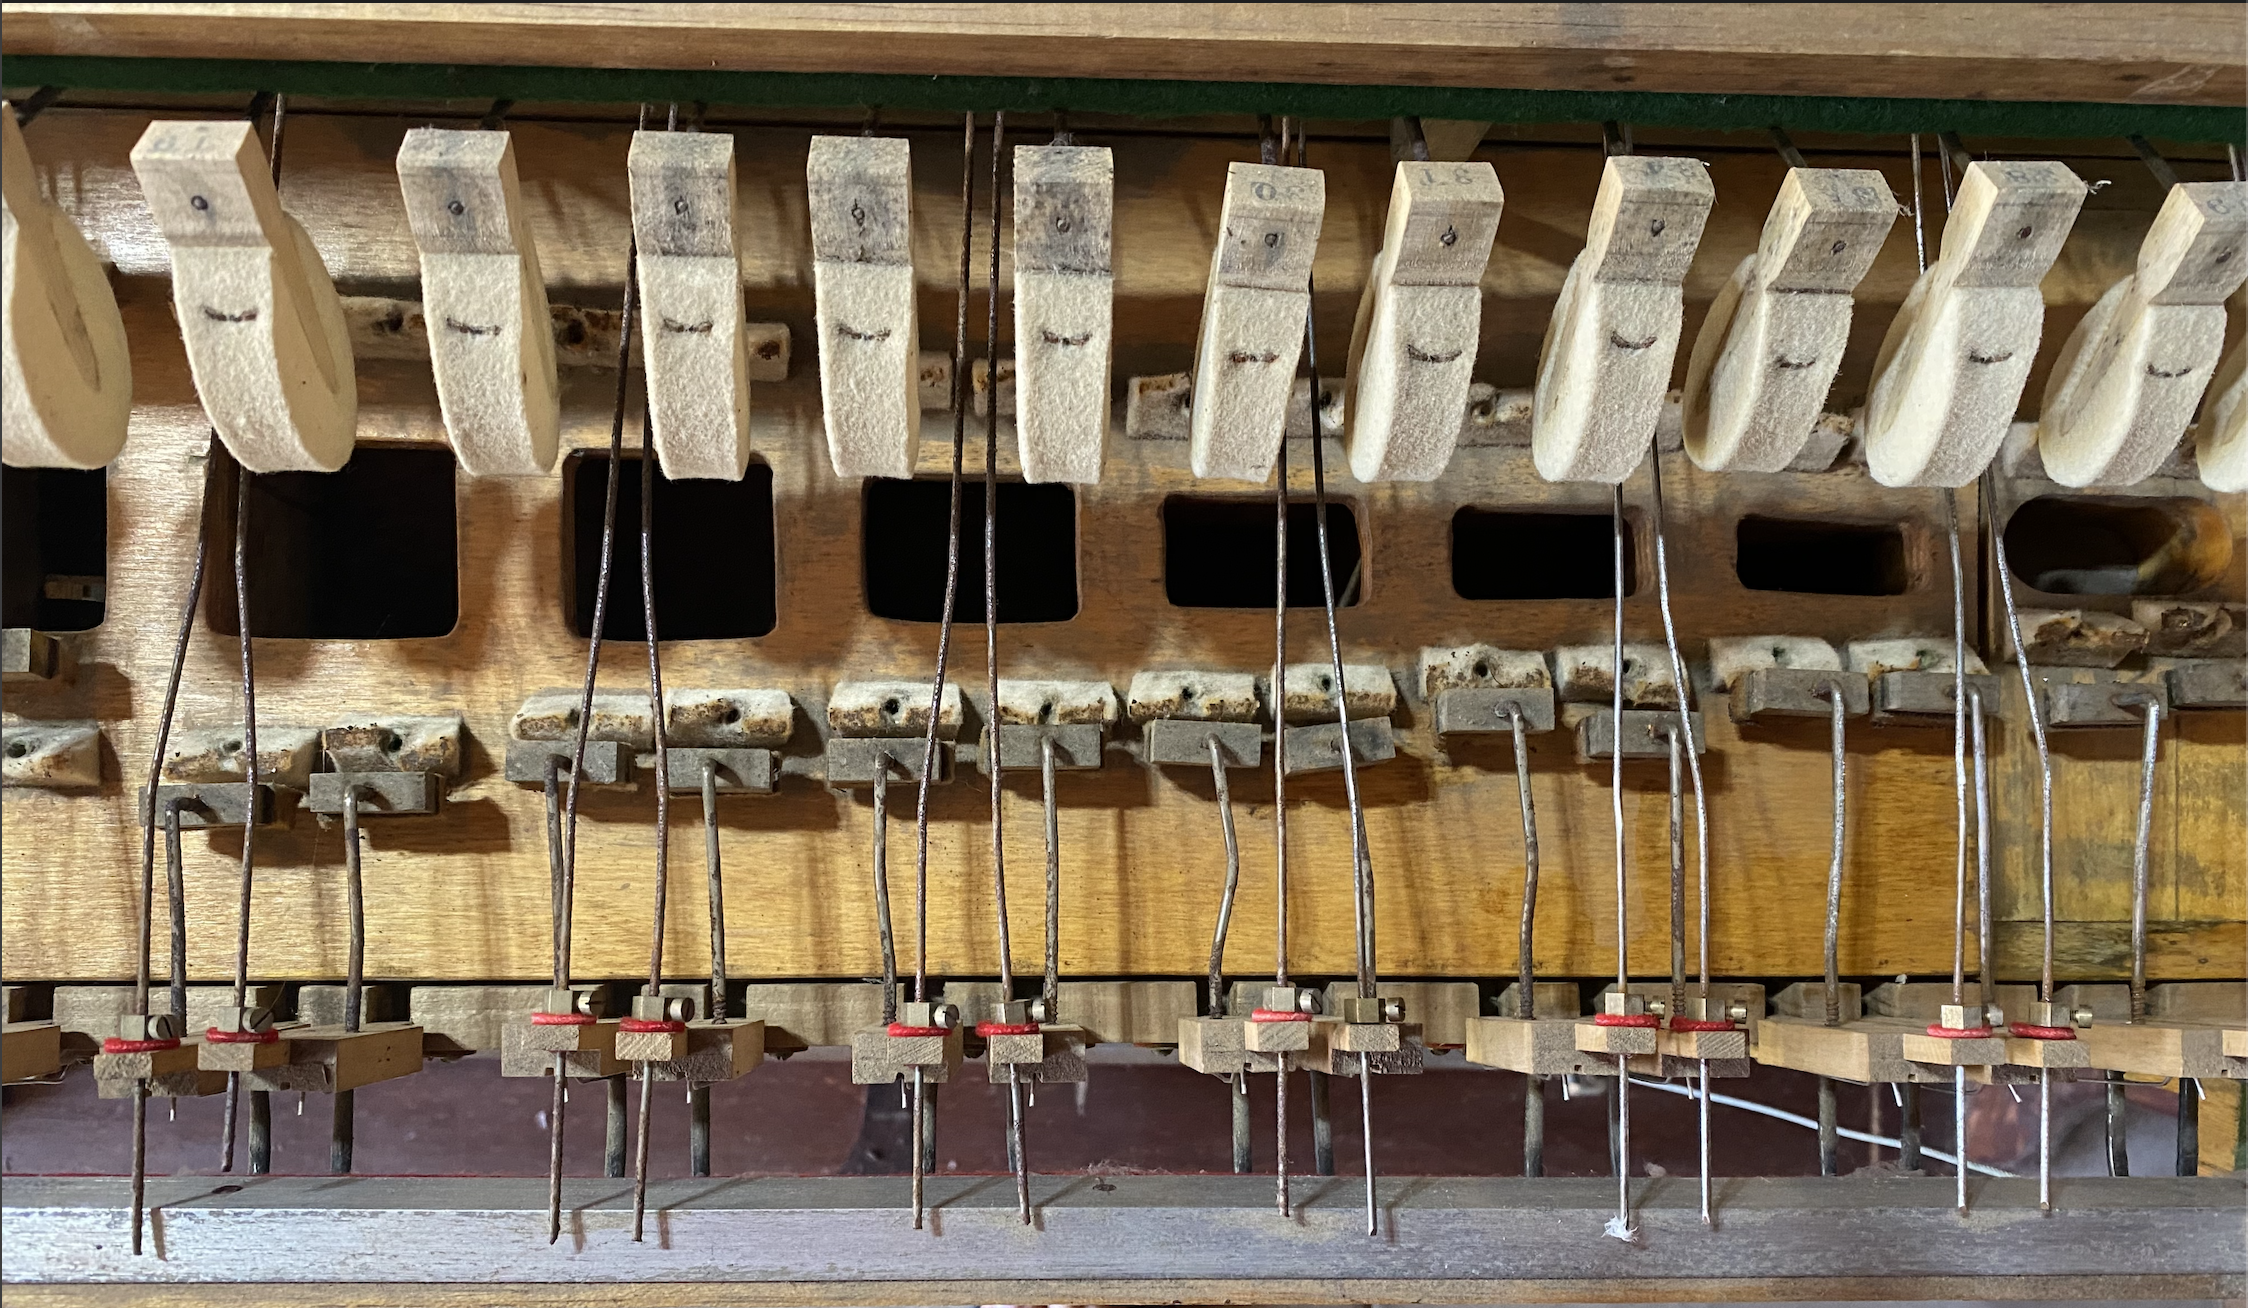
The next step was to remove all the keys from the celesta to gain better access to the interior.
Removing the rust from the tone bars was another challenge altogether. Using off the shelf chemicals was only marginally effective. The key was to employ a more advanced technique called electrolysis. This technique relies on an electric current to break the bond of the rust molecules. It can really work miracles as it penetrates areas that chemicals cannot reach. Here is the sound bar that was initially tested, prior to employing this technique:
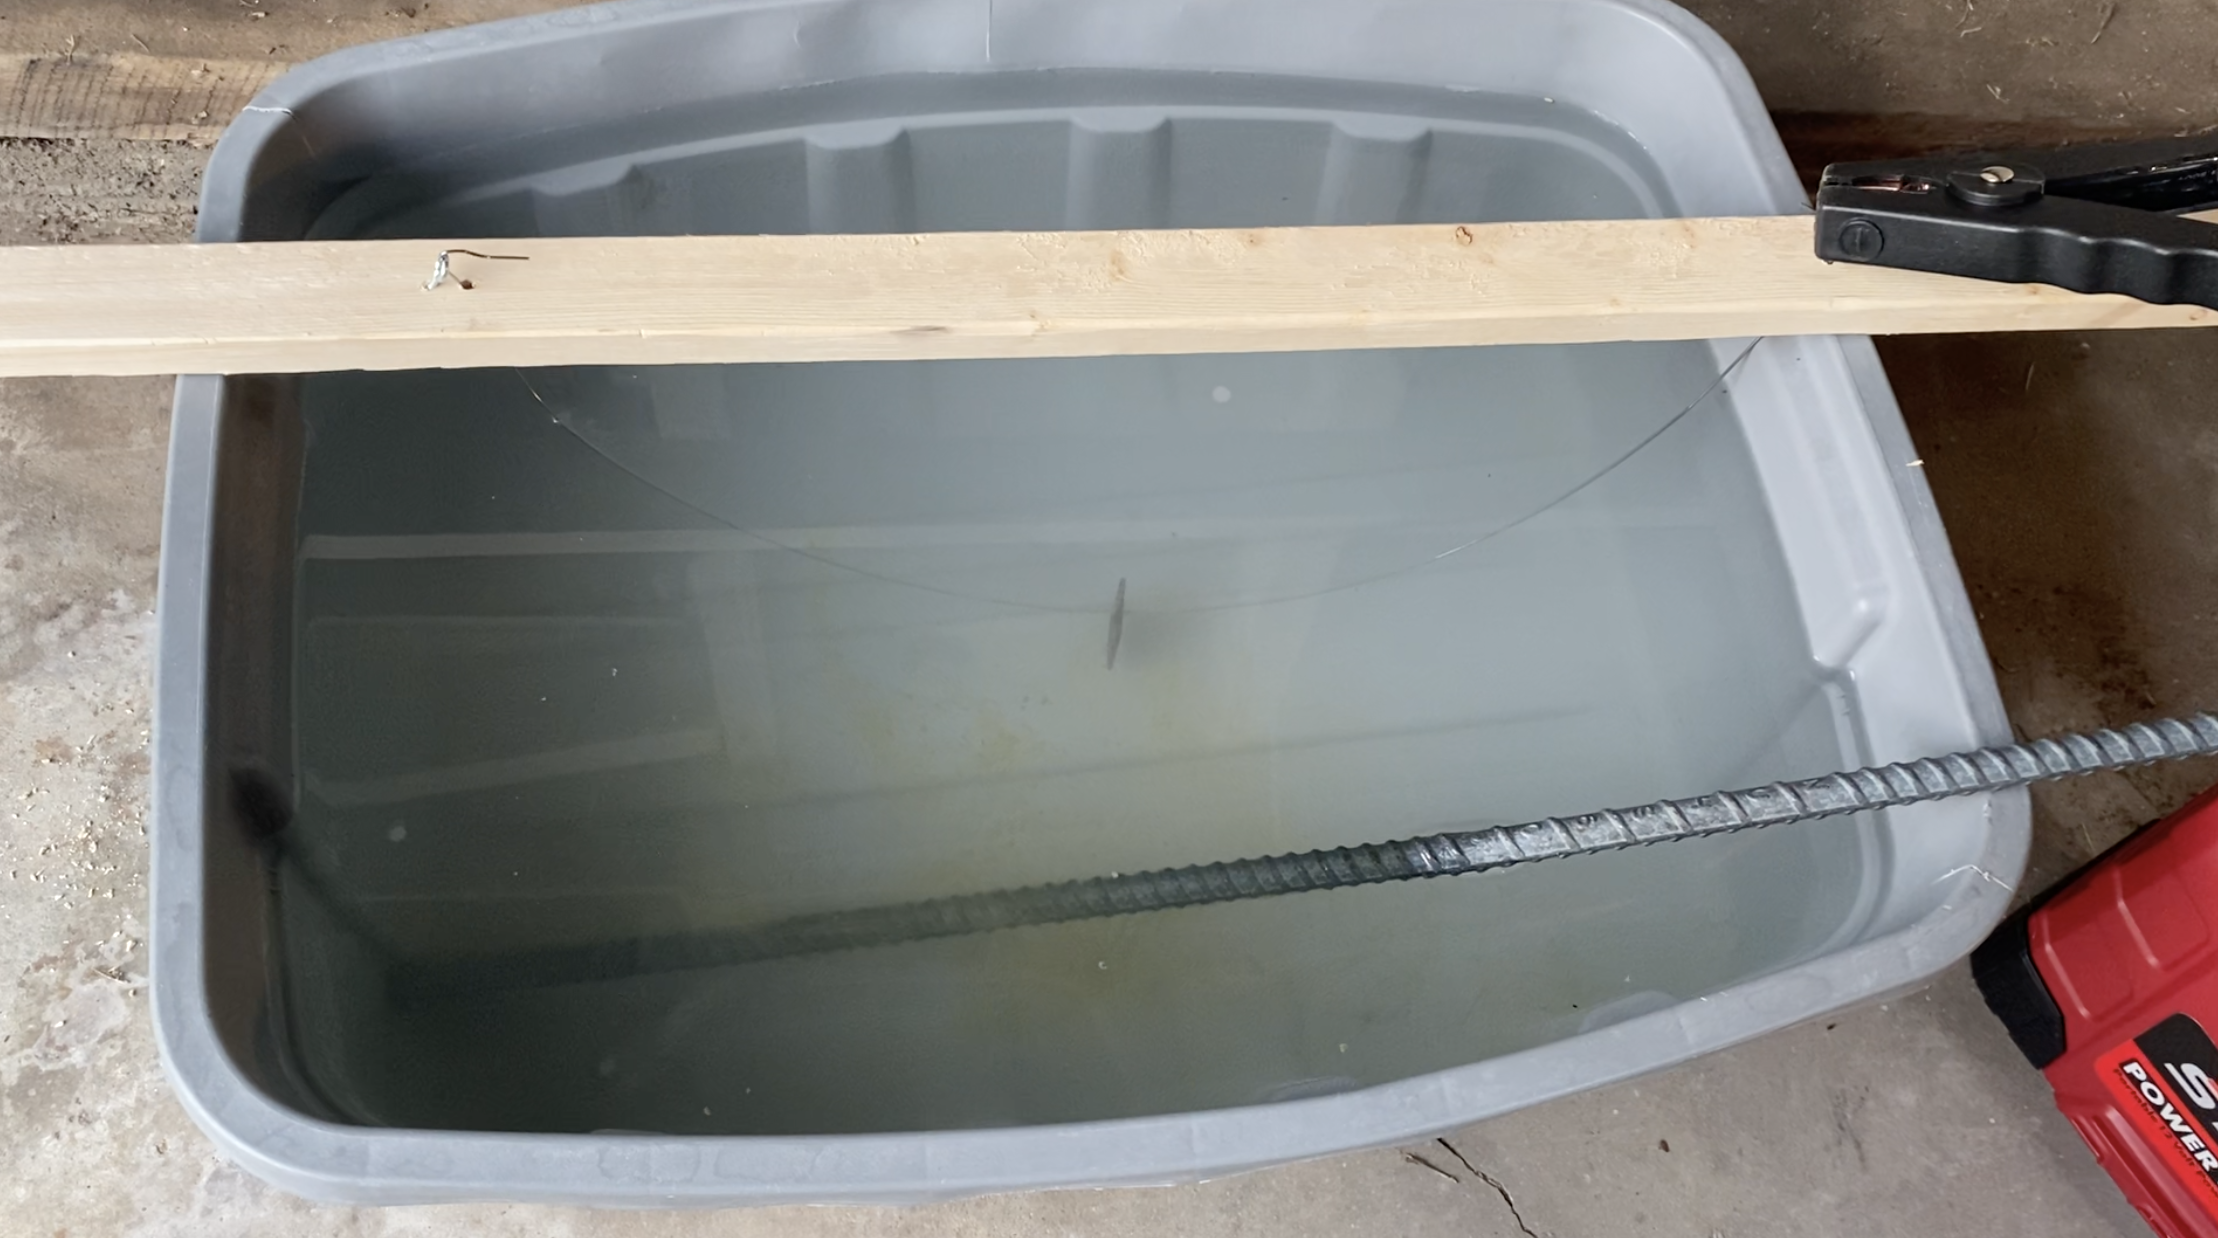
The process of creating an electrolysis bath is as follows:
A plastic bin is filled with water.
A small amount of washing soda is added, not to be confused with baking soda or detergent.
Two pieces of metal are inserted into the water, one which will carry a positive current, the other negative. Rebar is often recommended.
The item to be cleaned is suspended in the water and connected to one of the iron bars in a way that will conduct electricity. In this case, piano wire was used for that purpose.
A car battery charger is connected to the iron rods. The negative black wire is attached to the rod which is connected to the item. The positive red wire is connected to the rod which is not connected to the item. This rod is often called the “sacrificial anode”.
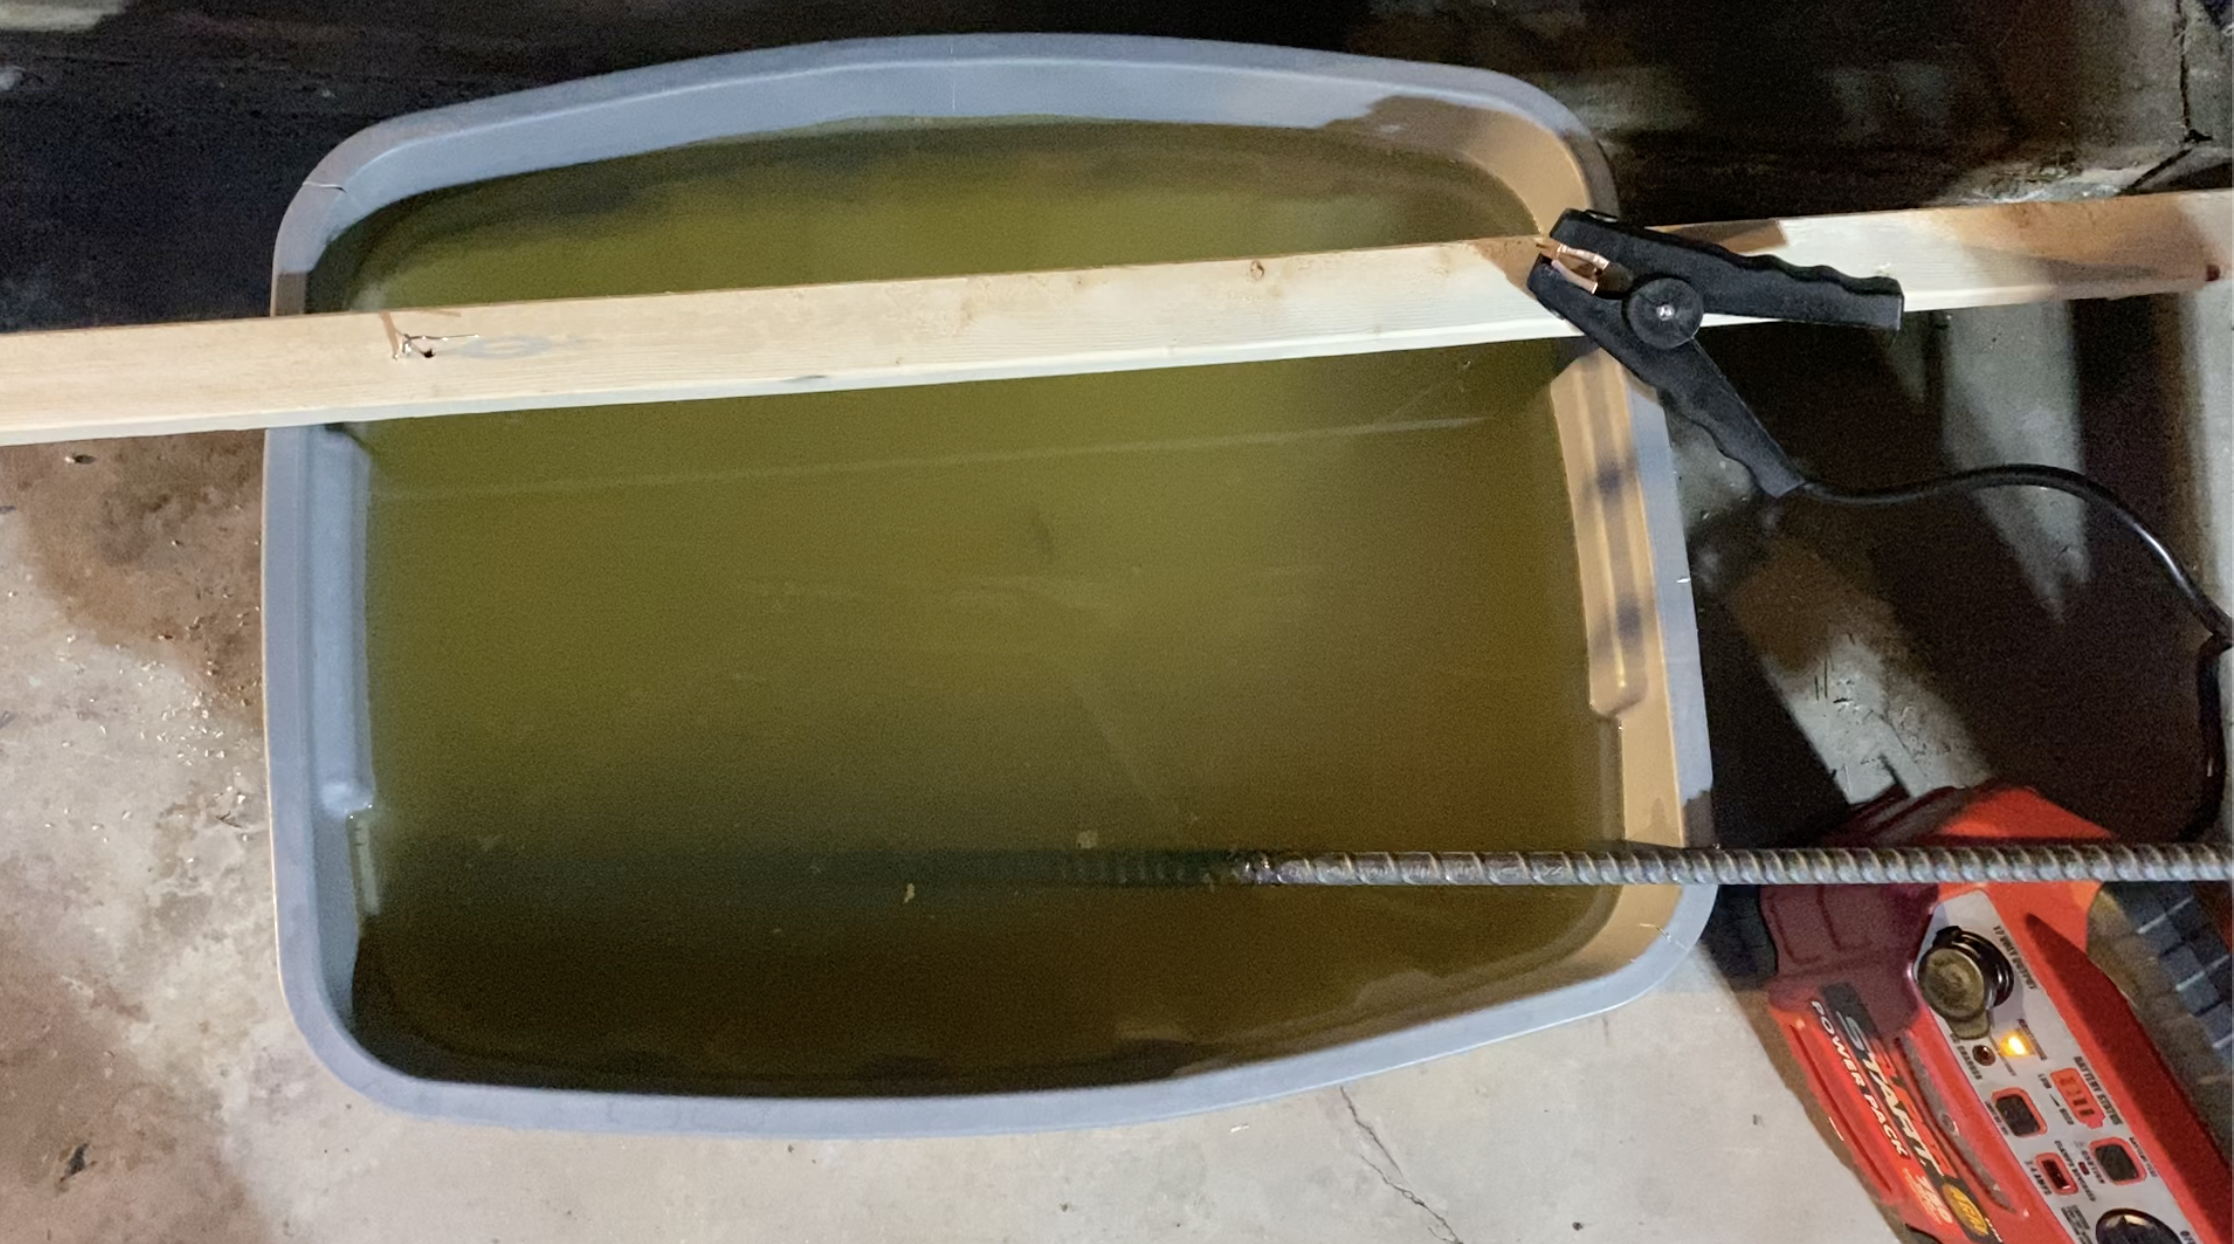
The battery charger is turned on and immediately you can see streaks of brown rust traveling from the sound bar to the sacrificial anode. If you look at the photo carefully enough you can see subtle brown lines in the water.
After running for about 24 hours the water is brown with rust.
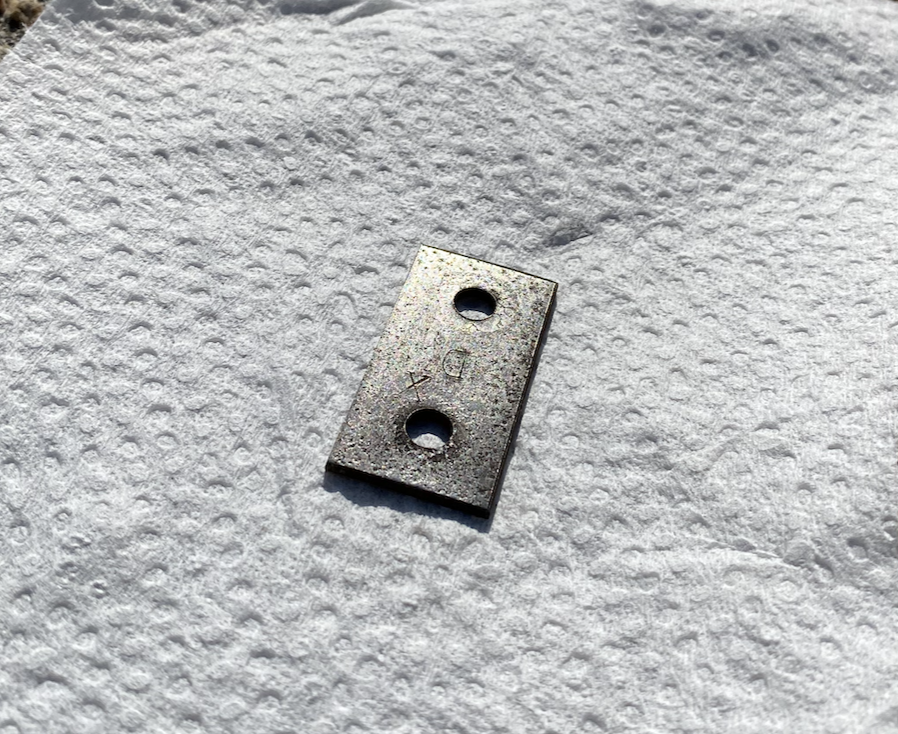
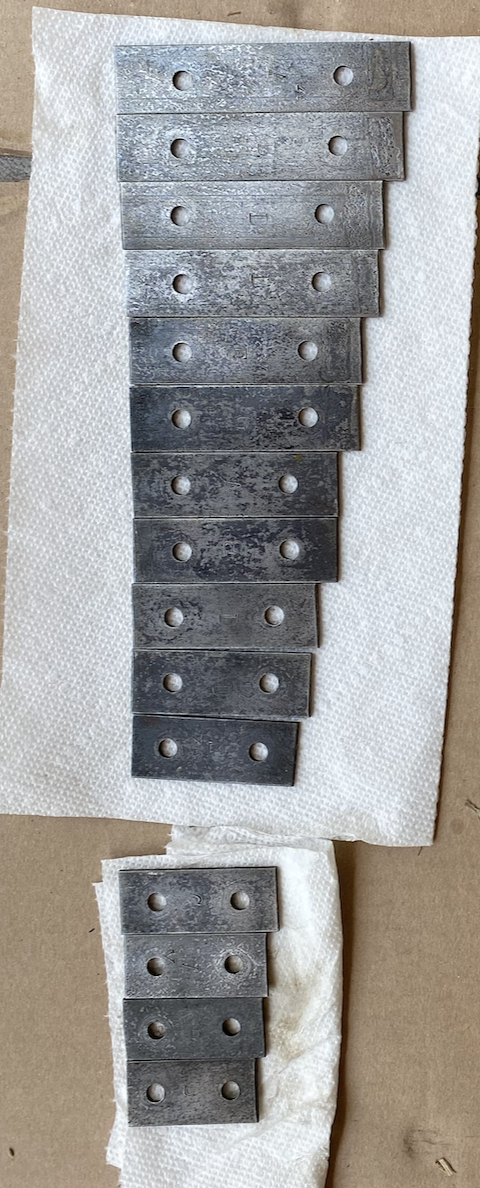
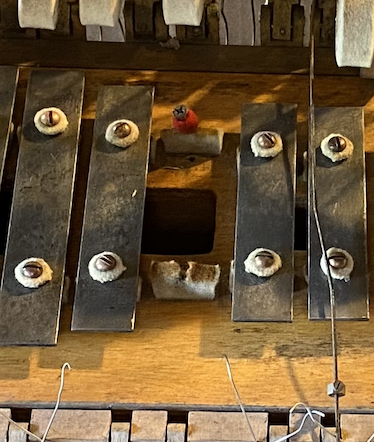
When we take the bar out the rust is substantially removed. However, there are two kinds of rust. Orange rust, which comes off easily, and black rust which is much more resilient. The black rust must be rubbed off with an abrasive. You may notice that now we can see the name of the note stamped in the metal “D X” which means “D#”.
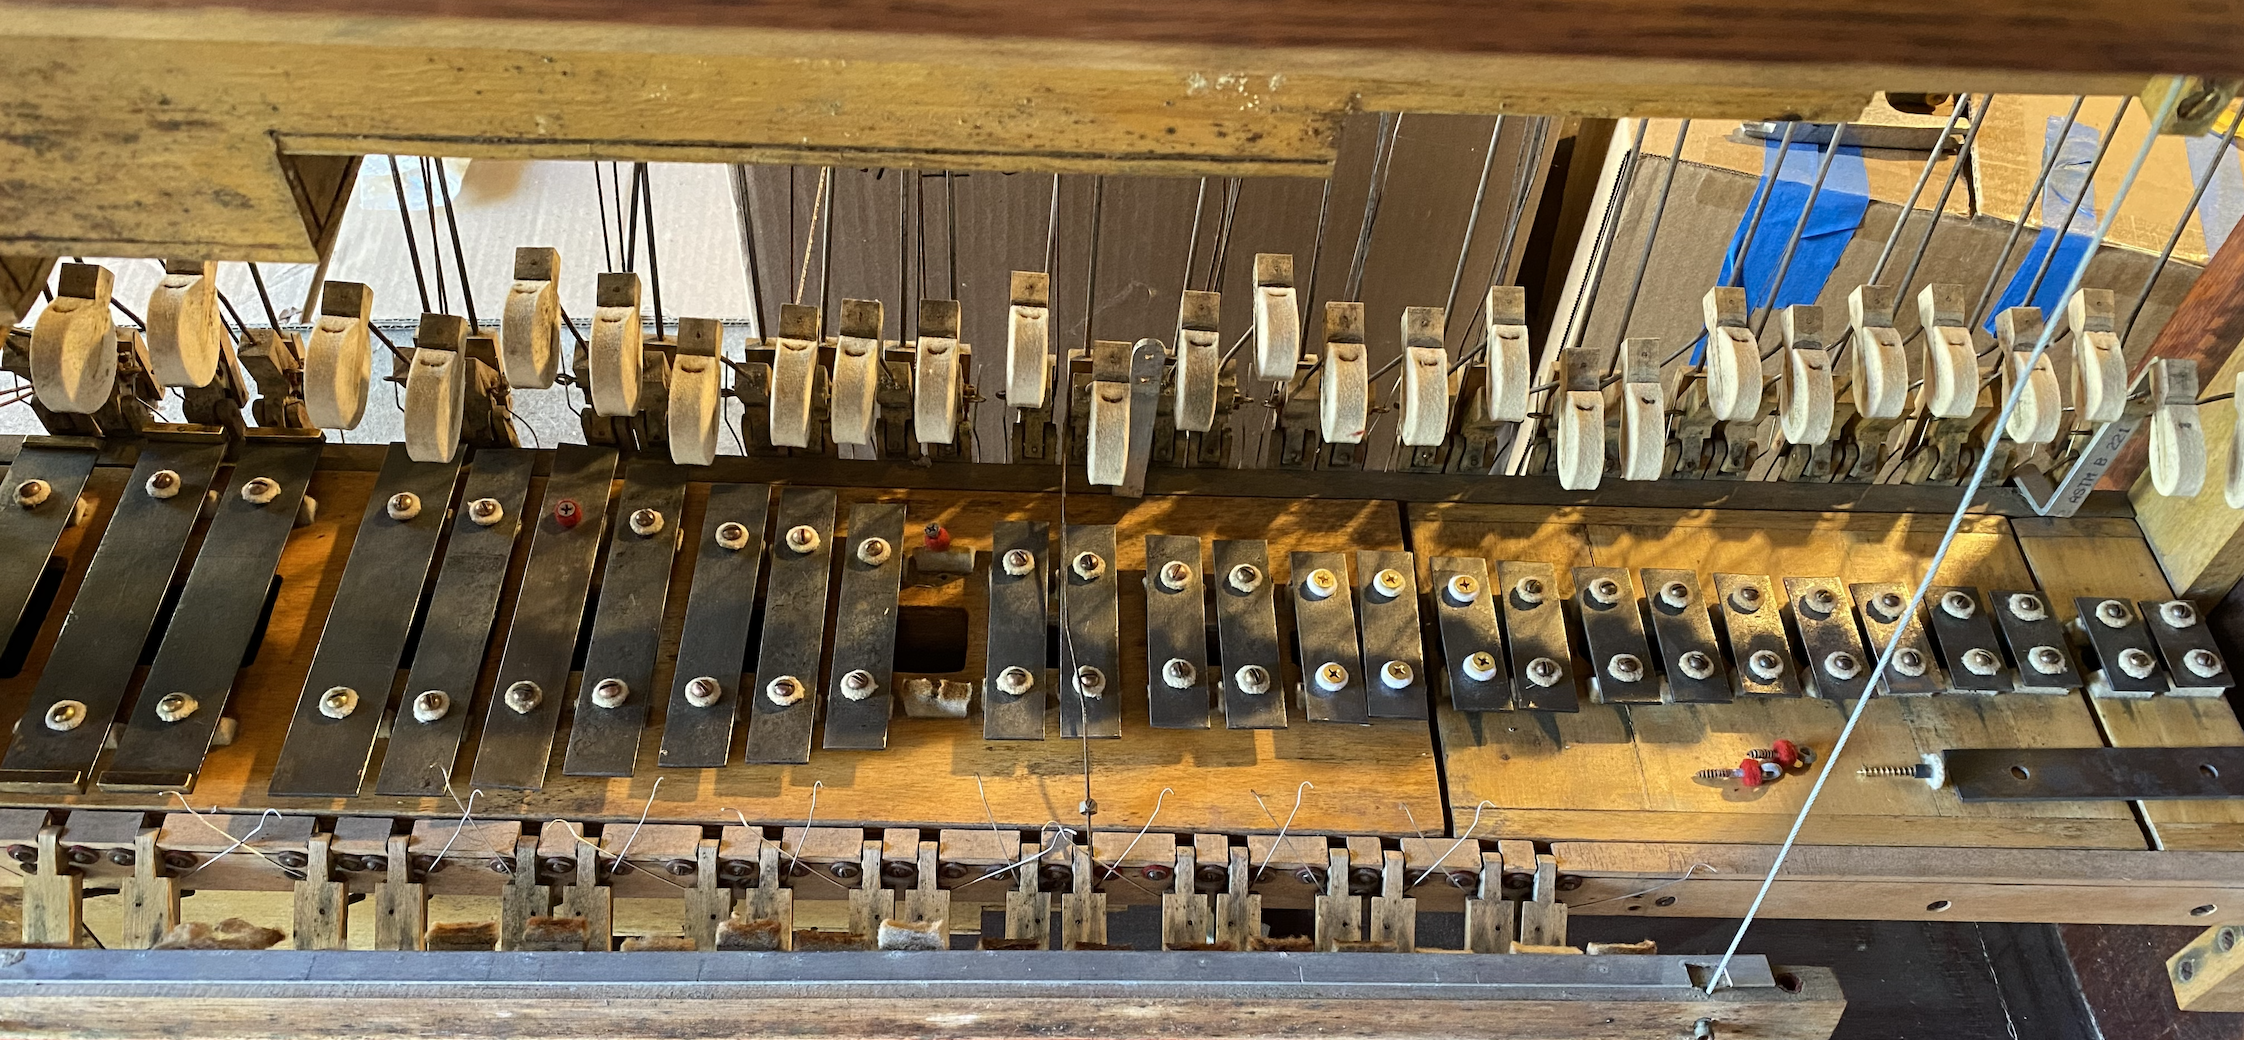
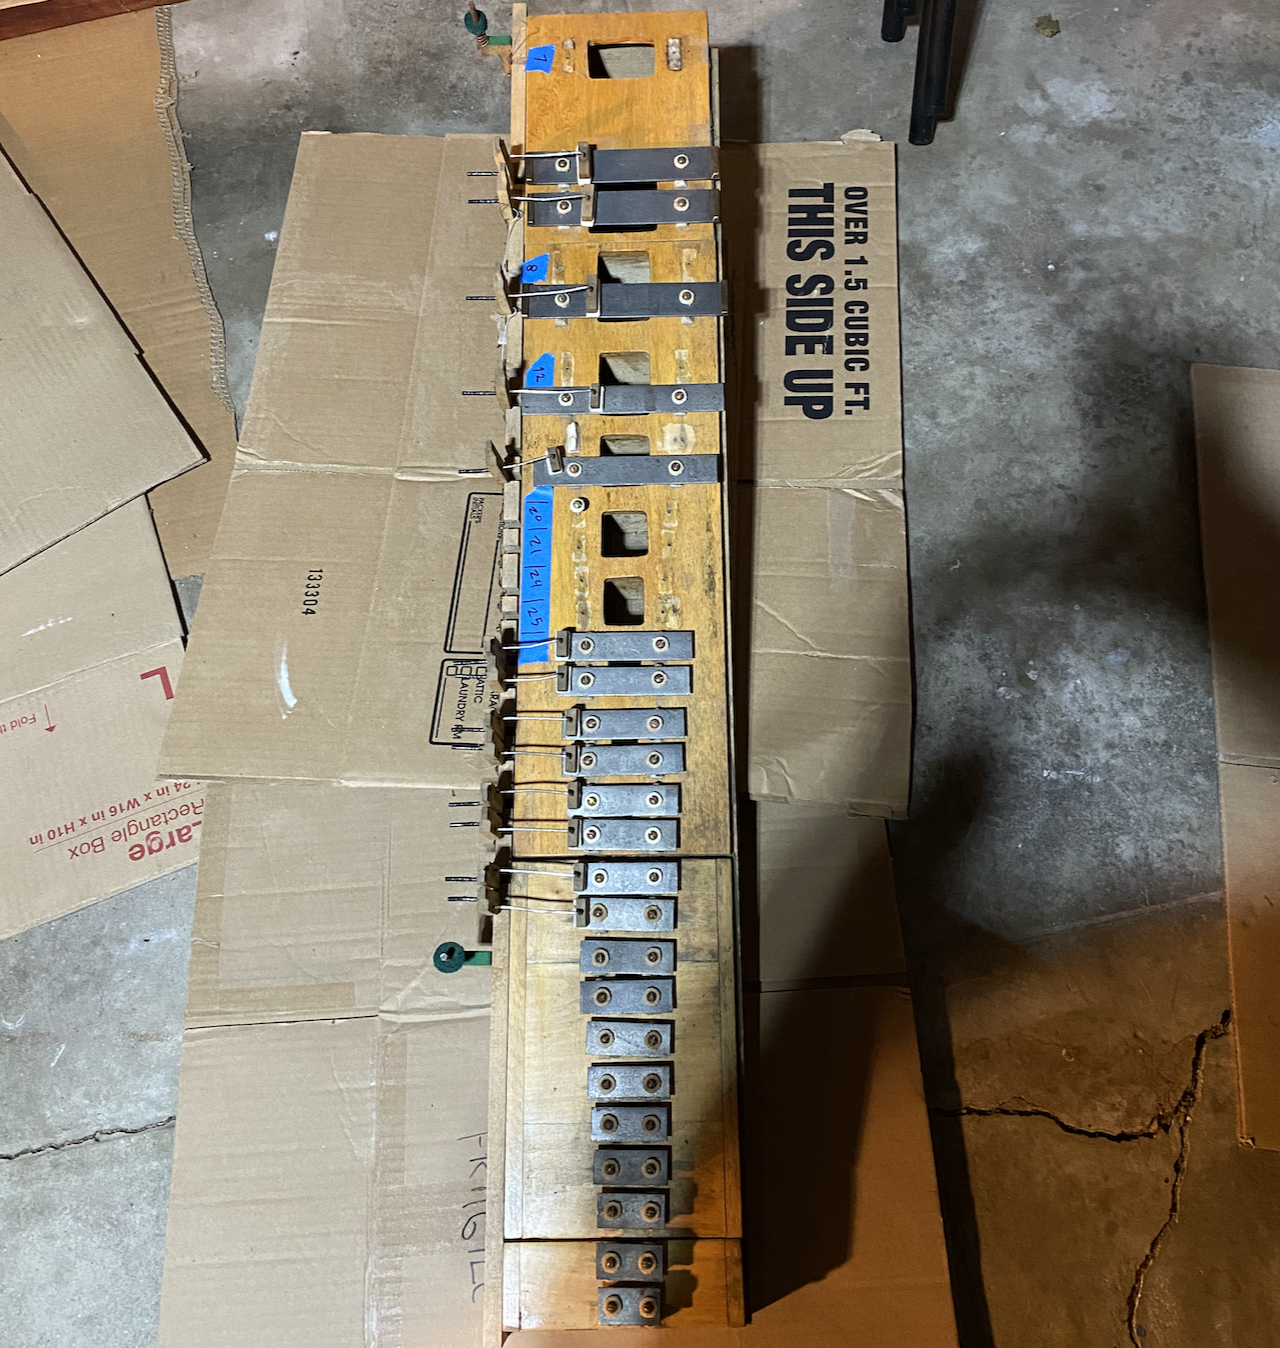
Now all the sound bars on the top row are removed.
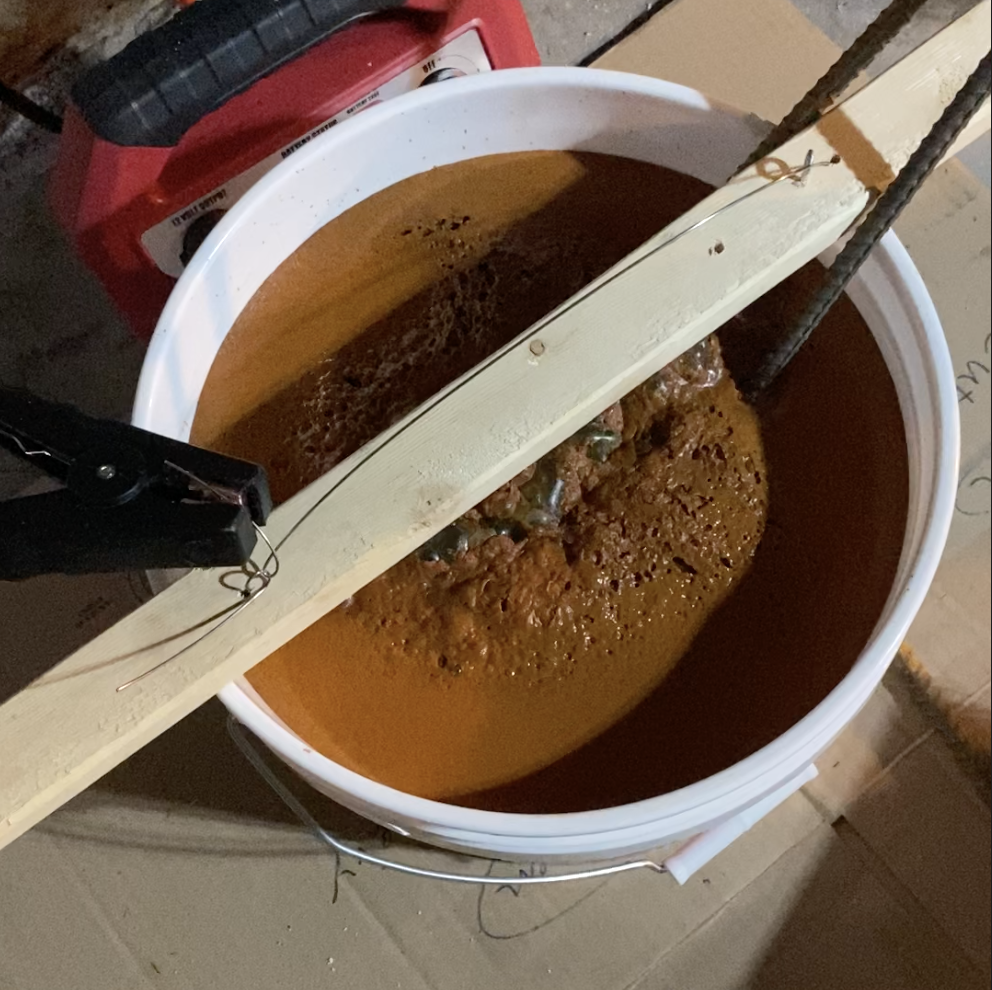
This time, the layout of the bath is modified. The iron bars are placed much closer together to facilitate better conductivity. Also a smaller, deeper container is used.
After running for several days the rust forms a thick foam on top which looks like a batch of chocolate brownies. Although this probably looks toxic, iron is one of the most abundant elements on earth and is not harmful.
After removing the bars from the bath they still need to be polished with steel wool to remove the black rust. This takes several hours.
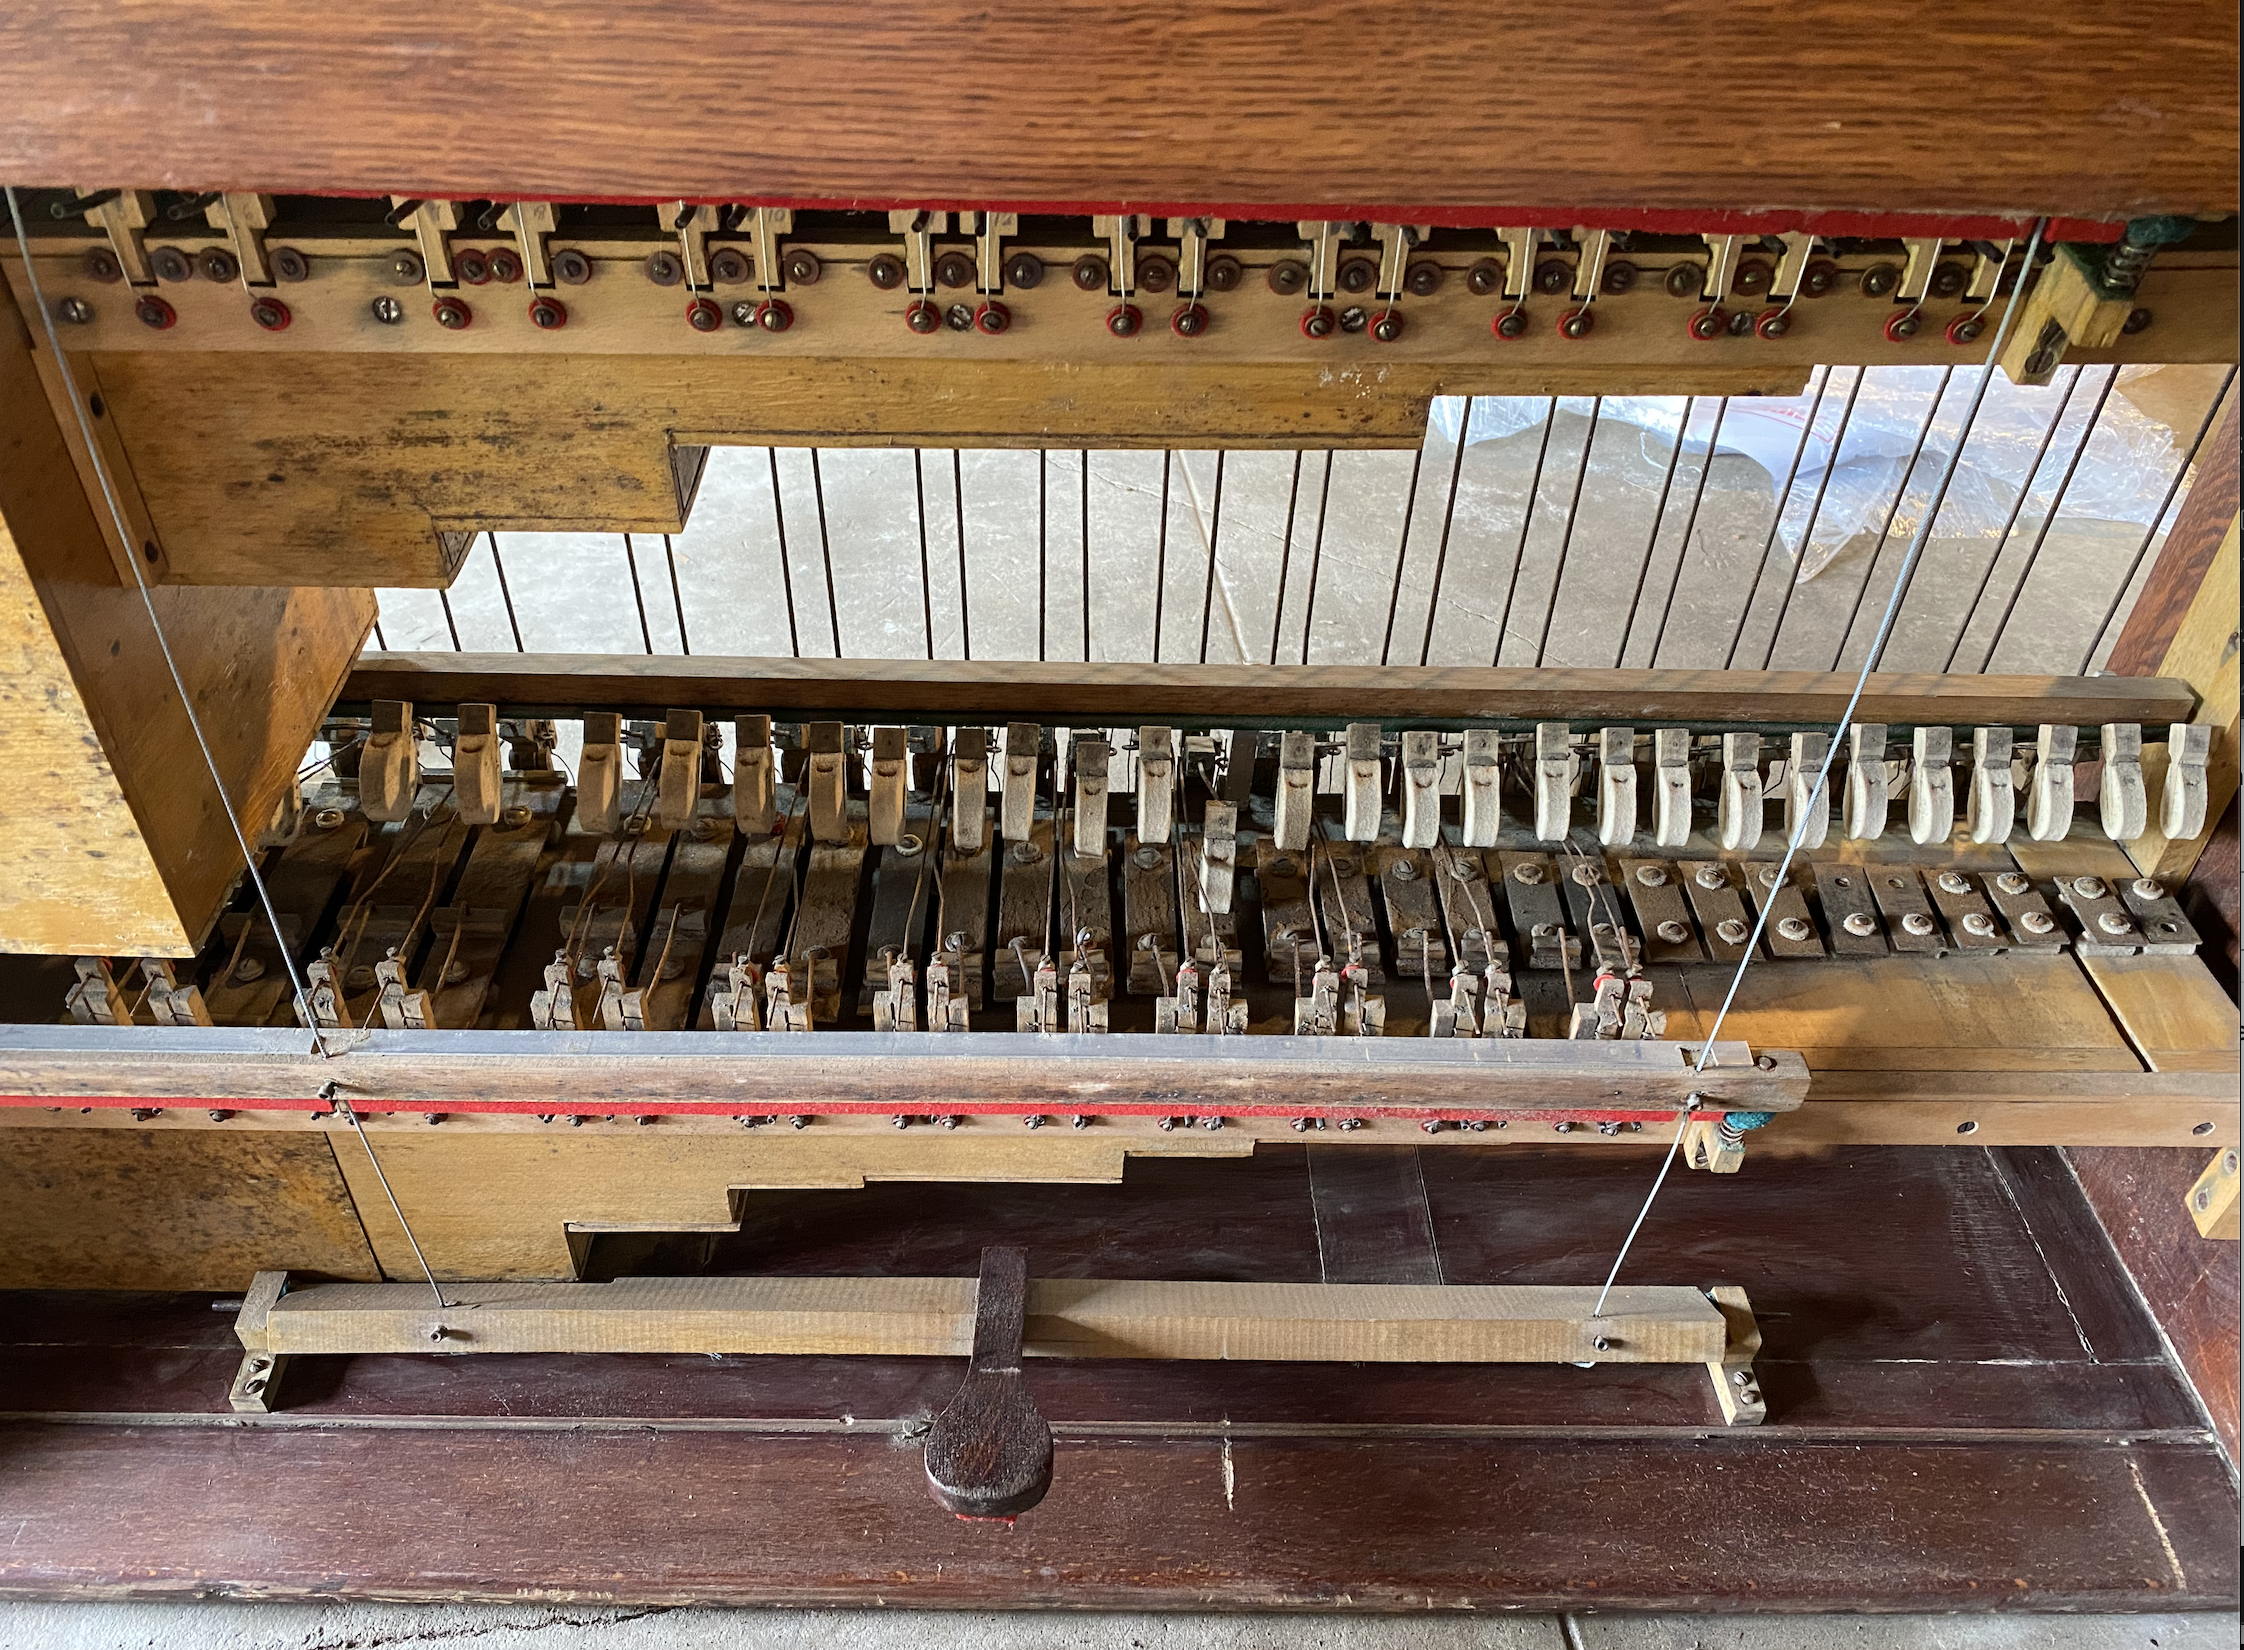
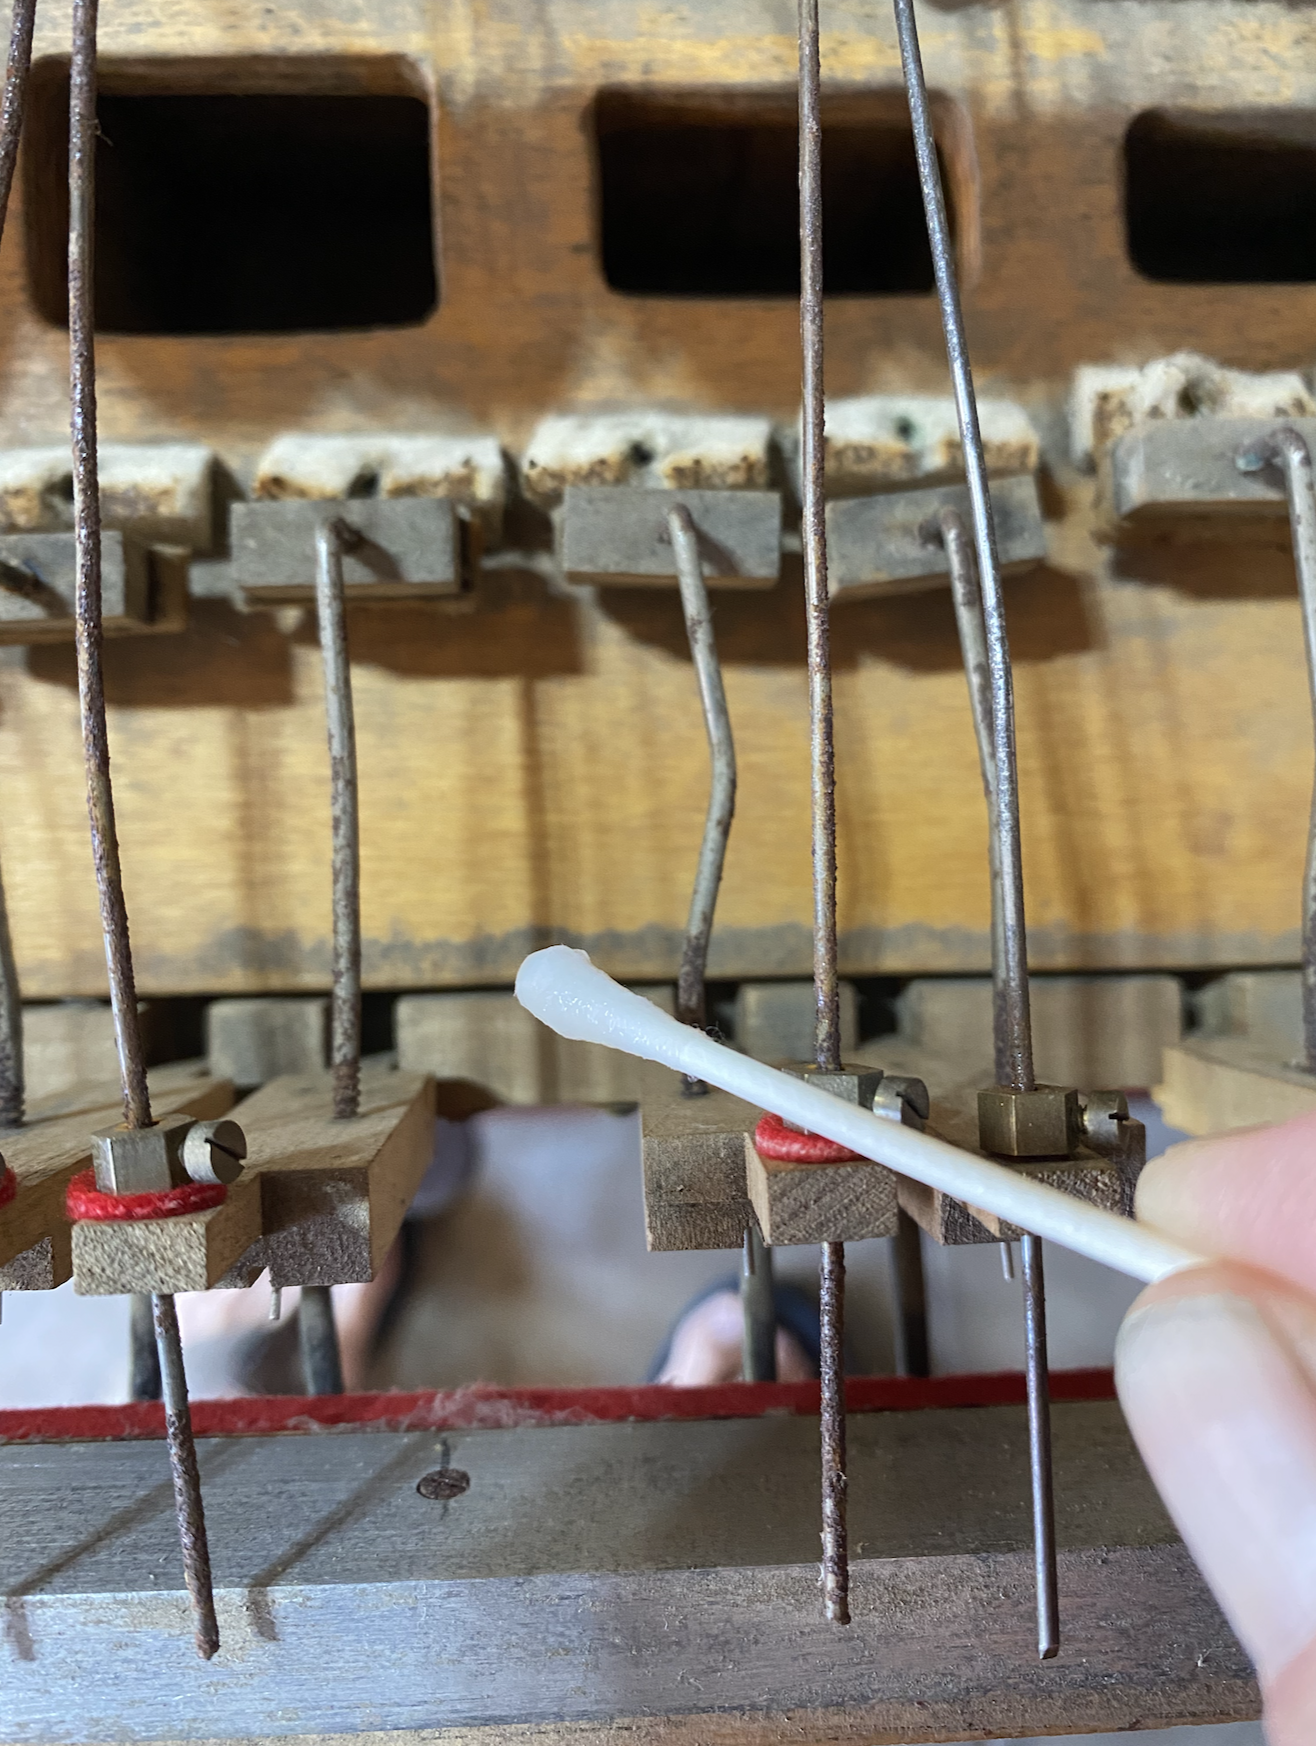
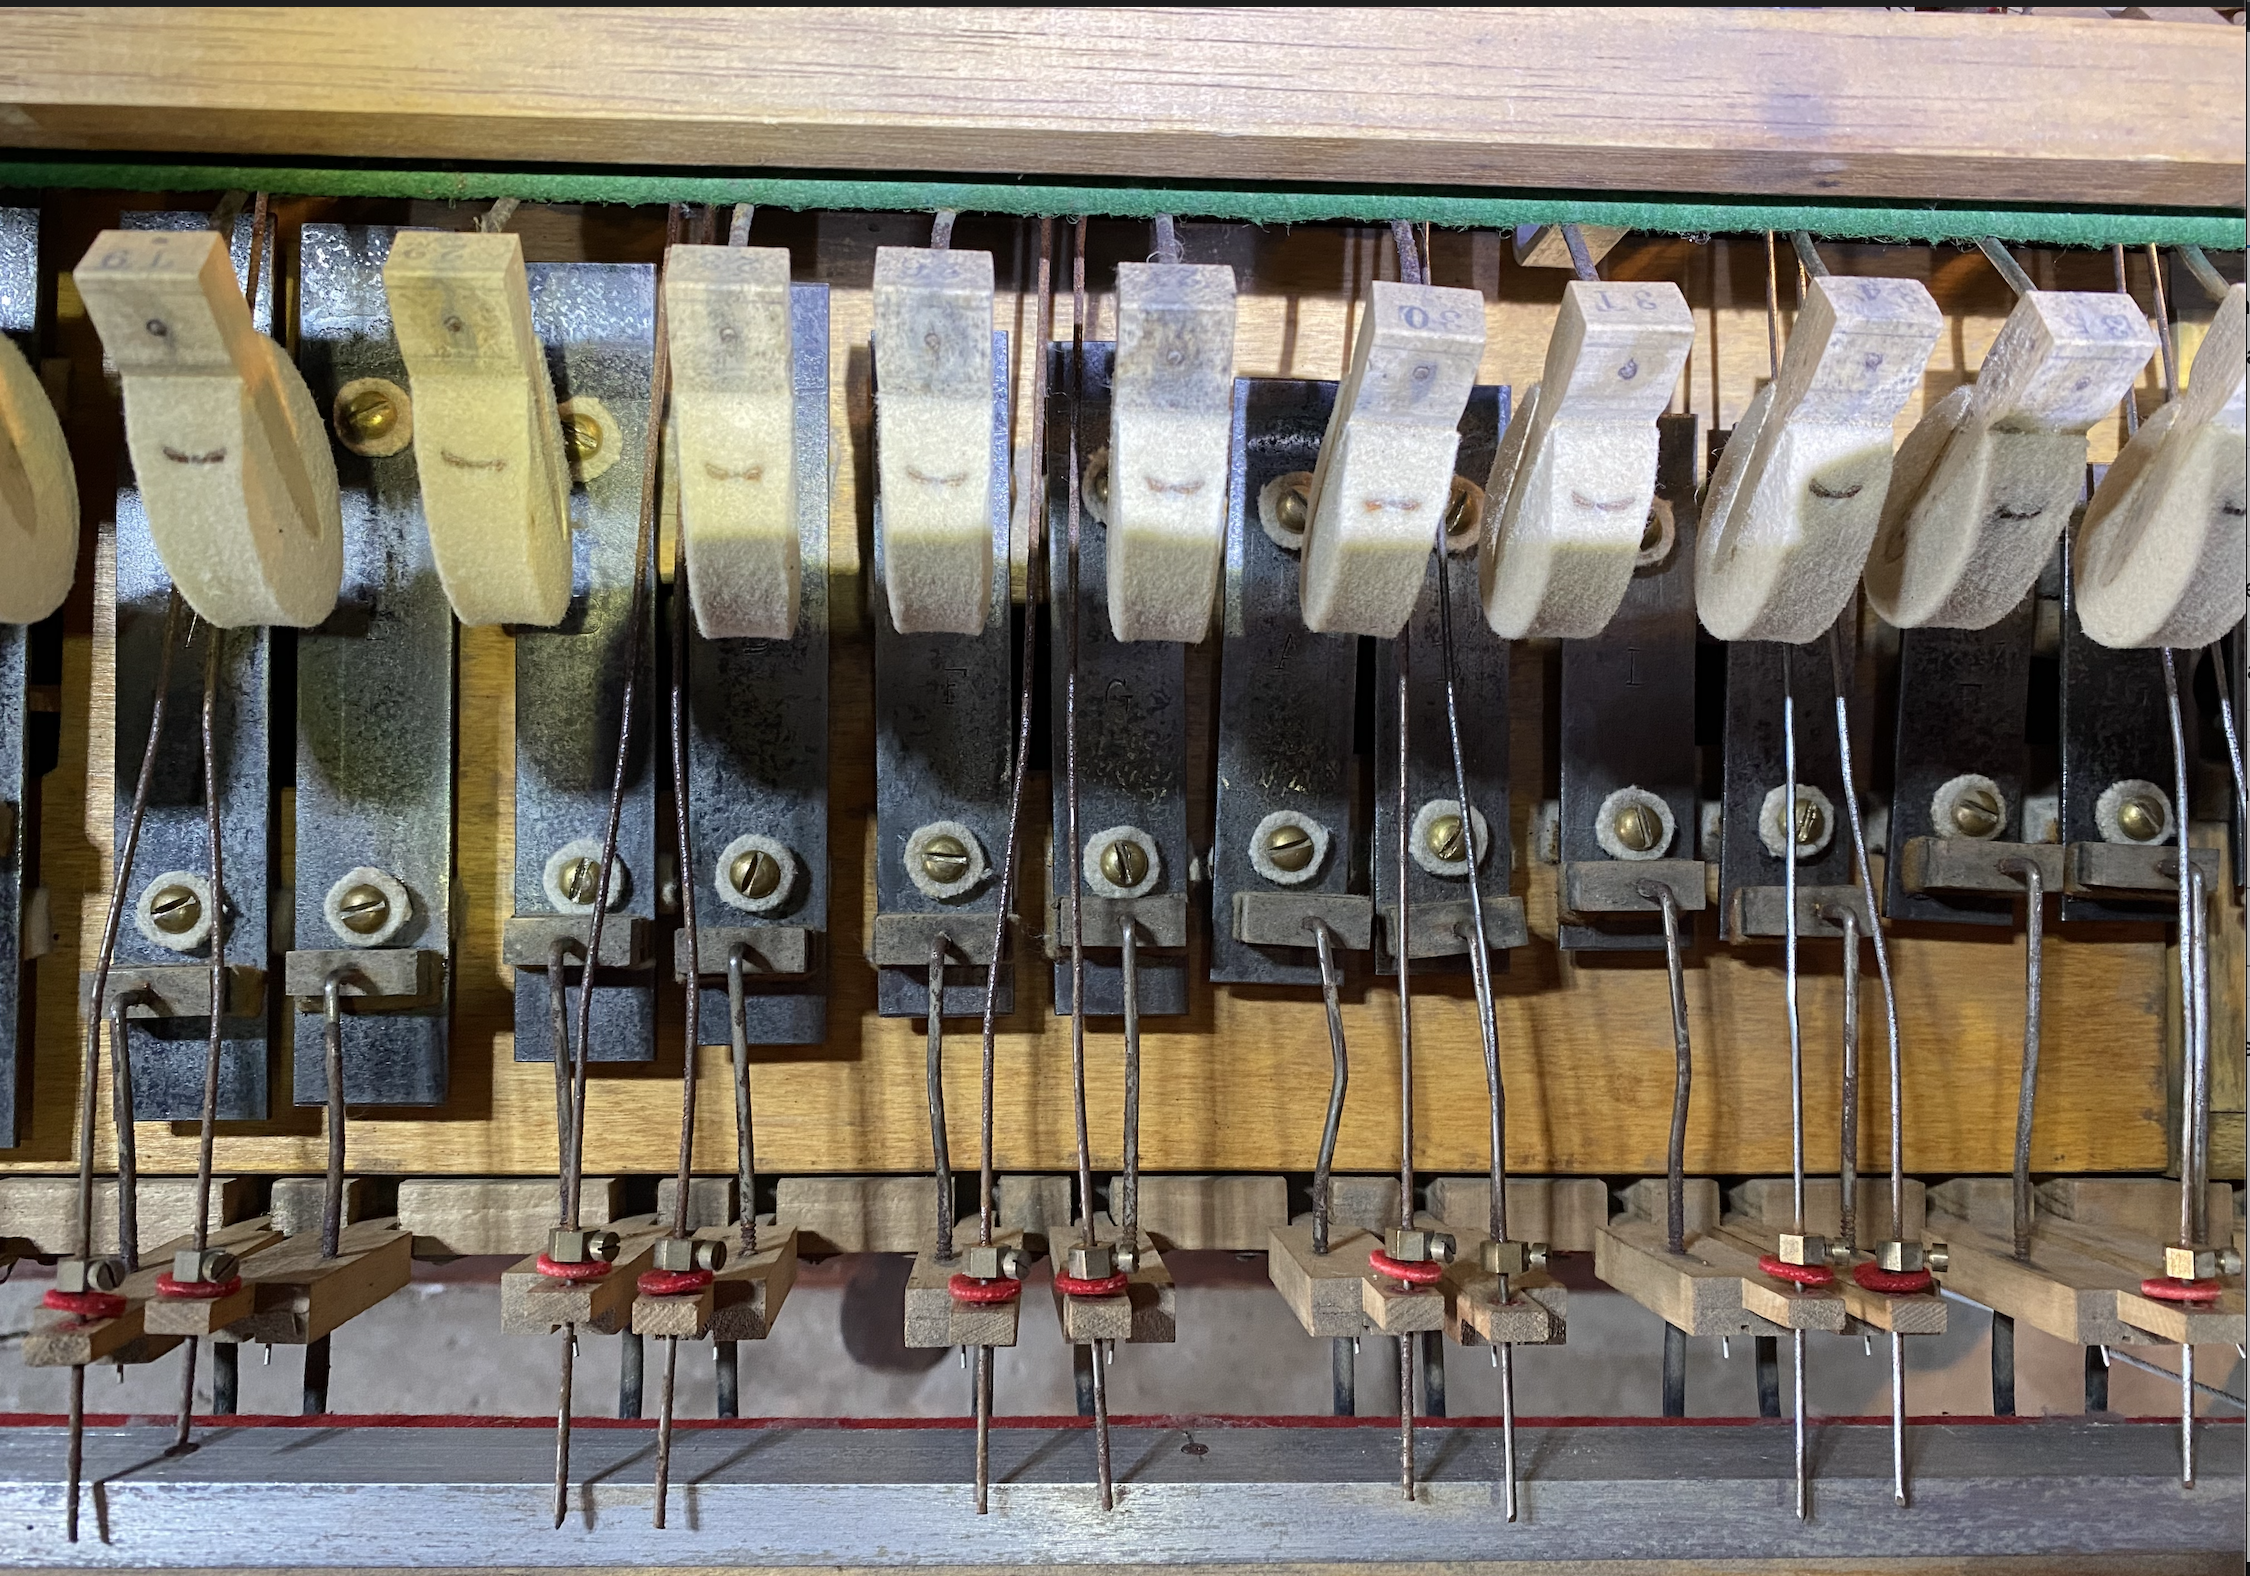
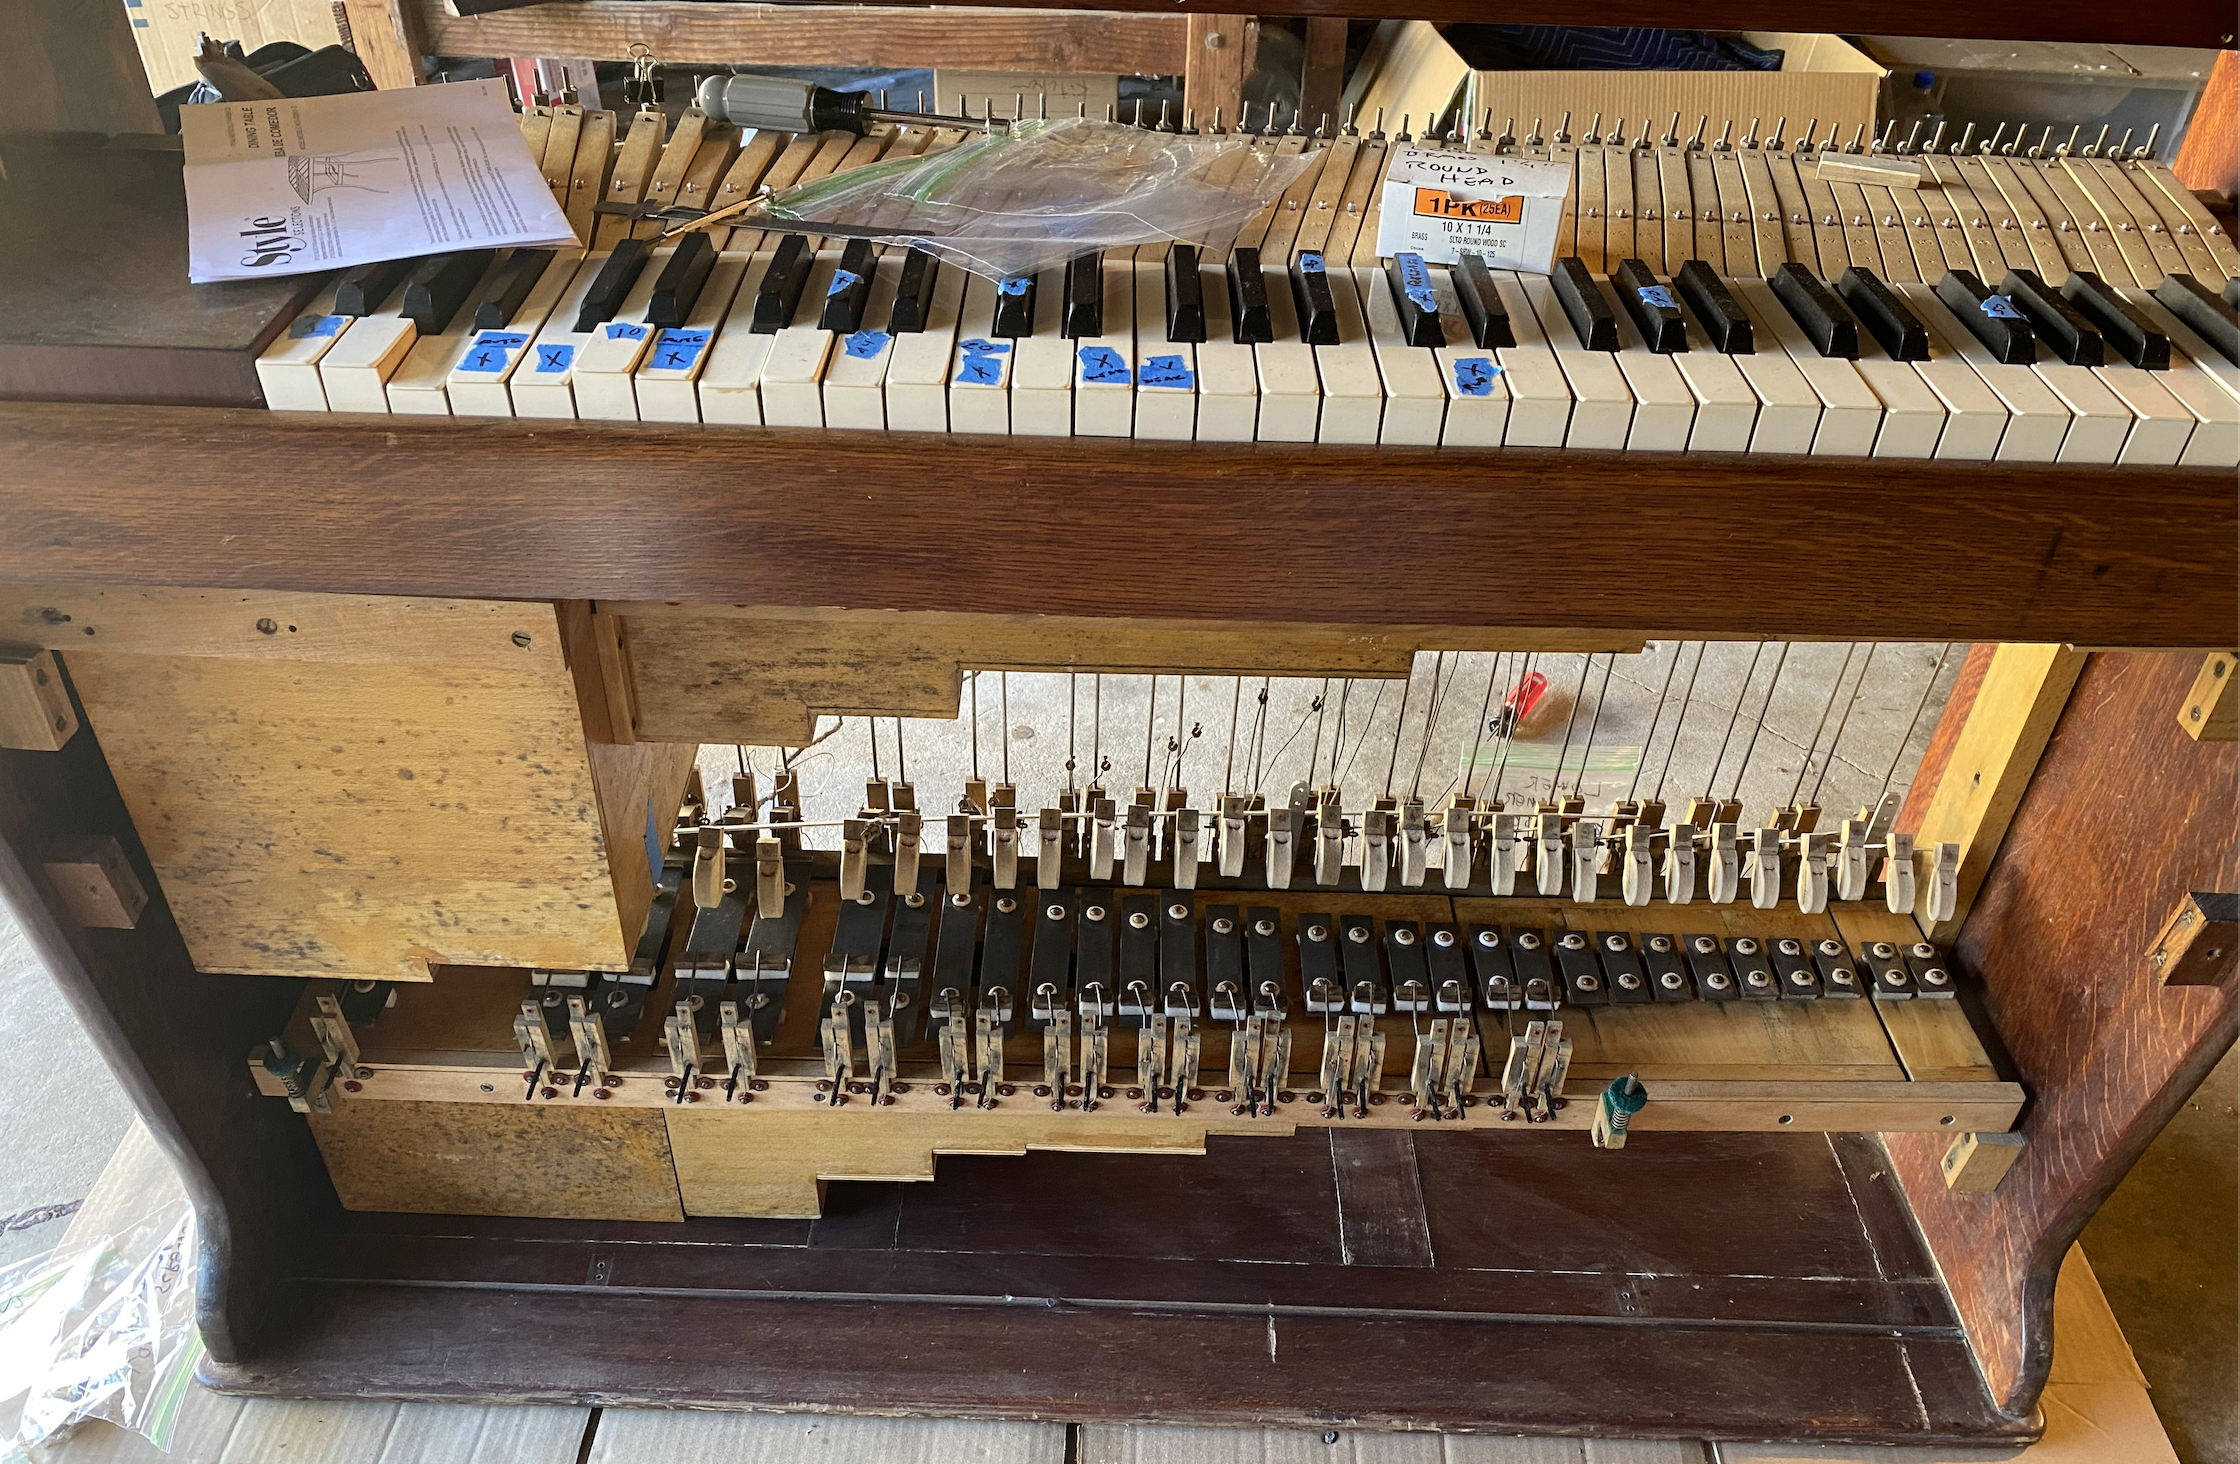
Prior to putting the bars back in the celesta, it was necessary to clean the upper level more thoroughly. This required about three hours with a damp Q-tip to dissolve the dirt. Notice the how metal wires are crusted with rust. The smaller wires are attached to the damper heads. The longer wires push the flanges which lift the dampers.
Now the wood is almost perfectly clean. The wires will be polished later.
Now the bars are installed back in the instrument. There are thirty bars. This takes about two to three hours.
Now the electrolysis process is repeated for the lower set of sound bars. This runs for several days before all the rust is removed. Then several more hours are needed to remove the black rust. This is done by soaking it in a chemical called Blaster Rust Remover which loosens the black rust substantially. Then it is rubbed off easily with steel wool.
A side effect of the rust on the sound bars is that they became glued to the dampers. This means that many dampers were damaged when the sound bars were removed because the damper felt was torn. All the dampers had to be replaced.
First the old dampers flanges are removed. The damper felts were removed by applying wallpaper remover which dissolves the glue after about one hour. Then the remaining material is cut off with a razor blade. New damper felts are cut from fresh cloth and glued on using plastic cement. Here is what the new damper heads look like:
Amidst all the other challenges, a massive, unexpected, and potentially unsolvable dilemma arose. Each hammer on the instrument is attached to a type of hinge called a flange. Each flange has a metal post attached to it which allows one to modify the mechanical timing. While trying to regulate one of these hammers, the metal post broke off.
I took it to a machine shop who said it was impossible to fix. However, he referred me to a master woodworker named Kurt Gary who believed he could repair it. He drilled many tiny holes around the metal post, then tapped it out with a hammer. He then drilled a clean hole, which he plugged with a wooden dowel. He machined a new metal post, drilled a hole for the post, and inserted it. It was a miracle.
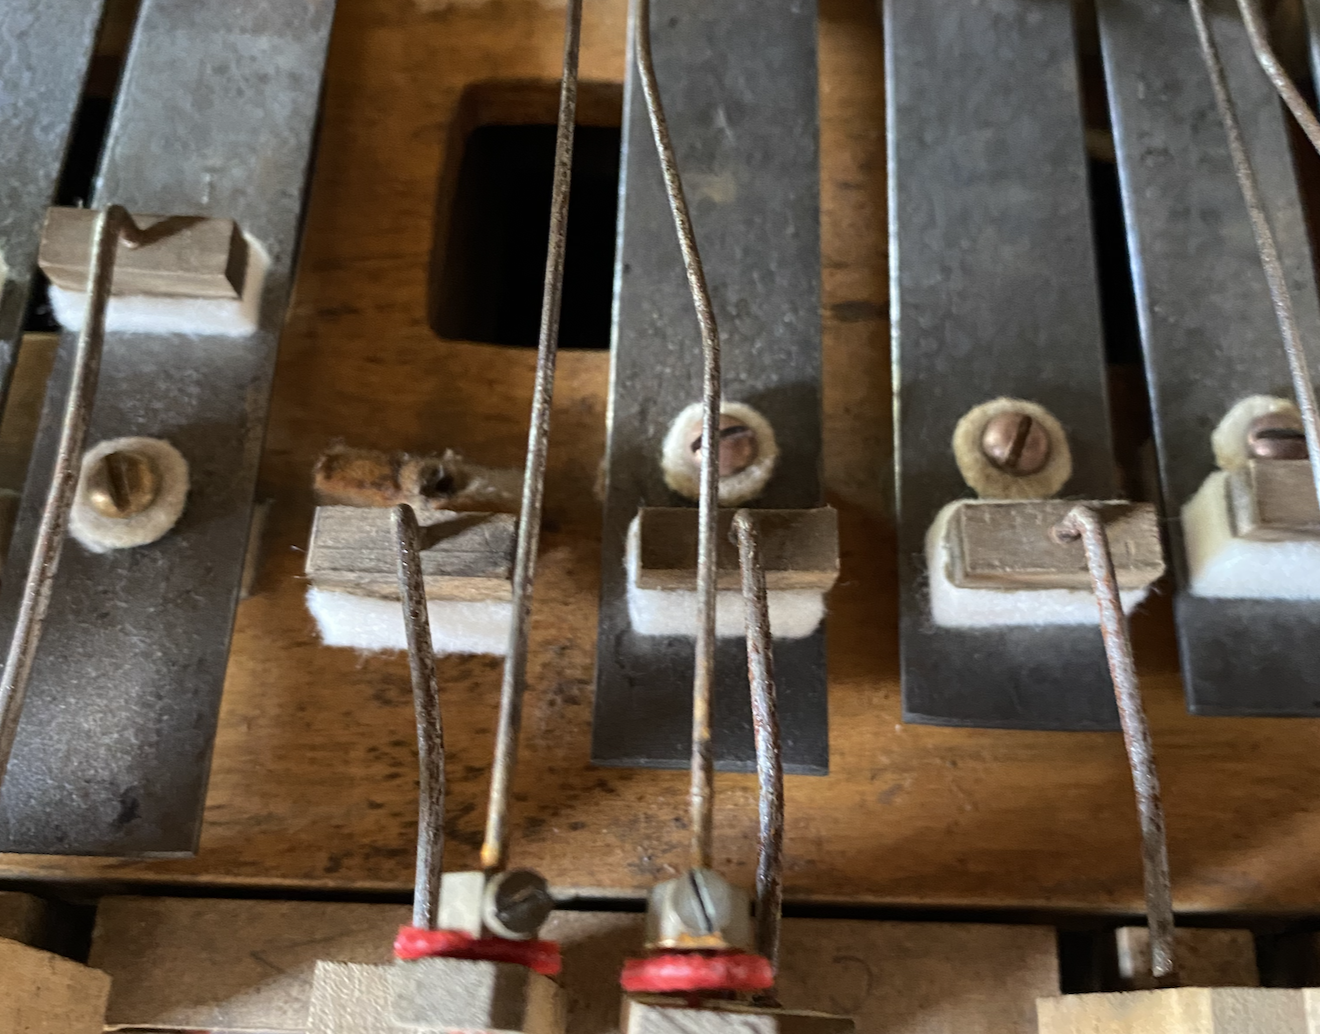
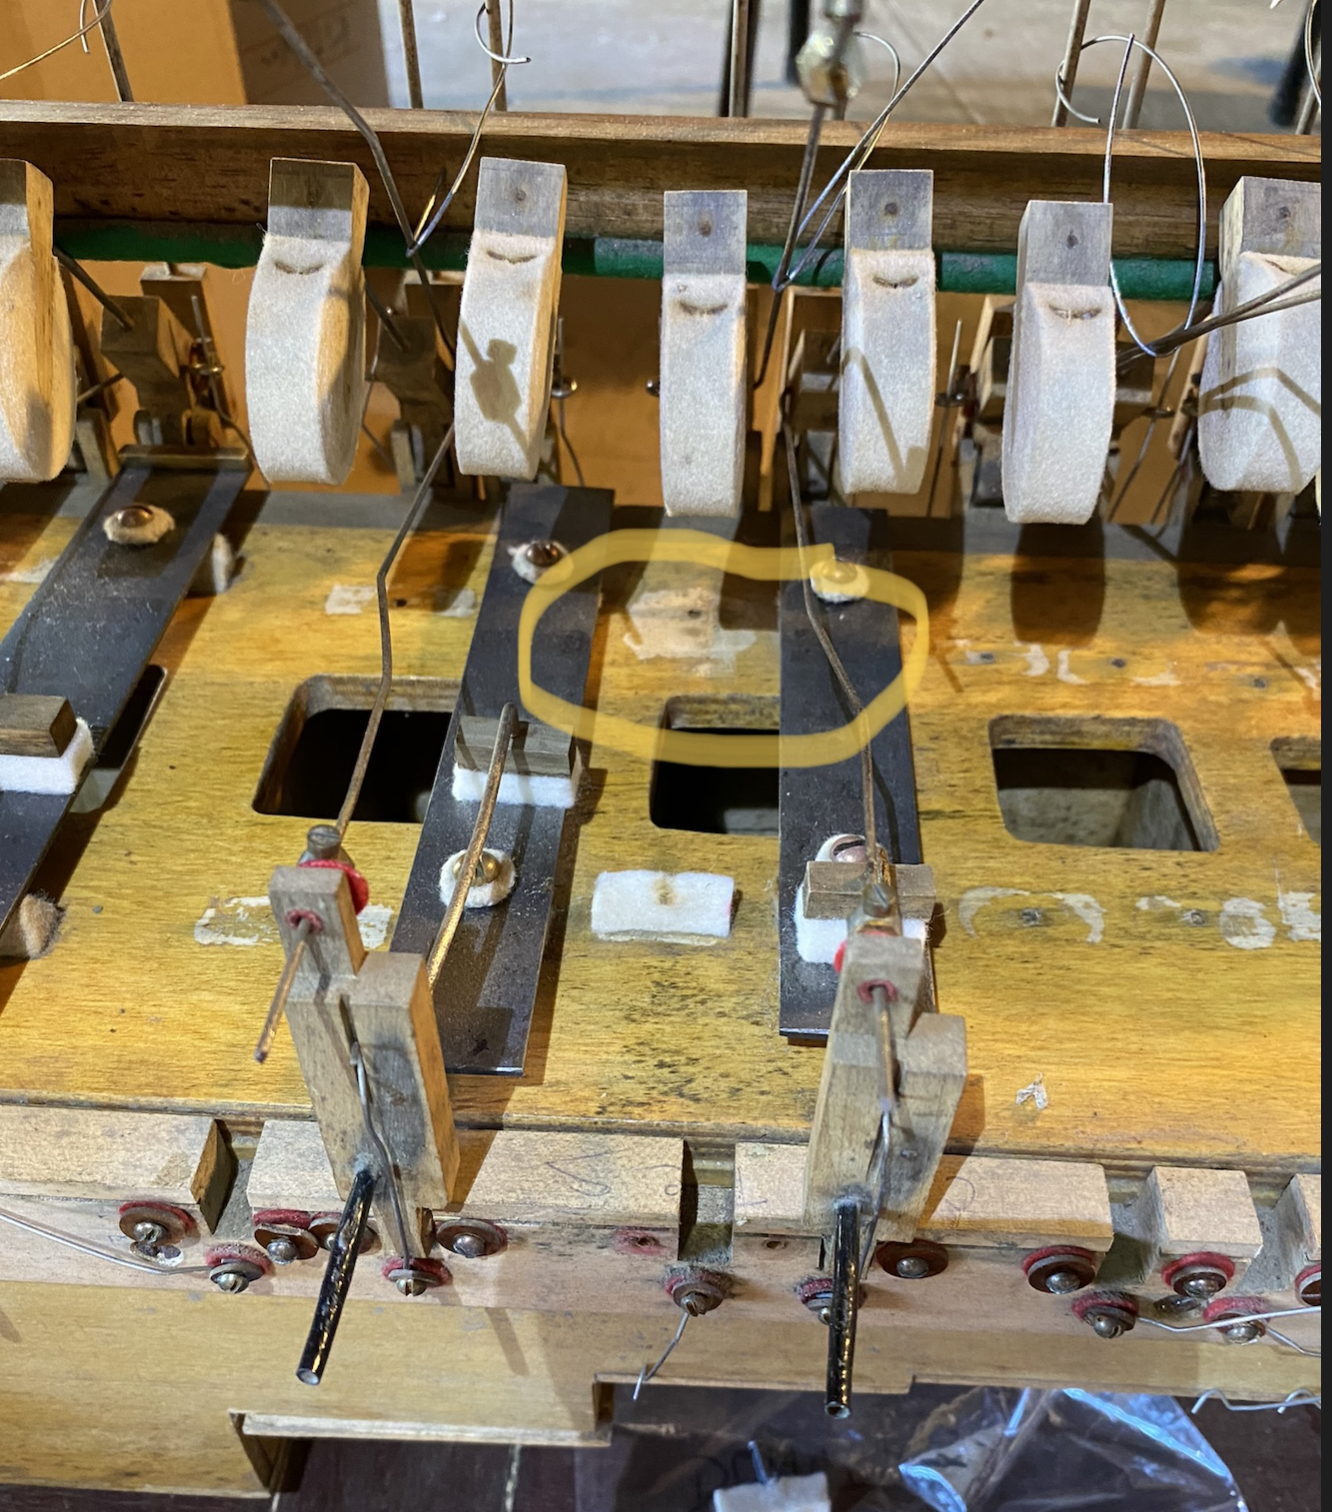
Now a new problem is revealed. If you look in the center of the picture below where one bar is removed, you can see that the white underfelts which support the bar are deformed and also crusted on top with hard brown rust. This can both dampen the sound bar and also cause a rattling noise. This is also due to the fact that they became glued to the sound bars and ripped when the sound bars were removed.
The damaged underfelts were removed in a similar way as the dampers by using wallpaper remover to soften the glue. Then a razor was used to trim what remained. In the photo below you can see that many of the underfelts have now been removed.
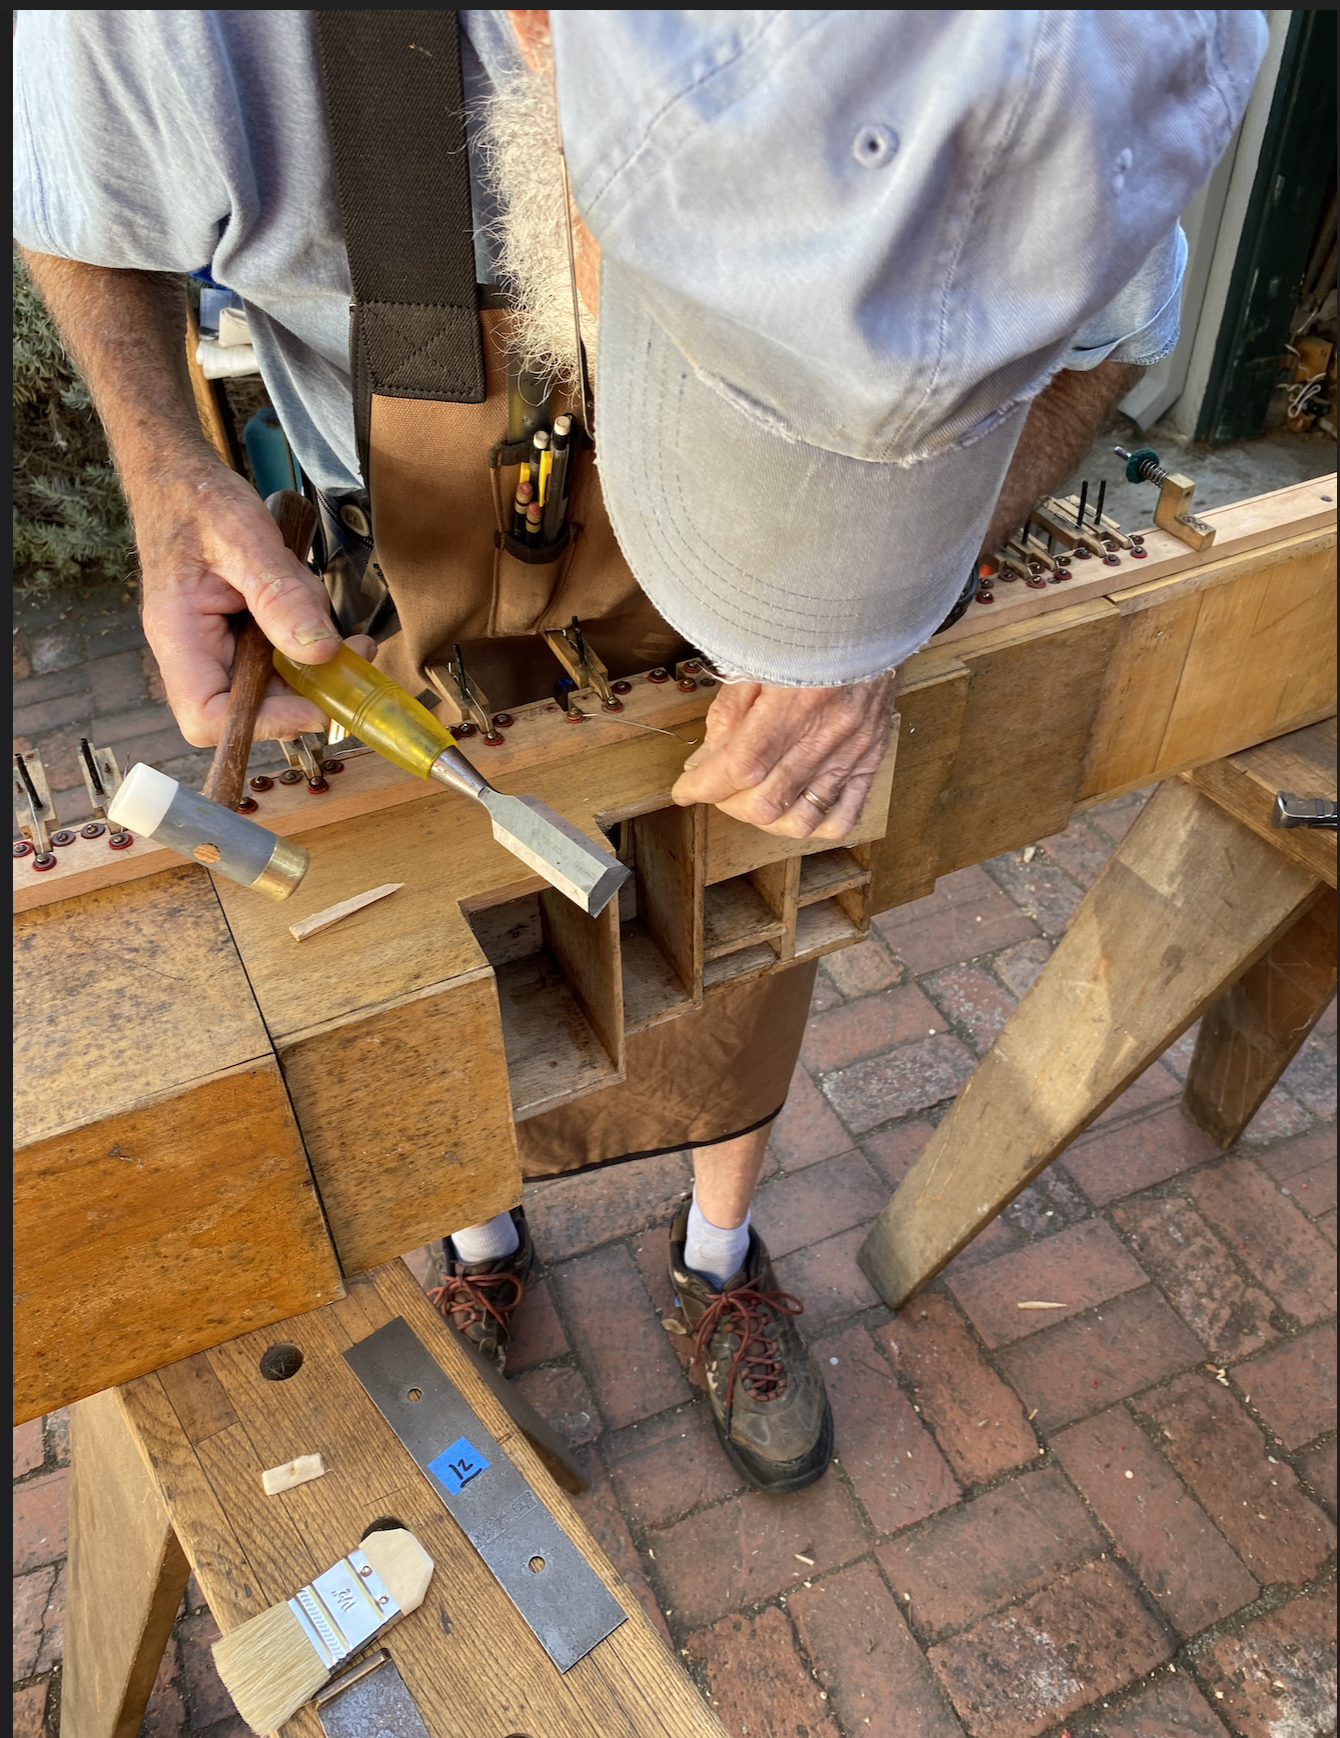
Many new problems were becoming apparent at this time. First, some of the screw holes were not deep enough to accommodate their screws. Also, some of the holes were not aligned with the holes on the sound bar. This creates sideways pressure on the sound bar which prevents it from making a sound. These repairs could not be accomplished while the parts were inside the celesta so the bottom deck was removed.
Yet another problem now became apparent. The sound bars sit on top of rectangular resonator boxes. These boxes pick up the sound from the metal sound bars and amplify it, reflecting the sound outward. This is much like the body of a guitar or violin. Once I got a look at the bottom, I could see that much of the wood underneath these resonator boxes was peeling from the celesta being underwater.

All of these repairs again required a woodworking specialist, so I took the part to the same master woodworker I used before. He used a chisel to break off the damaged pieces of wood. He cut new wood to the correct thickness and fastened it using glue, small screws, and nails. It was amazing watching him work.
After he repaired the wood, I brought it back to my shop and added a layer of orange colored shellac to try to match the hue of the existing wood.
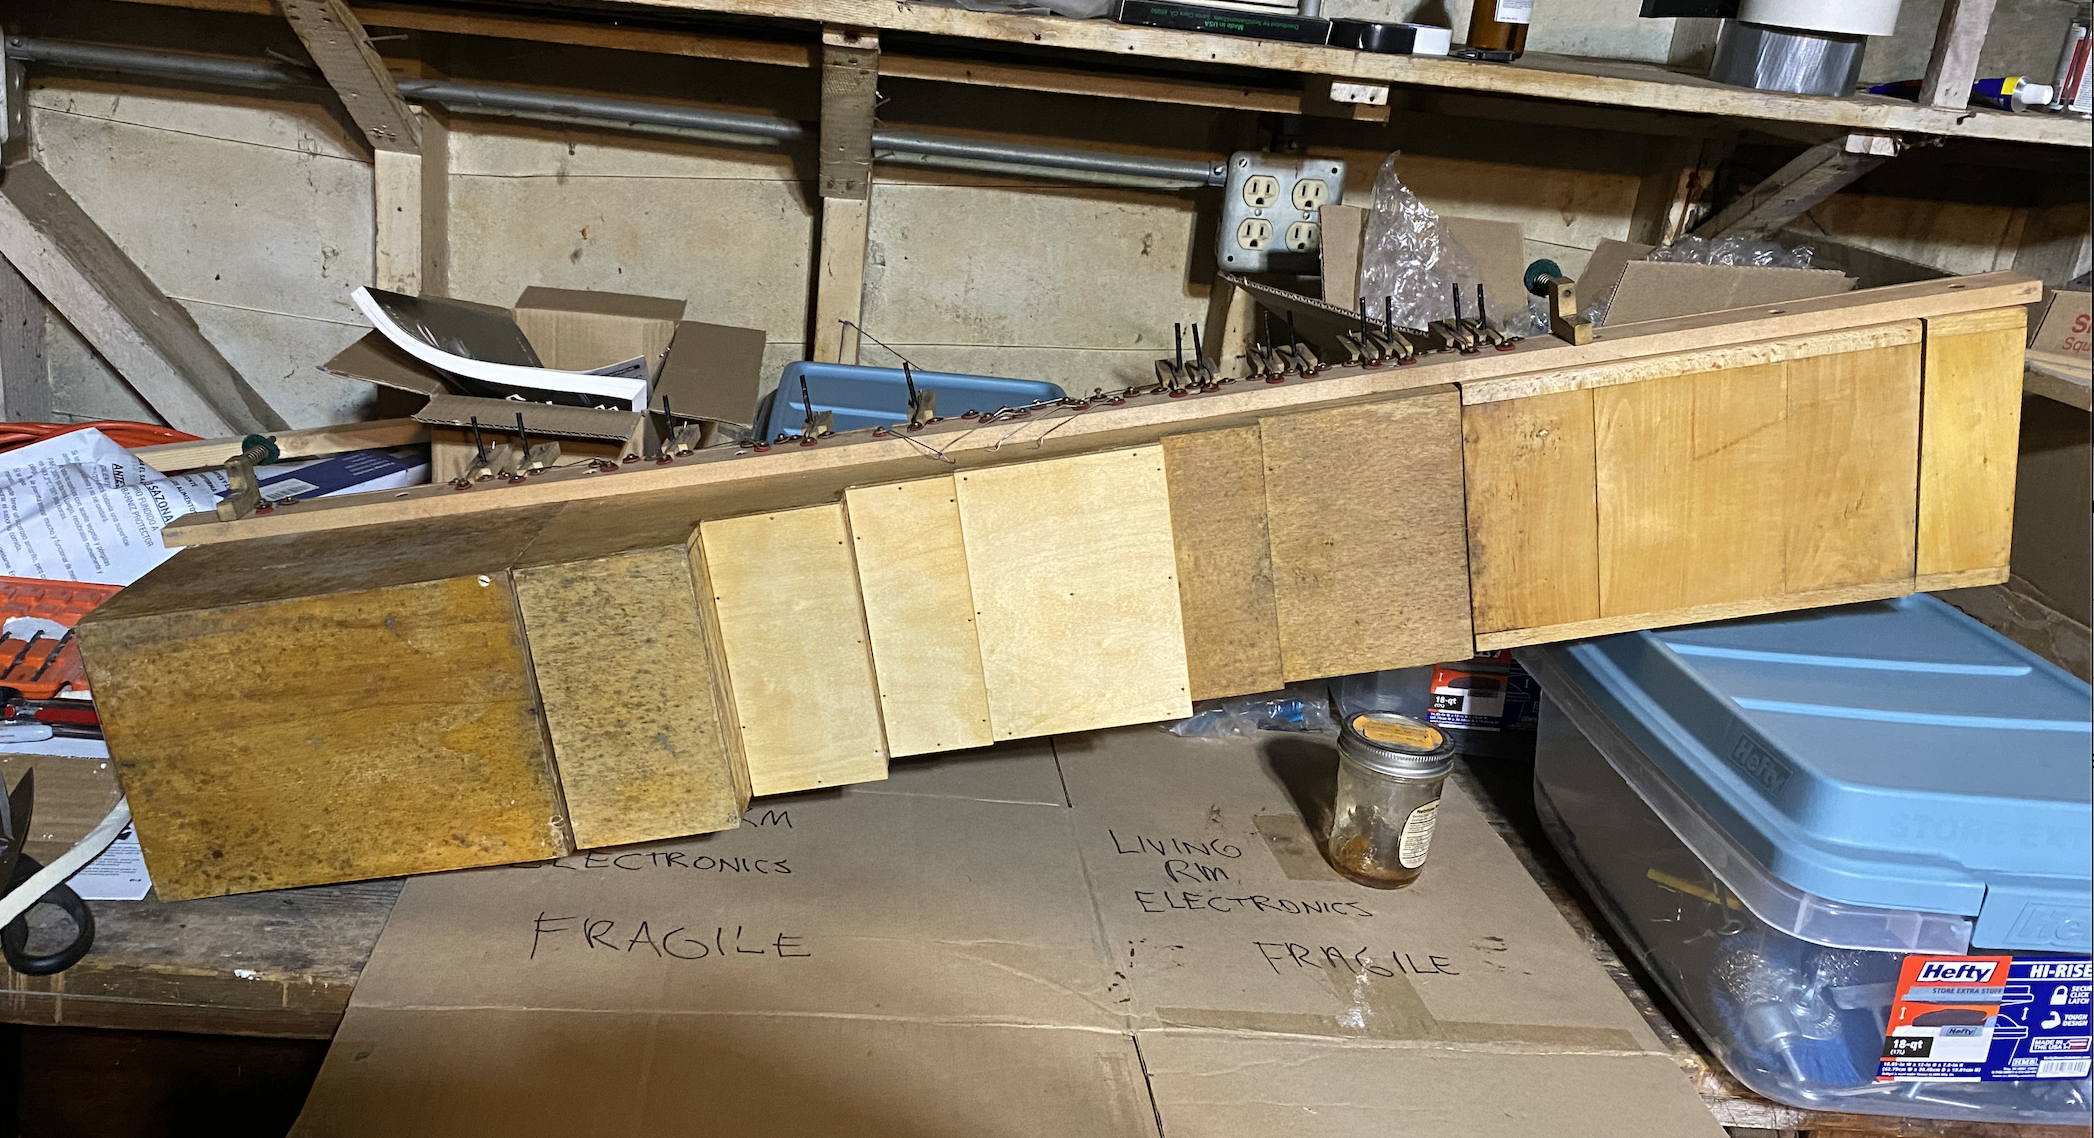
Now the instrument was ready to be reassembled. It took several hours of delicate work to get the resonators and sound bards back in the instrument without damaging it.
Finally, after being unplayable for years, the celesta makes music for the first time.
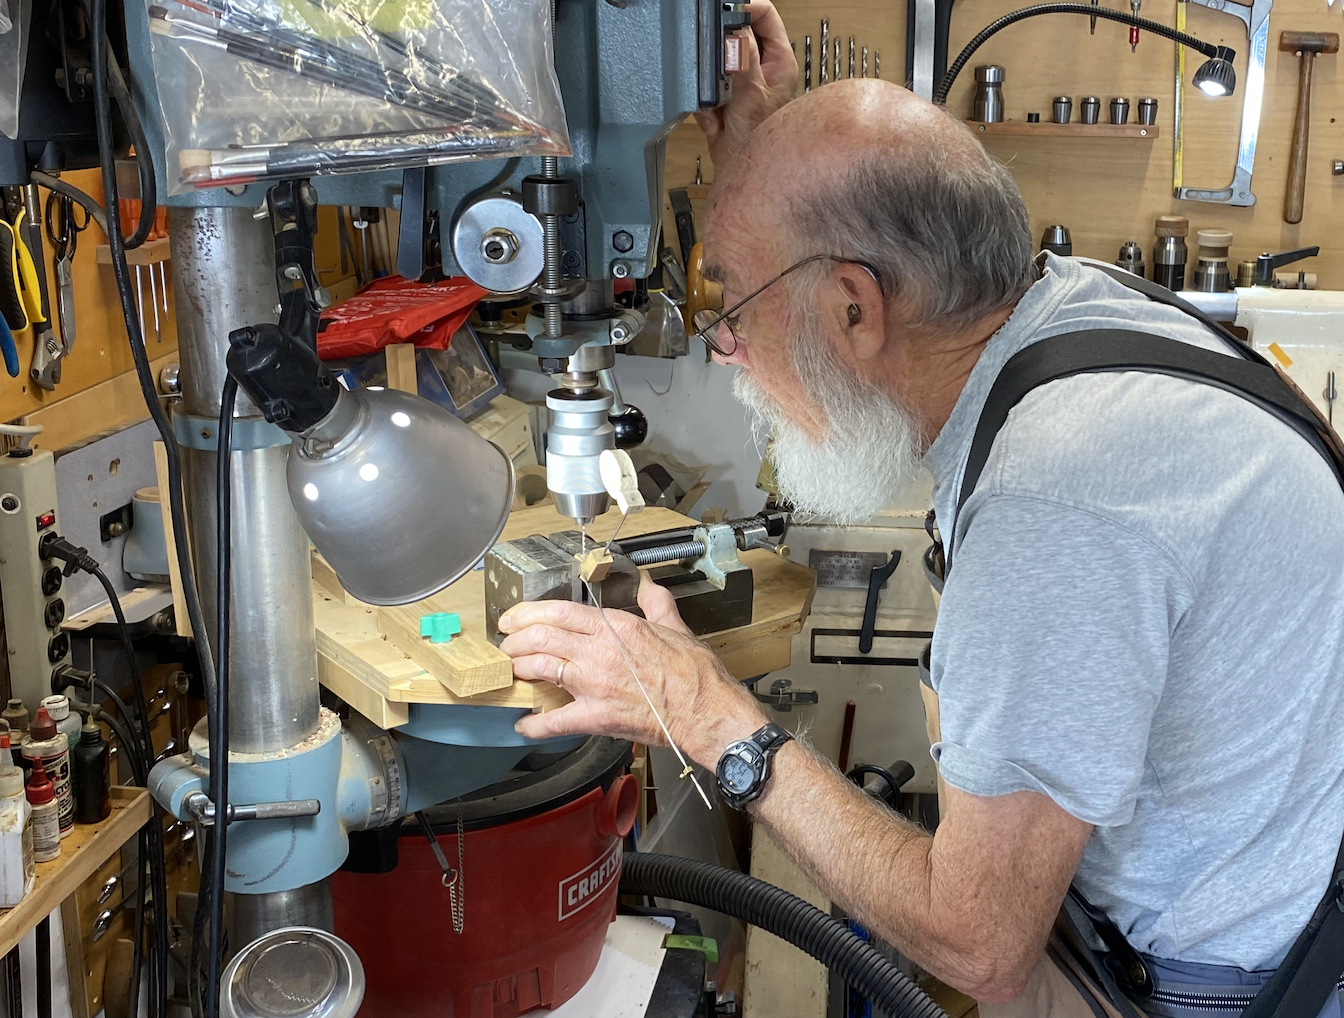
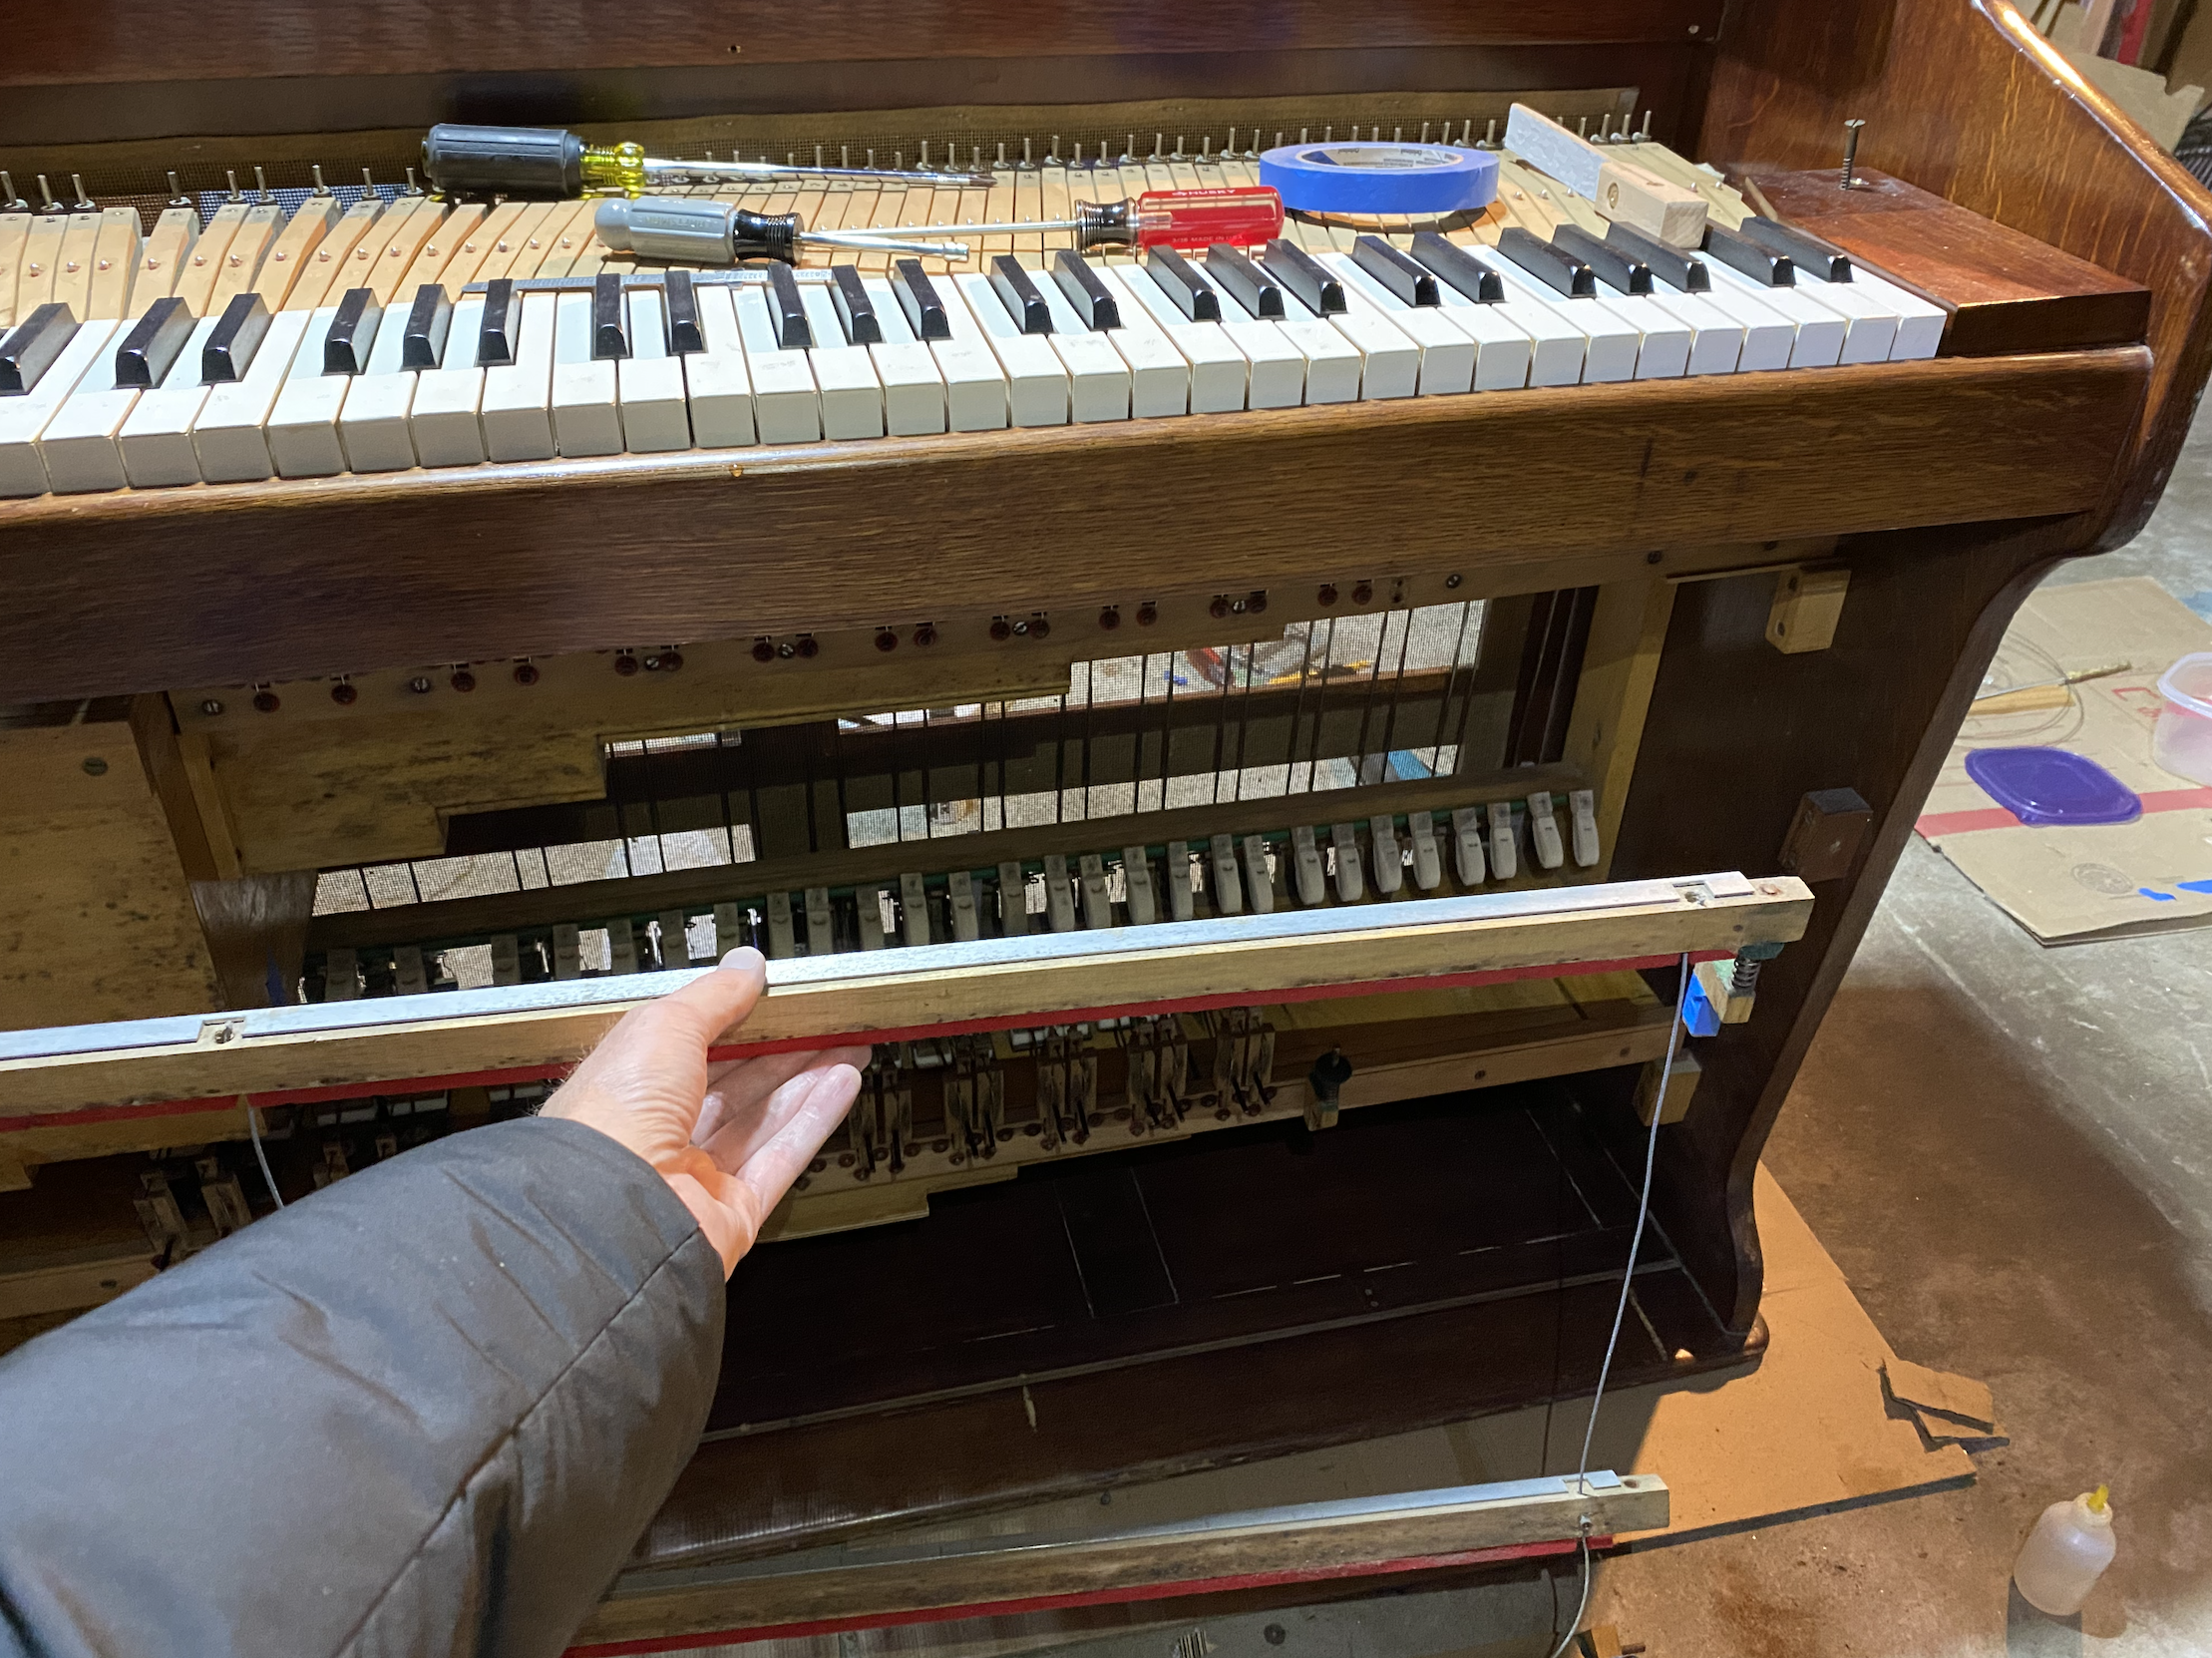
At this point it seems that the journey is almost over. However, now a new chapter begins. Although the major broken components have been fixed, the instrument still has dozens of keys which don’t play properly or don’t sound properly. It requires a process called regulation in which all moving parts are adjusted to their original specifications.
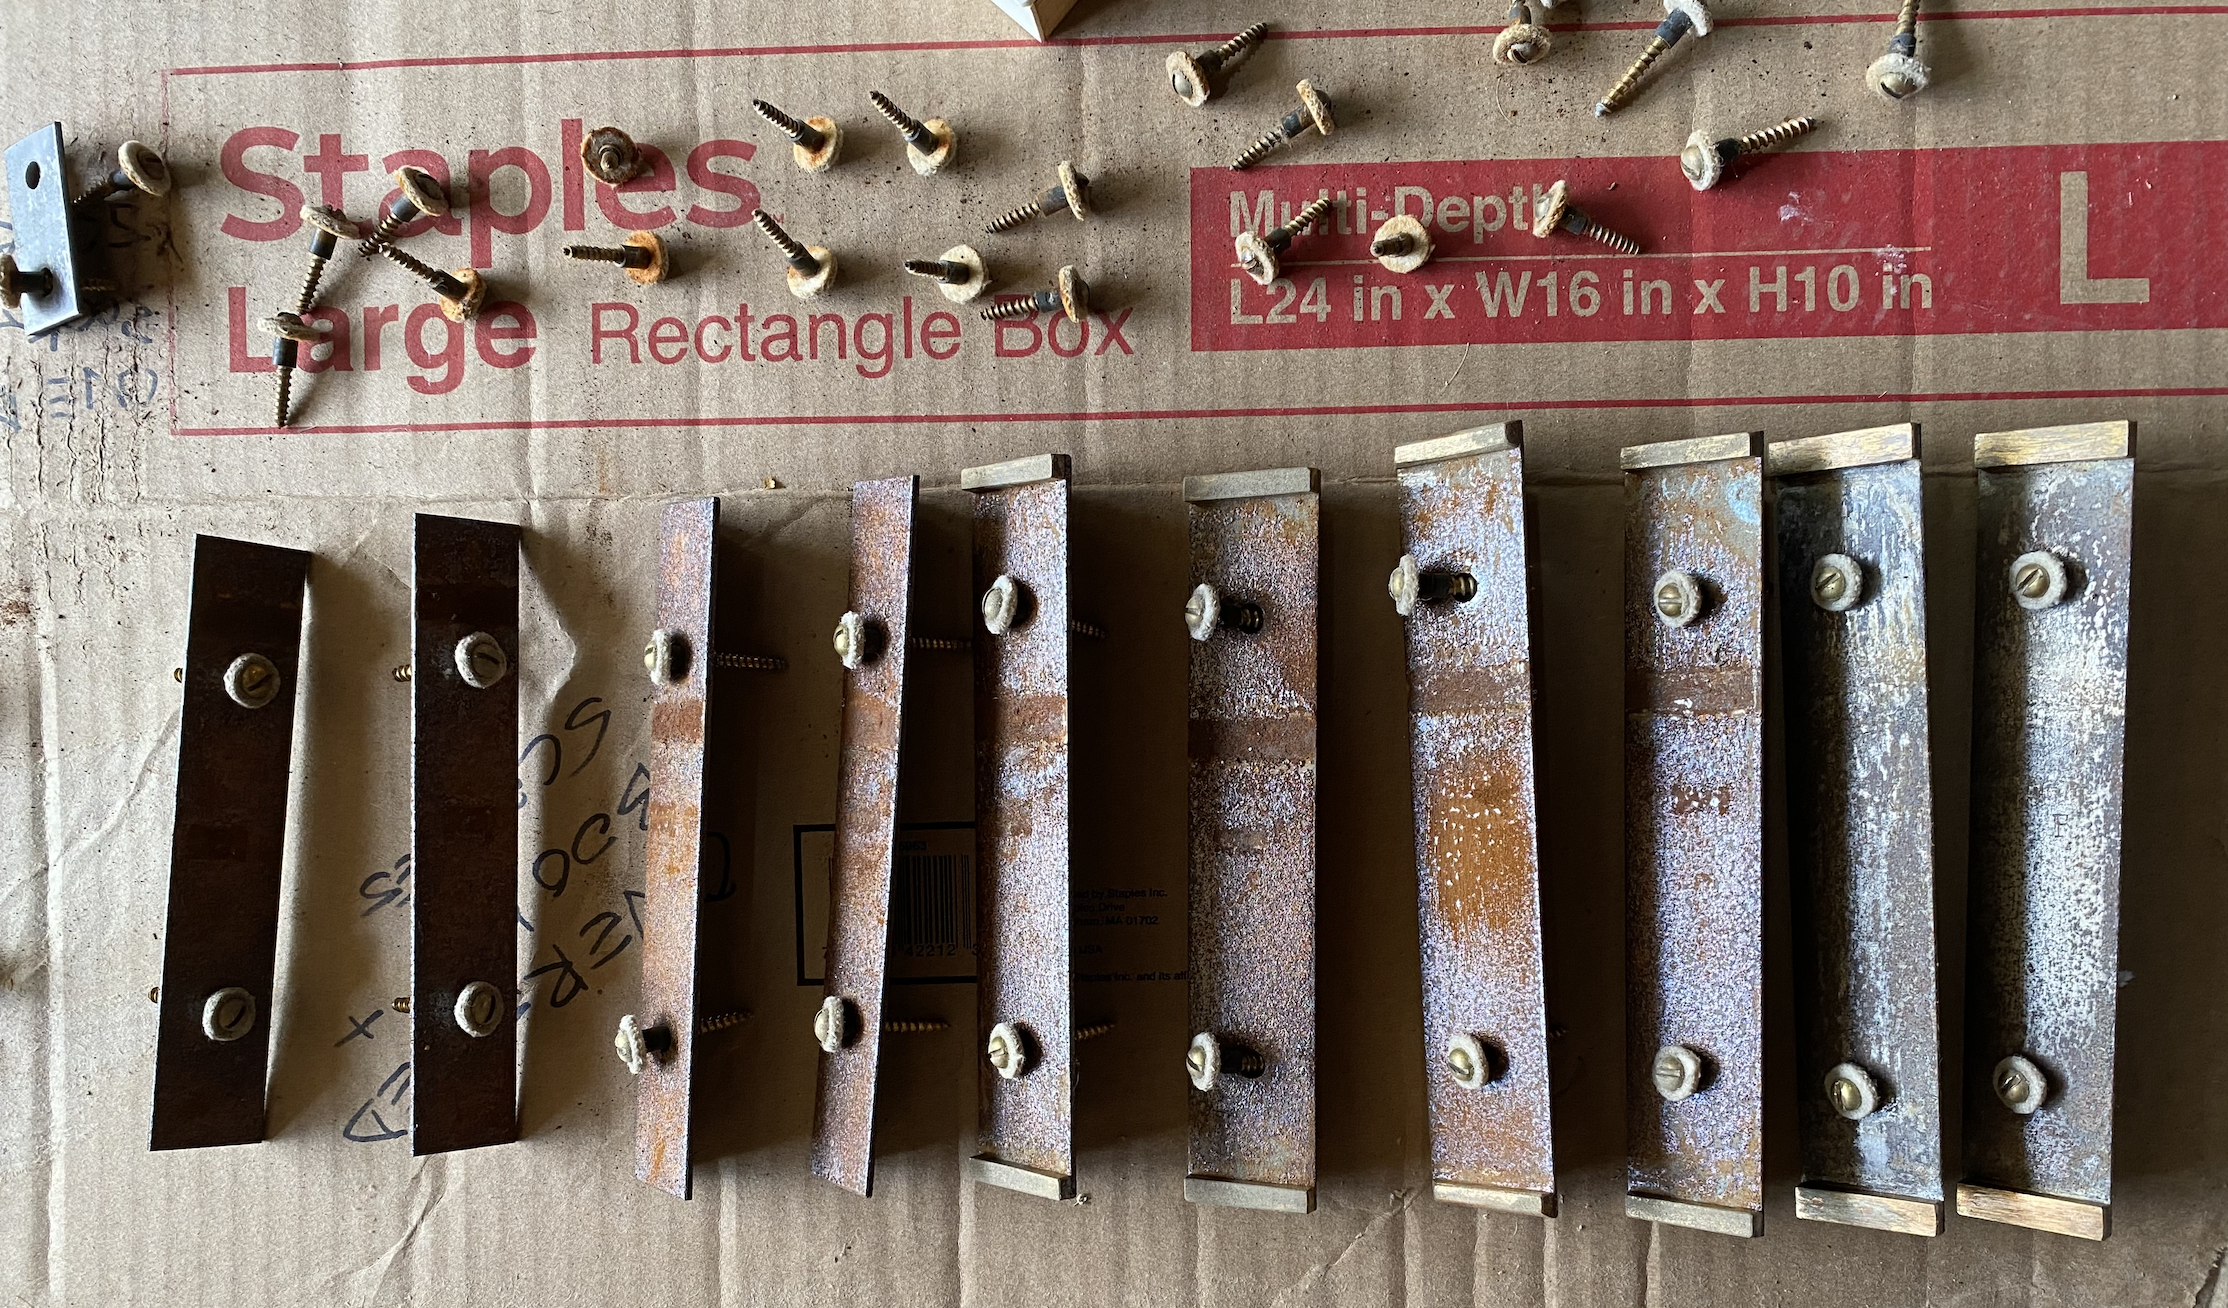
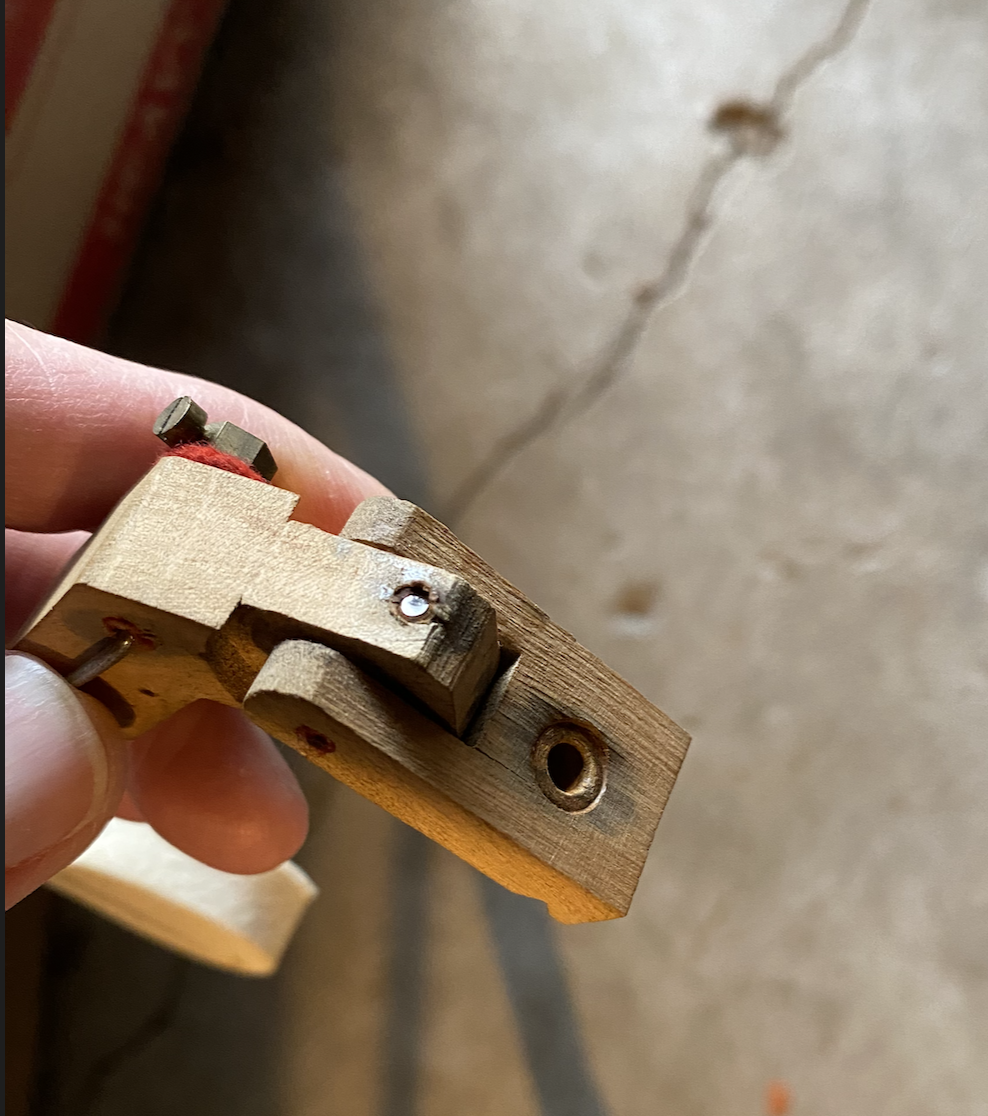
For example, some of the low notes are very noisy due to a double flange mechanism. This design helps get around the fact that the sound bars are wider than the keys. It does this by using a metal bracket to “reach over” from the key to a hammer which is off to the side. Unfortunately, these are old and very noisy. Each one had to be totally disassembled, repinned, and rescrewed.
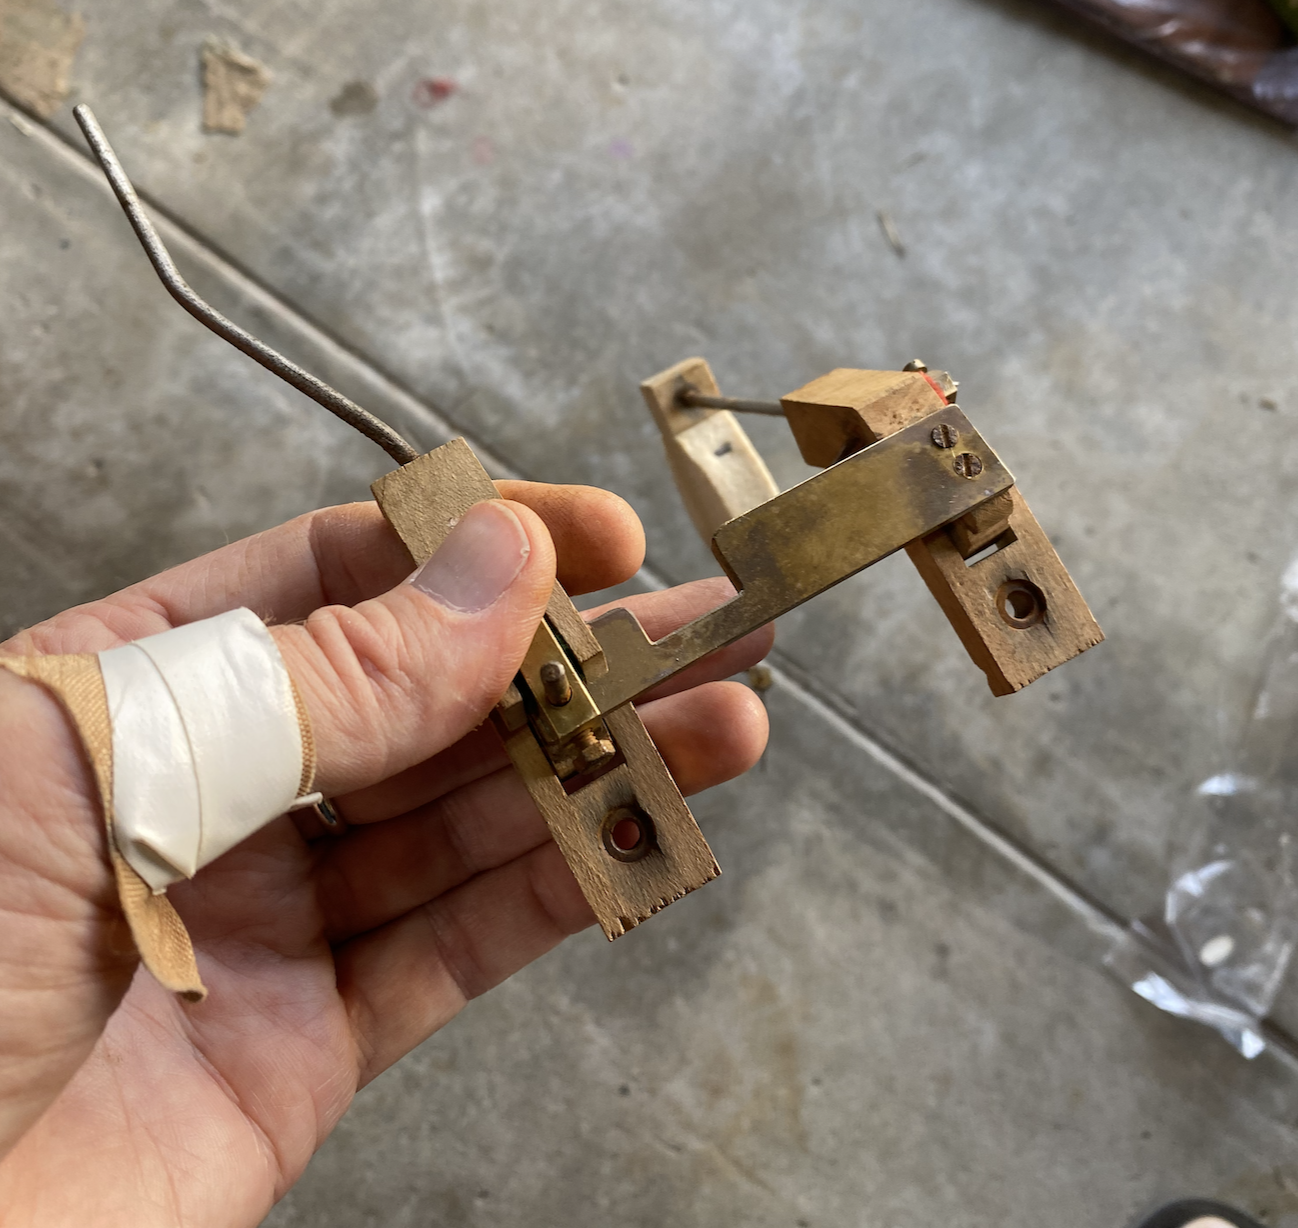
When replacing flange pins, also known as center pins, it is critical to get the perfect amount of friction. Too much and the hammer will be sluggish. Too little and it will be noisy. This is done by using thin files which are gradated in 1/1000″ increments. This was just one of many mechanical repairs that had to be done to get the proper touch and sound.
Finally, I install the foot pedal mechanism. This too has to be finely adjusted to get the proper timing. Installing this revealed many other adjustments that had to be made with the keys.
Finally after seven months of work and well over 150 hours the journey finally comes to an end. The interior of the instrument has been fully restored.