The Ins and Outs of Piano Tuning

The Ins and Outs of Piano Tuning

This article focuses on the specifics of how to tune a piano for the purposes of enlightening piano owners. We will discuss several of the main considerations that must be addressed in tuning a piano properly, as well as some major pitfalls. While few people would assume tuning a piano is easy, it’s unlikely the lay person realizes just how many factors are involved in getting the job done right.

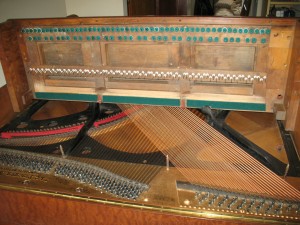
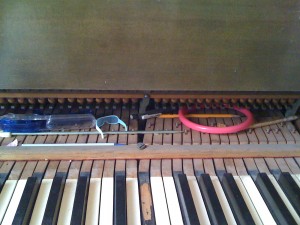
First, let’s just present an extremely general description of the tuning process. A piano has approximately 230 strings, give or take. Each string has a tuning peg attached to it which controls how tight it is. The tightness of the string, among other factors, controls its pitch. The piano tuner, using his ear or a tuning device, pulls each pin using a tuning hammer to make it looser or tighter until the string produces the correct pitch. Sounds pretty simple, right? If it were, piano owners would be tuning their pianos themselves.

One of the first issues that must be addressed is that there is no one standard by which all pianos are tuned. This is not because a standard has not been created. It’s because all pianos vibrate differently, and what sounds harmonious on one piano will be terribly discordant on another. Let’s attempt to understand why. A vibrating string carries many different vibrations known as harmonics. In theory, these harmonics are whole number multiples of the lowest vibration called the fundamental. If the main body of the string was vibrating 100 times per second, then portions of the string should also be vibrating at 200 times per second, 300 times per second, etc. In reality, this only works for strings that are perfectly flexible, which real strings are not. In the real world, the stiffer the string is, the less perfect the harmonics are. A real string might produce frequencies of 100hz, 201hz, 302hz, or something like that. The higher you go up the series, the more distortion there is. This distortion is called inharmonicity.

What does this mean when we tune a piano? It means that if you were to tune an octave perfectly, it would sound out of tune. The reason it would sound out of tune is that the harmonics of the lower note, due to their inharmonicity, would not line up with the harmonics of the upper note. To make an octave sound like its in tune, we have to tune the upper note a little higher than normal to get the harmonics to agree with the note below it.

Every piano has a different amount of inharmonicity. The shorter a piano is, the more problematic it is. The longer the piano is, the less problematic it is. The logic is simple. A longer string can flex more easily. On a spinet piano, which is the shortest type of piano you can buy, the highest note has to be tuned a whopping fifty cents higher than its predicted value to sound in tune. One cent is equivalent to one percent of one note, which means a C which is fifty cents sharp is actually halfway between a C and a C#. On a grand, one might only have to tune the highest note twenty cents sharp, due to the longer strings.

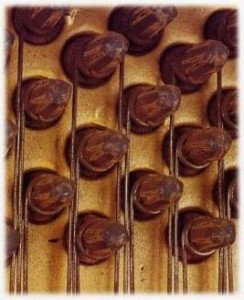
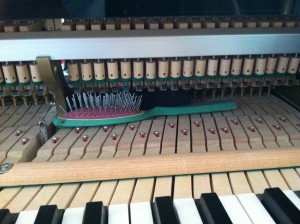
This is the first and probably most fundamental factor that must be addressed by any skilled tuner. Another very challenging issue is what we call setting the pin. The pins that are attached to each string are made of steel. Steel is much stronger than pure iron because it contains carbon, which makes it more flexible, and therefore less brittle. Because it has a small degree of flexibility, when we turn the pin with our tuning hammer, the pin actually twists a little. The problem is that if we tuned all the pins and walked away for a few hours, many of them would twist back. That means that half the battle is getting the piano in tune, and the other half of the battle is getting it to stay there. What tuners do to remedy this problem is to turn the pin a little farther than necessary, then turn it back the other direction. This way it is on pitch, but with no twist in the pin.

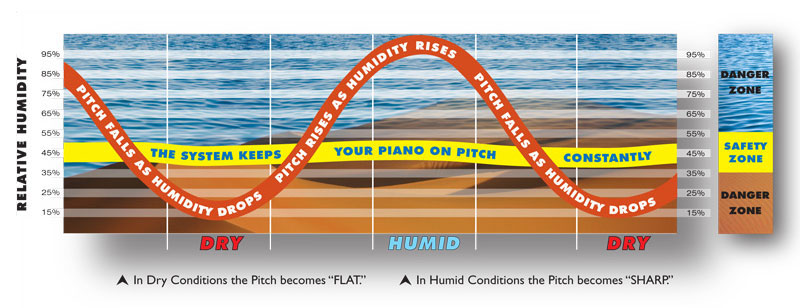
Many piano owners may have heard the term pitch raise. Raising the pitch of a piano means that it has gone so long without tuning that the strings are flat. Not just a little flat, but at least ten cents or more. Figure that a piano probably drops in pitch about five cents per year just from sitting. If a piano goes two years or longer without tuning, it’s probably time for a pitch raise. The reason a pitch raise is special is not because the tuner has to move his arm farther to tune each string. It has to do with the amount of tension on the plate which holds the strings. Consider that 230 strings, each with more than 100 lbs of tension, produce a combined load of about 30,000 lbs. Imagine if the tuner pulled each string and increased its tension by ten percent. That would effectively add 3,000 lbs of tension to the piano. This in turn causes the piano to shrink ever so slightly, which then lowers the tension of the strings. The net result is that the piano is now flat again. On average, when you increase the pitch of all the strings, the piano will drop by about twenty percent of the amount that it was raised. For example, if the piano was 100 cents flat to begin with and you tried to do a normal tuning to bring it up to pitch, in the end it would still be twenty cents flat.

Tuners can employ one of two techniques to compensate for this. One is called a “chip tuning”. This means doing one complete tuning on the piano to get it close to pitch, then tuning it again. The second technique involves calculating how much the piano needs to be raised, then tuning it twenty percent higher than necessary so that after it drops, it will be at the right pitch. If the piano is only two or three cents flat to begin with, the rebound effect is nominal and it is safe to do a normal tuning. If the piano is more than ten cents flat, the tuner needs to employ one of the special pitch raise techniques mentioned here. The good news is that once a piano is brought up to pitch, it should remain stable and not require another pitch raise the next time it is tuned.

Hopefully this will give piano owners a solid grasp of the methods involved in tuning a piano. It is also hoped that owners will find a greater appreciation for the amount of skill and training necessary to be a piano tuner. For information about getting your piano tuner, please visithttp://lapianotuning.com

David Mann

Member Piano Technicians Guild

What is Piano Regulation

What is Piano Regulation

For most piano owners, the term “regulation” is often shrouded in mystery. Their tuner may recommend a regulation to them, a fellow piano owner may mention it, or perhaps they may read about it on the web. I often receive inquiries about whether or not I can regulate someone’s piano. Typically, I find that the person inquiring is somewhat unclear about what they are asking for, and may be confusing regulation with tuning, or with minor repairs. The purpose of this article is to clarify what regulation is and why it is important.

Regulation involves taking every single moving part inside the piano and adjusting it so that the piano plays to the best of its mechanical and sonic abilities. Note I did not say adjusting it to meet factory specifications. Because the parts inside a piano way wear, expand, or contract over time, the optimal adjustment for your particular piano may not be the same as when you bought it.


tools

Piano Tuning Tools

Sounds simple right? A turn of a screw here, a tweak there…what’s the big deal? The big deal is that there are eighty-eight keys, and for each key there are over twenty items that need to be regulated. That’s about 1800 so called “tweaks”. Realistically, it may be slightly less than that because some of the items don’t involve all 88 keys, like adjusting the pedals. Also, consider that some of these adjustments are pretty tedious, such as adjusting the key height, which involves sliding thin slips of paper as thin as 1/1000 of an inch underneath the key, one by one, until the perfect height is achieved. When it’s all said and done, the entire process takes between one and two full days. Mind you, the average tech could be tuning a lot of pianos during those two days.

That brings us to the next order of business, which is cost. This may vary substantially depending on the region, the technician, and the condition of the piano. A ballpark cost for regulation is around $500, give or take a few hundred. A piano that is in perfect condition may be a little less, while one that is in truly poor condition or is just very old may cost a lot more. Given the amount of time it takes and the improvement in the overall performance of the instrument, this is a nominal fee.

Here is a breakdown of the steps involved in regulation:

1) Positioning the letoff rail (the rail that causes each key to “let go” just before the hammer hits)

2) Straightening the damper lift rod (assures that each damper gets the same amount of “push” when you step on the damper pedal)

3) Traveling hammer butts (so the hammers are moving in a straight line)

4) Aligning the hammers to the strings (so each hammer strikes the strings dead on)

5) Aligning the jacks to the hammer butts (the jack is the little lever that physically pushes the hammer toward the strings)

6) Spacing and squaring the backchecks (the backchecks catch the hammer after it bounces off the strings. If misaligned, the hammer will “bobble” and make a weird noise)

7) Squaring and spacing the keys (so the keys look nice and straight, left to right)

8) Setting the hammer stroke (so the hammer is the perfect distance from the string. This affects how much power you get from hitting the key)

9) Regulating lost motion (how far you have to push the key before it actually starts moving the hammer)

10) Regulating key height (adjusting the average height of all the keys at once)

11) Leveling the white keys (so each individual white key is the same height)

12) Leveling the sharp keys (same as above)

13) Regulating hammer letoff (so the lever which pushes the hammer lets go at the right time. If not set right, the hammer won’t bounce off the strings)

14) Regulating white key dip (so when you push each key, it goes down the same amount as its neighbors)

15) Regulating hammer checking (so hammer will get properly “caught” after it bounces off the strings)

16) Regulating sharp key dip (so each black key goes down the same amount as its neighbors)

17) Regulating the sustaining pedal (so the dampers lift at just the right time)

18) Regulating the dampers to the lift rod (similar to above)

19) Regulating the damper spoons (similar to above, but this adjustment is made individually to each damper, rather than one global adjustment)

20) Regulating the soft pedal (so the soft setting is correct)

21) Regulating the bridle straps (mainly there to help when the piano is being serviced, but if incorrect could interfere with normal playing)

What will you gain from regulating your instrument? The number one thing you will gain is improved feel and playability, while eliminating many squeaks and extraneous noises that occur when hitting a key. It will also cause the sound of each note to be more even, especially in terms of loudness. Even a novice player can feel the difference in a run down 100 year old instrument, vs. a new piano. In an old piano, the keys feel like driving down a bumpy road. They are all slightly different heights. Some make noises, some don’t. On a new piano, every key feels perfectly identical. The height is the same. They look the same. They sound the same. Its much easier to fly through a fast passage on such a piano, in the same way its easier to drive fast on a smooth, straight highway.

What is not part of regulation? You might be thinking that such a long list must cover every part that could possibly be fixed on a piano, and therefore the piano will be like new. Actually, there are several repairs not included in this list because they are actual repairs, not just adjustments. The most common ones would be keytops, hammer filing, key bushing, and repinning. If your keytops are missing or broken, it will be tough to regulate all the other settings. That would need to be taken care of first. Similarly, if the hammers have deep grooves, are caked with mold, and are quite ragged, those also would need to be fixed prior to regulation. Small grooves in the hammers are OK. Deep grooves need to be filed. If your keys tend to wobble easily from side to side, that means the bushings are shot. The bushings are felt linings under the key so it can slide snugly up and down the pin. When the bushings are gone, the key can move willy nilly any direction it pleases. Regarding repinning, this is necessary when the moving parts aside from the keys tend to move from side to side, or the hammer makes a click when the key is pressed. Popping out each pin and putting in a new one is not an easy task, so its better to fix the ones that are problematic rather than doing them all.

Who should regulate? All piano owners should regulate their instrument about every ten years. However, if the piano is very inexpensive, that money might go better towards a new instrument. Spinet pianos should not be regulated. Proper regulation will keep the piano from aging and getting to an unplayable state. If you are a serious player, regulation is a must. It is only possible to get the maximum level of control and speed on an instrument that is fully regulated.

Restringing Pianos

Restringing Pianos

Restringing is definitely one of the more challenging repairs one can perform on a piano. What I would like to accomplish in this article is to paint a vivid picture of what is involved in this process, and hopefully allow any piano owners out there make a qualified decision about whether or not to have their own instruments restrung.

A little over a year ago, I purchased an amazing instrument. It was made by J&C Fischer and Sons in ’86. Were you thiking 1986? No, I meant 1886. The exterior of this instrument was in fabulous mint condition. In fact I have never come across an instrument this old in such good health. It was still fully playable. All moving parts were functioning. 99% of everything inside was original. Even though my Pierce Piano Atlas told me the age was around this time (based on the serial number) I still was dubious. It was just too good to be true. However, once when I was taking the entire keybed out so the keys could be refinished, I found several flyers inside for a piano concert dated 1886. Truly remarkable.

11

J&C Fischer Piano from 1886

Over the course of the next twelve months, I began renovating the instrument. The most major repair by far that I performed was restringing.

Before any restringing could happen, I had to tilt the piano on its back using a special dolly, remove the entire front, not just the panels, and get the old strings off. Because the combined tension of all the strings is over 30,000 lbs, they have to be loosened gradually in several stages. When the strings were loose enough, I cut them off and removed the pins using a drill. All this alone took about a day.

22
Piano lying on its back using a tilter.


Piano lying flat using “tilter”

Next is where the real magic happens. This is when the new strings are applied. It is typical that when you restring a piano, you put in tuning pins that are larger than the old ones. The reason is that as pianos get older, the pins tend to get loose, meaning the instrument won’t stay in tune. In the case of my piano, the tuning pins were even looser than normal, so I had to put in pins that were a full two sizes larger. That’s to be expected on a piano which is more than 100 years old.

Restringing J.C. Fischer Piano

Piano midway through restringing process

The act of putting on a piano string has got to be one of the most physically challenging tasks I have ever attempted. Piano strings are not like guitar strings. That is, they don’t bend easily. They are made of solid steel and are many times thicker in diameter. If you are not totally focused, you will either bend the wire the wrong way and put a permanent crease in it that requires you to discard it. Or, the wire will jump out of your hands and literally fly across the room. This is no laughing matter. When I began the process, I ignored various warnings to where safety goggles. After nearly taking out my eyeballs a few times, I was happy to where them. Piano wire has a mind of its own. Learning to control it takes an incredible degree of sensitivity, focus, assertiveness, and finesse. It typically feels like you are wrestling a large snake and that snake is doing everything it can to overtake you.


41

Piano with all strings replaced

After repeating this process more than a hundred times over the course of ten days straight, I was finally ready to put the instrument back together. I reinstalled the front of the piano and the legs, and tilted it upright again. It was not time to declare victory yet however. The instrument still had to be tuned.

Tuning a freshly strung instrument is not like tuning a piano for a client. In the same way that detuning all the strings at once can cause problems when removing the strings, the opposite is true as well. Bringing all the strings up to pitch right away can damage the piano so it must be done in multiple passes. What’s more is that as you increase the tension on a few strings, the piano literally shrinks slightly because it is being pulled. What effect does that have? The strings next to it drop in pitch. That means if you went all the way across the piano bringing each string up to pitch and then checked the first string you started on, it would be much flatter than when you started. In the first day, I tuned the piano five times before the strings and the piano had settled in. Over the course of the next few months I probably tuned it another three times before I felt it was fully stable.

With all that work, it is no wonder that restringing a piano generally costs $2000 or more. Technicians who are reasonably experienced can do it in about twenty hours. It is rumored there is a tech in L.A. who can do the entire process in just half a day. In terms of materials, the cost of the plain steel strings and the pegs is probably around $150. However the copper wound bass strings have to be custom made for each piano and this costs several hundred dollars.

If you are considering having your piano restrung, here are the factors you should consider: First, pianos only need to be restrung after decades of use. Unless your piano is quite old, don’t even think about it. The exception would be if the strings are rusty, or if your technician complains the tuning pegs are too loose for it to stay in tune. Most pianos are never restrung. Restringing will cause a slight improvement in tone, but less so than having the hammers reshaped would. In the case of my piano, the improvement in sound quality was nominal. One thing it will not do is turn a mediocre piano into a Steinway.

Second, what is the value of your instrument? If the cost of restringing is more than half the total value of the instrument, don’t do it. Figure a good quality used upright in excellent condition is around $4000. An entry level NEW upright piano is also around $4000. A fair quality used upright is only around $1000 to $2000, don’t go spending $2000 on repairs.

Third, what is the make of the instrument? If you’ve got a 100 year old Steinway, it is OK to put money into it. The reason is that Steinways last forever and also tend to hold their value. Taking measures to maintain the instrument will also help the value. If the piano is a no name brand, sell it and get a newer one before you consider restringing.

When all the factors are considered, its clear that restringing is a repair for special instruments only. It is also clear that when a tech quotes you a price tag of several thousand, he is surely justified in doing so. If you are a technician, I would strongly advise attempting this process yourself. It is a fascinating learning experience.

The Importance of Humidity Control Systems

There is one factor alone that is responsible for most of the wear and tear on a piano. That factor is humidity. The purpose of this article is to explain in detail how humidity affects a piano, and then to discuss how this problem can be solved with the installation of a humidity control device.

I learned to tune pianos in Hawaii where I saw first hand the way that humidity could take a brand new piano and bring it to it’s knees. In numerous cases, this transformation took only two to five years. Although the humidity in your local area may not be 80% year round like it is over there, it is still causing the same effect, just at a slower rate.

The first effect of humidity is rust. Piano strings are made of steel, although not stainless steel as one would find in the kitchen. That means that they are susceptible to corrosion. The lifespan of a string is directly related to how quickly it rusts. Once a string rusts, it becomes brittle and will easily break when you try to tune it. One break is tolerable. After three or four start breaking, it means the whole set is going bad. Rust also affects the tone. Once the strings get even a thin veneer of rust it loses the bright pure tone it had when it was new.

Rusted Piano strings and pegs

When a piano is stored in a low humidity environment, the strings will last seventy five years before they start breaking. They may even last one hundred years. When exposed to high humidity, strings will last less than half that time. In very high humidity such as Hawaii, strings will become caked with a very thick visible layer of orange rust within two to five years. Anyone living near the ocean is also at risk. Consider that well before the strings start breaking, they will lose their tone, and the instrument becomes less enjoyable to play. Therefore, at all costs, one should try to control the humidity inside their instrument so they can enjoy it for years to come.

The other effect of humidity is that seasonal changes in humidity will cause the piano to go out of tune. This effect is not related to rust per se. Instead is has to do with the humidity alternating between wet and dry cycles. In high humidity the piano expands and stretches causing the piano to go sharp. In low humidity, the piano shrinks and goes flat.

21

Humidity also has a tremendous affect on the mechanical parts inside a piano. Most moving parts inside a piano use a hinge called a flange. A flange uses no grease or ball bearings. Instead there is a piece of wood with a tiny hole in it. That hole is lined with felt and a pin is inserted into it. The pin is able to turn by rubbing against the felt. When the humidity is high the wood expands and the hole gets tighter causing the pin to stop turning. Each time you press a key, at least three such flanges are engaged. Whenever a key is “sticking”, most of the time it is because one of those flanges is swollen from humidity exposure. This is especially true for intermittent problems. If your piano behaves on way in one type of weather, and another way in another type of weather, the culprit is obvious. I once repaired a Samick piano in Hawaii in which every single damper inside the piano had frozen solid due to humidity exposure. The net effect was that when you played it every note rang indefinitely, even once you let go of the key. It took about six hours to repin every single flange and get it working again.


Wool piano hammers becoming detached.

The good news is that there is a solution to this problem. Dampp Chaser Corporation has created a device called the Piano Life Saver System which keeps the humidity inside the instrument at the appropriate level day in and day out. I own one in my piano, and strongly recommend all my clients get one as well, especially those near the ocean. My piano stays in tune, and I have no mechanical problems when the weather changes. Here is an example of how the system works.

A piano humidity control system in action.

The device has one or more long black heater rods, and a black box called a humidistat which detects if the humidity is too high, then activates the rods. Because it turns them on intermittently, it uses less electricity, and also avoids making the piano too dry which is equally problematic. The entire system takes 1-2 hours to install by a qualified technician, such as myself. The cost is little more than getting your piano tuned, and will save you thousands over the lifetime of the instrument.

Here is a photo of the upright system:

Dampp Chaser Humidity Control system on an upright piano

Here is what the system looks like in a Grand Piano:

Grand Piano Humidity control system


I strongly advocate the use of the Dampp Chaser Humidty control system. It will allow you to maintain optimal conditions inside your instrument, get a lot more pleasure out of using it, and spend a lot less money fixing it.

To have one of these systems installed, please visit http://lapianotuning.com to set up an appointment.

What Else is In Your Piano

What Else is Inside Your Piano?

A couple years ago I wrote a popular blog article entitled “Discovering What’s Inside Your Piano” which highlighted some of the curious objects I have found in my line of work. I make a regular habit of taking photos of the unusual treasures I often come across. Since writing the last article, I have found numerous objects that are far more odd, and frankly, much LARGER than anything I have found before.

We would expect normal items to slip inside the piano like pencils, paperclips, etc. Church pianos are especially laden with such debris. But for more unusual items, it becomes a lot more difficult to imagine how they could get in there. I can explain 99% of these special cases with one answer: Children. To a small child, a piano looks like a slot machine. It has slots and holes of various sizes and when a child sees an object of about the right size and shape, naturally he or she’s tests it to see if it will fit inside. Next thing you know, the object vanishes never to return. Or at least not until ten or twenty years later when the piano gets serviced by a technician such as myself.

Here is my “Greates Hits” of items I have found.

Largest Item: A full sized T.V. remote.

This item was impressive because it was too large to get inside the piano by any normal means. It was also impressive because there was no evidence of any mischief on the part of children. I and the piano owner speculated for some time as to how it got there. The conclusion I finally came to is that the owner set the remote on top of the fallboard, the lid that covers the keys. Someone opened the lid to sit down and play, and the remote slid backwards and into the piano. Another explanation is that the fallboard was open already and pointed straight up. Someone pulled it forward slightly and dropped the remote inside, possibly by accident.

remote
T.V. Remote

Largest Quantity of Items: 16

The owners called me because some of the keys weren’t playing properly. I expected the usual ailments: tight flanges, tight key bushings, etc. I was both surprised and relieved when I opened it up and saw an entire convenience store worth of trinkets. There were so many that I had to take several photographs just to cover them all. Among the spoils were the following:

Three Photographs

Some Leaves

3 Lollipops (melted)

A Pen

3 Pencils

Toy Sunglasses

Pool Diving Ring

Hole Puncher

Knitting Needle

Mystery Item that looks like a dish sponge.

Misc items inside piano
sponge2
More items inside piano


Best Story: The Dead Rat.

The story surrounding this find is just as interesting as the rat itself. I spend several weeks every year on the north shore of the island of Kauai. While staying out in the jungles of Haena with my friend Doug, he asked if I could help his friend Marco get a dead rat out of his piano. I asked, “What is Marco’s address?” Doug replied with typical Hawaiian directions as follows: Drive to the two bridges. In between, turn right up the dirt road. When you get to the broken down truck, turn left. “How will I know which truck?” I asked. He said, “You’ll know”. After turning go to the house at the end and go upstairs.

I did all of this and arrived at Marco’s shack in the jungle. The piano was a gorgeous 1985 Steinway M grand in mint condition. Quite a contrast to the humble shack in the middle of the rainforest. Marco was a hardcore surfer with a red face, tan skin, heavy brow who looked like one of man’s ancient ancestors. There were scantily clad Brazilian girls everywhere in a panic from the smell. They had tried to take it apart themselves and parts were everywhere.

In about five minutes, I had the action out, and removed the rat. I put it back together and remedied the damage they had done. Marco was so grateful that he told me I was welcome in his home any time and to please play the piano as much as possible. I took him up on this invitation and stopped in almost every day to play for about an hour. The construction workers who were hammering away downstairs greeted me as “The Piano Guy” and were happy to hear me play. It was definitely one of the highlights of my last trip.

trip

Cutest Item: Dear Jacob Letter.

What always intrigues me is that each item tells a story about the past. This was a secret letter written by a child which, like the rest, ended up inside the piano. It reads as follows:

“Dear Jacob, I wrote in xmd. If you don’t know what that means it’s my new language. It means thank you for the Pikachu pillow. I love it. From Andrea.”

A secret letter found inside a piano.

Runner Up:

Hair Brush.

Probably nearly as interesting as the T.V. remote.

A hair brush found inside a piano

Please check in periodically to see what new finds I have discovered.

If you are having some mechanical issues with your piano and you think you a strange foreign object might be the culprit, visit:

http://lapianotuning.com

We will fix the problem, and you might even find your way into the next blog.

The Mechanics of Piano Tuning

The Mechanics of Piano Tuning

From the exterior, the workings of the piano appear quite simple – you press a key and a sound is produced. However, the mechanism that allows all this to happen is far more complex than one might realize. This article will talk in detail about the moving parts inside your piano, as well as how to keep them working properly.

The piano was not the first keyboard instrument. It was preceeded by the organ, the clavichord, and the harpsichord. The piano had a major advantage over these instruments, however, which was dynamic control. That is to say, the harder you press the key, the louder the note. In the early 1700′s Bartolomeo Christofori came up with the mechanism which makes this possible know as the “double escapement mechanism”.

Piano Double Escapement Mechanism

When you push down on the key a hammer strikes the string producing a sound. In a real piano, there are many levers in between. However, imagine for a moment that the key and hammer were connected together as one solid piece. If you pushed down on the key the hammer would hit the string, but with the key still depressed the hammer would continue touching the string and stop it from vibrating. The resulting sound would be a metallic thud. The innovation of the piano mechanism is that the lever which pushes on the hammer slips out of the way at the last second so that the hammer can actually bounce off the string and allow it to vibrate.

The early prototypes of the piano were still a far cry from the modern piano. J.S. Bach lived just long enough to see the first versions of the piano come into being. In fact, there is a famous anecdote in which he visits his son who was court musician for King Frederick of Prussia and the king showed off several new pianos he had just acquired. However, Bach regarded these early prototypes as garish and crude instruments. In Mozart’s time, the piano really came into it’s own as the mechanism was perfected enough for professional usage.

As a piano owner, it is useful to have some knowledge of the workings of the piano, so that you will recognize the importance of having it maintained. Just for the key to hit the hammer properly, there are five moving parts. These parts are the KEY, the WHIPPEN, the JACK, the REPETITION LEVER, and the HAMMER. Each of these moves on a hinge known as a FLANGE. If the wood swells due to high humidity, this flange may become tight and any one of these parts may cease to move. This is why I strongly emphasize a HUMIDITY CONTROL SYSTEM on all pianos. If the flange becomes loose due to low humidity or wear and tear, then the part will move too easily and may even wobble. The result is commonly a clicking sound. If such problems are not prevented by controlling the humidity inside the piano, then your technician will ultimately have to take out the part, remove the pin from the flange, file it with a long needle, then install a new pin. The whole process takes about ten minutes per key. Installing a humidity system can reduce the need for these types of repairs and save you money.

Because there are so many moving parts, each part must be adjusted to precisely the right setting. This procedure is know as regulation. Every five to ten years, your piano should undergo a full regulation to ensure that all the mechanical parts are functioning properly.

Please visit http://lapianotuning.com to keep your piano tuned and functioning properly.

Tuning Pianos In Hawaii

Kauai, the northernmost of the Hawaiian islands, is where I learned how to tune pianos. It also happens to be the rainiest place on earth. This article will share anecdotes from my experiences in tropical paradise.

scenic1

For two and a half years, I lived on the north shore of Kauai. I worked as a high school teacher, and also gave music lessons privately. My piano students kept asking if I knew anyone who could tune their piano. The only name I had was an older fellow named Mr. Rapozo. However, whenever my clients called him for a tune up, he would take one look at their piano, say “I am too old for this!” and turn around and leave without touching the instrument. After about three of my clients complained to me, a lightbulb went off in my head that I should learn how to tune pianos.

I signed up for the most prestigious correspondence course available from the Randy Potter School of Piano Technology and began learning my trade. Initially I just tuned pianos on the cheap for friends and eventually started tuning more professionally. When I was learning, my first few pianos took a whopping FOUR HOURS each. I remember it was a big breakthrough when I actually tried to book two pianos in one day.

Eventually I moved back to L.A., continued gaining experience and knowledge as a tuner, and began getting referrals from some very illustrious clients. My skills had clearly gotten to a level where even the most discerning clients were happy with my work. However, I still made it a point to fly back to Kauai every year to tune up the pianos on the island.

Typically I visit in March because that’s when the surf is best at my favorite spot called Tunnels. About a month before my trip, I start advertising in the local paper. I also contact all my previous clients. As the calls start coming in, I keep track of who needs a tune up. A few days before I leave I start packing up my tools, my surfboards, and my clothing. When I get to the airport I am carrying two 35 lb. tool bags, one on each arm, two surfboards, a carry-on suitcase, and a backpack with all my chargers, computer, ipad, and technology. If that sounds like a lot, it is.

Anahola Baptist Church in Kauai

When I get to the curb at the airport, I have someone from the local “island car” rental company pick me up. These are real junkers that go for about twenty bucks a day, cash. Sometimes, they may have a smashed side window, pink transmission fluid squirting out, and a stick to prop up the trunk. Usually the first day I don’t schedule any tunings as I need to get my logistics squared away.

As far as lodging goes I have a lot of good friends on the island. My accommodations range from couch surfing in a cliffside condo 100′ above the ocean, a brand new guest house on a giant property with horses and fruit trees, or my own bedroom in a house high up in the jungle. Regardless of where I stay it always feels like home.

Guest house in Kauai

On the last visit I tuned a whopping 35 pianos, averaging about three per day. Just juggling that many clients is a workout. I am typically typing away on the computer late into the night rearranging my calendar and confirming appointments. Because there are mountains in the middle of the island, and impassable cliffs on the west side, you have to drive all the way around to get to the other side. That means I have to be smart in scheduling my appointments. I will typically work one town each day. Waimea one day, Lihue another, Kapaa another, etc.


2

I try to get in a surf every day that I am there. I am usually in the water by 7:00 or 8:00AM, surf for about two or three hours then hit the road to do my tuning appointments. On a busy day I may start at 11:00 AM, and easily go till 8:00 or 9:00 PM, seeing three different clients. The pianos are often in pretty bad shape over in Hawaii due to the moisture so I will commonly install a humidity control system, clean the interior, fix some broken strings, and possibly do two full tunings to get in it pitch. Here is a fairly typical problem I often see.

Wool piano hammers becoming detached.

On the way home, I stop at the local Foodland, get a giant sandwich with my Makai discount card, then fall asleep at my lodging for the night. The next morning I start all over again.